The following is part of an email that I have been sending out in my attempt to find my new home.
It has a description of what I am seeking…
My Email
I’m a farmer, researcher and ecologist from the United States. I left the USA because of what is happening there socially, politically, ecologically and because of the massive industry created health crisis that is surfacing. I am traveling to different organic farms and ranches as a means to explore the region.
I recently operated a 100% grass fed organic A2/A2 cow micro-dairy in Washington State on the Olympic Peninsula for the past four years. I made kefir, raw yogurt, and soft “farmers” cheese in addition to providing milk to my community.
I care deeply about health, the environment, and the future of life on Earth. My efforts in recent years have focused on food security, community resilience, nutrition, the harm from toxic chemicals, the dangers of electromagnetic radiation from wireless technologies and other electronics; along with other educational and collaborative action along those lines.
WHAT I AM LOOKING FOR
-Somewhere where the ecosystem is healthy, beautiful, clean, and with abundant wildlife.
-Somewhere with a temperate climate that is not super cold.
-Somewhere remote, away from cities, with no cell phone reception.
-Somewhere with a high land to human population ratio.
-Somewhere that is not a high risk area for earthquakes, volcanos or tsunamis.
-Somewhere where the people are kind and the community is tight knit.
-Somewhere with a high degree of food self sufficiency where natural farming practices and lifestyles are the norm.
-Somewhere where I can fish, hunt, and/or work with grazing animals.
-Somewhere where I can join an existing farm endeavor to help produce organic vegetables, nuts, forage wild plants, milk animals or otherwise contribute to group self sufficiency.
-Somewhere where I can study and learn Spanish. I am happy to trade English for Spanish classes or work out some other trade/compensation for language instruction.
-Somewhere where I can learn to ride a horse.
MY NEEDS
-Kitchen access, so I can prepare my own food. I prefer to eat a diet of mostly: berries, meat/animals/seafood, dairy, vegetables, mushrooms and nuts – depending on what is in season. I am strictly organic with my food. I like to source all of my food within my given bio-region if possible.
-Basic shelter and bathing needs. I have a tent and sleeping bag with a ground pad.
-A place free of WiFi and out of cell tower reception because of the harmful biological effects of this technology on brain function, the heart, the nervous system, DNA, reproductive system, etc.
A few links for more information since many people are unaware of the research on this topic:
These are social networks focused on regenerative and organic farming. I use them as a way to find places to land in a given region. Then I ask the locals lots of questions while I explore the area.
One will find a ubiquitous prevalence of harmful technologies like Wi-Fi and Smart Phones on these farms. But it is a starting point. Ultimately we will need to create communities that do not allow such technologies.
In my prior post about electromagnetic radiation, I explained that those who choose to live among cell-phones, WiFi, cordless phones, digital radio frequency utility meters and other wireless “Smart” devices will become physically/mentally damaged to the point of becoming a proverbial Zombie. The science fiction Zombie films got one thing wrong. It was not a virus that would over-run humanity creating the roving rabble of Zombies. It is the cell phone (combined with various chemicals and excess sugar consumption) that would create the Zombies.
I listened to all 47 talks of the summit. I uploaded a few of my favorites to Dropbox and am making them available at the links below.
Richard Lear – This is a great place to start. Richard is a researcher offering a new biological model for understanding chronic disease. It covers 36 diseases that have more than doubled in rate of incidence over the past 25 year period.
It is a great overview of the rise in germ-less chronic human-made disease and the 6 causative factors in the emerging health crisis.
Dr. Martin Pall – Two part interview. Martin Pall’s summary of the science and the predictions for the effects of electromagnetic radiation on our species (and other life) is a major wake up call. This is a must listen to interview. Part 1 Part 2
Patrick Wood – Important discussion about the surveillance and Big Brother applications of 5G.
Terry Stotyn – Electrical engineer discussing the dangers of the digital utility meters on our homes.
Raymond Broomhall – Interesting legal strategy to oppose electromagnetic radiation. It has been said that the only thing that is likely to turn global exposure to electromagnetic radiation around is 300,000 lawsuits to bring the industry to heel. Raymond has the most effective method that I know of on the legal front.
SOLUTIONS
For actions that you can take to reduce your radiation exposure, download:
HOW TO USE THE GUIDE: Even though this Guide includes 7 different solution areas, there are over 30 individual tips & links… with many links to specific products recommended by the Building Biology Institute and Josh Del Sol. It is super handy, but also could be overwhelming to try to do it all.
So, I’d recommend you implement 1 or 2 of the tips each week. Do the easiest “low hanging fruit” first, then progressively implement more tips. Every step will reduce your EMF exposure. I’d encourage you to print it out and check off each task as you go.
We’re going to have to make a radical break from the mob to survive.
This is my program for survival.
1) Get out of the city or any population center, now.
2) Get rid of wireless technologies. Get off of the power grid and prepare to abandon electricity and electronics all together. This includes solar and other alternative power sources. For the reasons why, read The Invisible Rainbow.
If you are blessed to find yourself at a Cono Sur asado, it is a real treat and a beautiful tradition. Asado is a general term meaning roast, but it is most frequently used in the sense of an outdoor barbecue. Many families in this part of the world get together on the weekend for an asado.
There are typically two ways to do an asado. One is with an asador (an iron or wood stake or cross) and the other is using the parilla (grill) to suspend the meat near a fire, above coals.
ASADOR
Here’s the process for cooking with an asador:
Build up a good fire.
Wipe the iron stake clean with a rag.
Skewer your chunk of meat with the asador and secure the meat with wire so that it doesn’t slide down the metal stake.
Pound your asador with the meat attached into the ground near the fire.
You can adjust the metal stake as needed by leaning it forward or back.
Goat neck on the parilla and ribs on the asador.
Don’t put the flame directly below the meat. You want the flame adjacent to the meat. Use a heat reflector to direct the heat to the meat for cooking. In this image I am using an old wheel barrow to reflect the heat onto the meat. Alternately, scrap metal roofing, sheet metal, rocks, etc. work well.
Any parts that don’t cook thoroughly can be finished with the parilla (grill) method described below. Just remove the asador from the ground and place the meat horizontally across the parilla (grill).
When the meat is cooked, wipe off the bottom of the asador (below the meat) and remove the meat for serving or cut off slices of meat while it is on the asador.
An example of using sticks for an asado.
The other traditional method of cooking meat in the Cono Sur is using a parilla.
PARILLA
Here’s the proper way to use a parilla (grill) for a traditional asado.
Build a fire. You will be cooking with the coals, not the direct flame.
Orient the bulkier side of the meat near the fire.
Start with the fat or bone facing down. These take more time to cook. In this photo I have a goat neck on the parilla with the bone side starting facing down.
Build a bed of coals by using a long stick to shift coals beneath the meat. Form the coal bed into the shape of a cradle. Place less coals underneath the middle of the meat and more coals along the outer perimeter. Also build up extra coals where the meat is thickest. This should help achieve a more even heat distribution.
Place your hand near the meat, just above the grill. You want to be able to keep your hand there for at least 10-12 seconds before you have to pull your hand away from the heat.
The fire is too hot when you have to pull your hand away in 7 seconds or less. Cooking at this temperature will not cook the inside well and may burn the outside. You want a slow cooking.
You will be rotating the meat until all parts are cooked. This will usually take several hours.
Ribs cook quicker than other parts of the animal and are a good cut to start practicing with.
New hot coals will need to be added underneath the parilla as the prior ones start to cool. Continue checking the heat with your hand and adjust the amount of hot coals accordingly.
This parilla is made from lengths of different gauge rebar construction steel. It is probably not the best metal surface to use for cooking but past use has left it coated with a burnt on layer of fat that acts much like the coating on “seasoned” cast iron cookware. So there is probably little direct contact or reaction with the metal due to the coating.
EARTHEN POT
This is my preferred way to cook. It retains the moisture and liquids from what I am cooking. The lid shields my food from the smoke. As much as I love an asado, I suspect that the frequency in which people cook meat over a smoky wood fire in this part of the world is a contributing factor to the frequency of stomach cancer found in the region. Smoke is after all a carcinogen.
This is an unglazed clay pot that I bought for about $13 new. It is sitting on a grill with the fire adjacent to it.
Like the grill method above, build a fire. Then shift the coals under the pot. Never cook directly with the flame. Using a direct flame cooks the food too quickly, may burn the meal and covers the pot in smoky soot.
Home made oil lamps, candles and do-it-yourself emergency fire starters, for simple living or the apocalypse — as is relevant to the situation.
I first learned about burning oil and fat for light from a little booklet called I Didn’t Know That Olive Oil Would Burn by Merry Bickers.
This was many years ago. At the time I made some of the olive oil lamps mentioned in the booklet using a jar, wire and wick.
I also made a more primitive version of this oil lamp using an abalone shell to contain the olive oil and cattail fluff for the wick. I was living in California. I had experimented with different fibers for wicks: hemp, jute, cattail fluff, soap root, soap root leaves, redwood bark, and wild oat grass stems. (Note: braid or twist the grass while still pliable, before completely dry. Then dry the braid/cordage, otherwise it will be too brittle to fashion into a wick.) All of these fibers worked to one degree or another but cattail fluff was by far the best. I put it in a clump, partially submerged in liquefied oil before lighting. It was the simplest and brightest of the wicks that I had tried.
I bought olive oil for my fuel because that is what was locally available. I didn’t want to use high quality olive oil to burn for light, nor did I want to spend a lot of money and I didn’t want to buy from a conventional chemical olive producer either. So I called up a local organic olive producer and asked for their their lampante oil (the leftover oil after pressing). At the time it sold for $20-25 per gallon. I bought a 5-gallon bucket of the stuff.
Fast forward several years…Now I’m in Patagonia and over the past several seasons my lighting system has dramatically improved. I have stopped using the jar, the wire wick holder, and purchased manufactured wicks. I use a simpler system that is cheaper and brighter. This post is about the evolution of my lighting system.
There are three components to consider when making an oil lamp: fuel, type of container, and wick. In this post I’ll cover these components as well as the operation of the oil lamp and why I prefer to use an oil lamp for lighting.
Toward the end of the article I will also go over how I make both wax and tallow candles.
Lastly, I will share the emergency fire starter that I invented.
MAKING A METCHERO
How I make oil lamps. In Patagonia one name for an oil lamp of this type is metchero.
For the past several seasons I have been living in the Andes mountains in this house:
The house mostly sucks: no insulation, no critter-proofing, a very leaky roof, an exposed and easily frozen water pipe, a sink that takes a few hours (at best) to drain, a floor that floods during heavy winter rains… you get the idea.
The house has one redeeming quality, no electricity! So my lighting sources were the glow from the wood stove, my headlamp, home made candles and oil lamps that burnt goat or cow fat.
The oil lamps were my primary source of light.
FUEL
Any oil/fat from plant or animal sources will do.
Veggie Oils
Olive oil is said to be the purest vegetable oil. Olive oil is produced from trees rather than most other vegetable oils that are produced from annual crops. Typically annual crop production degrades the soil much quicker than the production of tree crops due to tillage. Olive oil is also obtained from pressing olives, unlike the complex chemical extractions used for many other common veggie oils. If olives are grown locally in your area then this is a good oil to use.
Mary Bickers has used sunflower, canola (rape seed), safflower, peanut, sesame, walnut, grape seed, corn, hemp and soy oils. Some of these oils are not as bright as others or clog the wick and soon go out. The oil sometimes varies in its performance from one batch to another. Some may be smokey with corn oil being the worst in her experience. She prefers olive oil.
There are ways to acquire cheap veggie oil: you can buy it in bulk in 3-liter cans or you can collect waste oil from restaurants. From what I have researched most veggie oil is nasty stuff. Plus, I avoid cities, so scavenging waste fry oil or buying things from stores has no appeal. Also, much of the corn, soy, and canola oil is genetically modified and grown with glyphosate (Round-Up) or other toxic biocides. I don’t want nothing to do with any of that. I don’t want to buy it, get it on my skin or burn it into the air that I breath.
So, for me, organically grown olive oil is probably the only veggie oil that I would consider using in a Mediterranean climate. Coconut or palm oil would be a possibility if I was in the tropics.
Animal Fat
According to Miles Olson in his book Unlearn, Rewild: Earth Skills, Ideas and Inspiration for the Future Primitive“Animal fats that are liquid or soft at room temperature are easiest to use (fish, raccoon, pig, seal, bear) while those that are solid (deer, cow, elk, moose, sheep, goat), also known as tallow, are a bit trickier to work with. Both can be used.” Mary Bickers says “that chicken fat and in the Far East butter is burned for light. Melt the butter, skim off the foamy top and use the rest.”
The tallows will need to be heated, melted into a liquid (on top of a wood stove for example) before they can be used. Mary Bickers suggests: “You can also make a depression in the center of hard fats, place a wick and use a little veggie oil to start the lamp. The heat produced will melt the tallow.”
Miles also mentions that the Inuit (Eskimo) use of this style of oil lamp to light their ice homes with “beautifully carved long shallow soapstone containers with many wicks burning at the same time, using whale or seal oil as a fuel source, the warm light reflecting off the rounded, white interior walls of the igloo. These oil lamps were actually used as a heat source and method of cooking by the Inuit, oil being a far more abundant fuel than wood in their bioregion.”
In most wilderness and rural environments animal fat is probably going to be the most available and ecological option available for lighting.
Don’t use petroleum based fuels with these lamps.
Rendering Fat
Starting with raw goat (or other animal) fat. Cook it on a low-medium heat. I usually add a little water to the bottom of the pot when starting. This helps prevent burning, especially when using a wood stove where temperatures are more variable.
Starting to cook. Check periodically to make sure the fat isn’t sticking.
As the fat is heated, the oil is released from the membrane and the water is cooked off. I continue cooking until the fat membrane is brown and shriveled up. Then I strain out the membrane and let the pot of rendered fat cool.
Rendered oil with membrane removed.
I then take the pot of solidified fat and turn it upside down. I slam it onto my counter or table, knocking the disc of fat out of the pot.
Cutting fat disc into chunks that will fit into a tin can.
I will later melt these chunks down on the wood stove using a tin can. Then I will add the melted oil to the oil lamp prior to lighting.
MAKING THE WICKS
I have been using three types of wicks this past year for lighting: cotton cloth, charcoal, and “punky wood.” All work well and are widely available throughout the world.
All of these wicks (cotton, punky wood, and charcoal) can provide enough light using only one oil lamp to light up a room. The light produced is sufficient for cooking, reading or doing other activities. When well constructed, these lamps are vastly superior to candles. They are brighter and are less work per hour of light.
Punky Wood Wick
The spongy, partially decomposed wood chunks known as “punky wood” can be found anywhere wood is growing. It makes a great wick.
Chunks of punky wood.
Chunks of punky wood placed in tuna can.
Chunks of punky wood soaked in oil. Note the tips of wood extending beyond the rim — this will increase the lighting angle and keep the flame from drowning.
Lit punky wood oil lamp with a lovely flame.
Charcoal Wick
Another great option for a wick is wood charcoal. I discovered this by using a flaming stick to light my metchero when the tip of the stick broke off and fell into the lamp. The charcoal tip was integrated into the wick and I noticed it burning well.
Charcoal placed in can.
Pouring melted goat fat into the charcoal can. I roll the charcoal in the oil, coating al sides, before lighting.
Lighting the charcoal oil lamp.
Charcoal lamp lit. You can’t get a flame like that with any standard candle. The flame that these oil lamps emit is sufficient for cooking over, if you set up a stand to support a pot.
This charcoal wick and the punky wood wick are my two favorite types of wick. They are among my most important lighting discoveries this year. I prefer these two types of wicks to cotton because they seem to last longer as a wick, requiring less maintenance. Also, they are more natural than cotton. Burning old cotton rags exposes you to dyes or other chemicals used in manufacturing the cotton fabric. Never trust industrially produced anything, it’s all poison.
Cotton Wick
Every metchero and tallow candle that I’ve heard about, read about or seen in Patagonia uses cotton rags for the wick. Cotton rags are plentiful in most places.
Using a stick to push the cotton wick into oil. The cotton is from an old scrap of torn up jeans.
Notice how the cotton rag is mounded above the oil and rim. This lamp is ready to be lit.
GLASS JAR OIL LAMP
Cotton is the most effective type of wick that I have found for using glass jars to make oil lamps.
If you are going to use a glass container for your lamp, you will need to make a wire wick holder and have wicks that will fit. The wick holder keeps the flame from directly touching the glass and cracking the jar. The advantage of using glass is that the light shines in all directions and if you place a small mirror underneath a glass oil lamp, you reflect the downward light upward. This can really help light up a room.
Making A Cotton Wick
Cut cotton cloth strips.
Twist the strips of cloth into a wick by using a cordage making technique or you can braid the cloth strips if you prefer.
Making A Wire Wick Holder
The purpose of the wick holder is to suspend the wick above the oil. The wick is suspended enough to maintain a small flame to glow and through capillary action sucks oil from the container through the wick to the fire. The oil should not be too far below the flame, as the oil may not be wicked up as fast as the flame is consuming the oil. If this happens you will burn up your wick quickly and your lamp may produce smoke. You want the oil to wick (move) quickly up the wick. The less distance that the oil needs to travel upwards, the better.
Wire wick holders can be made from steel wire.
Note: avoid copper and galvanized steel. Vegetable oil and animal fats are made of fatty acids that produce toxic verdigris when in contact with copper. Copper, like lead, is a metal best avoided in general. Galvanized wire has a zinc coating and may release toxic vapors when burnt.
Twisting the wire into a wick holder.
The spiraled wire holds the wick above the liquefied fat.
Completed wick holder with wick placed inside the glass bowl.
Soak your wick when filling up your lamp with oil.
The flame will only travel down your wick until it reaches the coiled rim of the wire wick holder. Adjust the flame so that it burns bright and clean with no soot. Too much wick above the oil causes smoking and burns up the wick quickly.
For optimal brightness it is good to occasionally trim your wick.
These lamps need to be tended regularly, the oil replenished, and the wick adjusted. Use something non-flammable to adjust the wick (pin, tweezers, pliers, knife). If your lamps are smokey, make adjustments to the wick, find a cleaner fuel or you may be subject to certain health risks.
Why I Stopped Using Glass Oil Lamps
I stopped using this type of lamp. Now I just use a scavenged tuna can and slump the wicking into a mound that protrudes above the rim of the can. The tuna can is more durable than glass. The glass container in the photo broke from the heat of the wood stove. It was just sitting on top of the stove when it cracked, not even above direct flame. If I was using a better quality glass made by Pyrex or a mason jar, this should not have been a problem. I also don’t like the hassle of fussing with and constantly adjusting the greasy wick on the wire holder. I can get a much larger and brighter flame with much less maintenance by using a tuna can without the metal wick holder.
TIPS TO OPERATING THE LAMP
The photos in the wick section show the basic process: place wick and liquefied oil into a fire resistant container (tuna can, shell, clay pot, etc.). Then light the wick.
Here’s a few other things that I do when using these oil lamps…
Each time I light my lamp, I top up the fuel.
I preheat and melt down a fat chunk in a tin can. Then I ladle the liquid fat into the oil lamp.
In this picture you see my basic system. To the left, on the front of the stove is the ladle resting on a tuna can. In the middle is the tin can that I use for melting down fat. I keep this liquefied so that I can add more oil to the lamp as needed. To the right is the oil lamp. All are heated by the wood stove during operation to keep the fat liquefied and flowing. I tend to sit and read in front of the stove with the oil lamp slightly above and in front of me.
To avoid the constant need to top up the container with fresh oil, the surface area of the lamp should be greater than the height, i.e. a wide, shallow container is best.
If using an opaque dish, it is best to get the wick above the rim to increase the area that can be lit up.
Avoid lighting the wick while the fat is still solid. The fat will not be able to move up the wick unless liquefied.
Don’t do this! Lighting a lamp that uses wick holders while the fat is solidified will result in the wick quickly burning out.
Cold oil doesn’t wick as well as warm and tallow (animal fat) must be melted prior to use. As the lamp burns, the oil gradually warms up making it easier for the fuel to travel up the wick. I melt tallow by placing the lamp on my wood stove. I do all my cooking on the wood stove and usually start a fire in the evening, before I might need to use the lamp. Mary Bickers warns: “Be careful when heating your lamp on a stove or it could burst into an impressive column of flame.” I have not had any issues with this myself despite placing these lamps on the hottest part of the wood stove.
In the winter, if it is particularly cold (my house has no insulation) I keep the lamp on the stove to prevent the fat from solidifying.
Make sure to completely dip your wicks into the liquefied fat before lighting.
For lighting my lamp: I put a stick into the wood stove fire box. Then after it has caught a flame on the tip, I will dip the tip into a little bit of liquid fat/oil and re-light it. The first burn “charcoals” the tip of the stick. The dipping of the stick in the oil coats the tip of the stick in a flammable fuel. This usually puts out the flame on the end of the stick. On the second lighting of the stick the tip will burn better and longer, making lighting the oil lamp easy.
If I need to move the lamp to a new spot, I will put on a leather glove. Then I will place the lamp onto a folded-in-half piece of card board.
Then I move the lamp around with the cardboard. Spills can and do occur. Be careful. If I had a nicer house I might take the time to make a wood plank with a trough around the perimeter to catch any oil that might spill over the side of the lamp when carrying.
I snuff out the lamp by placing a flat stone over the top.
AVOID USING FAT/OIL FOR LIGHTING THAT YOU WOULD EAT.
This was a realization that I had early in the Winter. Fat is a very important food source, arguably the most important. It is especially important if it is very cold or if there are problems with your food supply.
I had to deal with cold, running low on food, scavenging two dead horses and (a many weeks dead) cow to get through the winter.
Any fat that is good for eating is better to save for food. I use moldy, rancid, old, and burnt fat for lighting now.
Luckily, part way through the winter while scavenging supplies from the house of a man that had died a couple of years prior, I found several gallons of rendered fat in pots. The fat was dusty, some had been chewed on by rats and it was sitting in aluminum pots. I avoid things cooked in aluminum because of the association with Alzheimer’s. So the dead man’s fat stash became my lighting fuel for many months.
These are two photos of the abandoned house that visited in the winter where I found rendered fat.
The floor is dirt and the walls are mud adobe. Much of the walls are blackened by the smoke from the stove. This house is better sealed, more insulated, and smaller than the house I was living in. It is probably a more comfortable winter shelter, being easier to heat.
MAKING CANDLES
Tallow Candles
I use a form to make candles because I find that dipping takes too much time.
In this picture there is the bottom of a glass wine bottle, with the top sawed off and a beer can with the top cut off. I don’t consume alcohol. I scavenged these containers from the trash. There’s also two paper inserts from rolls of toilet paper. The wick is twisted cotton from an old t-shirt. It was dipped in wax a few times, letting it cool before each dipping. After the last dip, I held the wick straight and blew it dry. This gave the wick some rigidity, which is important for this process.
Place the paper cylinder from the toilet paper roll into the jar. The jar must be perfectly cylindrical (the sides need to be straight) in order to separate the form later.
Pour in the tallow. Fill it up so that there is a little bit of the paper insert protruding above the oil. You will need to grab onto the paper with some pliers later.
Notice that the color of the tallow is dark. I am using burnt tallow as a deterrent for rodents. I don’t want them eating my candle. This seems to kinda work. Alternately, you can make your tallow candles with a food grade tallow and have it as an emergency food source. You will just need to store it so that critters can’t get to it.
Let the tallow cool. You want to have the fat solidified just enough to hold the wick in place but not be so solid so that the wick gets bent while being inserted into the fat. If the tallow becomes too hard and the wick is bent while inserting: remove and straighten the wick, and place the glass jar on a warm surface to remelt the tallow. Then try again. If you insert the wick while the fat is still hot, you will lose the rigidity in your wick and it it may not stay centered and straight in your candle. You want the wick centered in the middle and straight.
Use a stick to test the softness of the fat. Choose a stick that is a smaller diameter than your wick, just in case the fat doesn’t fill the hole back in completely.
Insert wick. If needed you can use the stick to support the wick to keep it upright.
Let the tallow cool until solid.
Grab the paper board insert and pull. Sometimes it comes out.
If the mold wont separate, place the jar in an oven or somewhere warm. It just needs to slightly melt on the outside. Then pull the paper insert out.
If you heated the tallow to pull it free, let it cool.
Cut off excess around the paper insert.
I collect the tallow bits and remelt them for later use.
Peel off the paper. Cut the bottom of the candle so that it is flat and sits level.
A beer can can also be used. I bent in the sides of the can to hold the paper insert in place. This wasn’t necessary as it is easy to position the paper insert once the oil is poured in. By bending the can, I was not able to reuse it and had to cut my candle free.
Notice the whiteness of the tallow. This candle could be eaten in an emergency.
Finished. Notice the untrimmed wick on the dark candle. This later causes a problem when burning.
Place candles in a container to catch drippings.
Because I didn’t trim down the excess wick from the dark candle, the larger flame melted a channel on one side of the candle, drained the tallow and quickly, in about 20 minutes, burnt through the candle.
If this problem is caught early, you can use a finger to move some of the tallow around and reinforce the leaking area, thereby damning up the leak. Trimming the wick when it curls or if the flame is too large can also help.
It is important to figure out the right diameter (or thickness) of the wick in relationship to the outer diameter of the candle. If the wick is too thick, it will cause the same problem as shown in the photo above. If the wick diameter is too thin, it may tend to create a crater in the candle and drown the flame. Somewhere in between is just right.
The same diameter wick in the above photo worked well for the wax candles that I made in the winter. But tallow seems to melt at a lower temperature and these tallow candles were lit in the warm spring. The appropriate diameter of the wick will be influenced by ambient temperatures and whether you are using tallow or wax candles.
Wax Candle
I use the same process for the wax candle.
I collected candle stubs and melted them down into this can. This is a mix of beeswax and whatever other kind of candle wax that I collected.
I used tape to seal the bottoms of the paper insert from the toilet paper roll. Tape is hard to come by out here, so I came up with the re-usable bottle mold featured in the prior section.
Finished candles.
Wax candle after use.
Conclusion
I made a couple of the wax candles and tallow candles to try them out and compare them to the oil lamp. I can not think of any scenario where I would choose to use a candle over the oil lamp. So I probably won’t bother with making candles anymore.
MAKING AN EMERGENCY FIRE STARTER
Originally I was trying to make a Sterno can for cooking in a situation where I couldn’t make a fire due to excess moisture from rain or snow melt while in a wilderness setting. This would be in a situation in which sticks and wood might be too wet to start a fire. Basically I was trying to make a low tech backpacking stove that didn’t rely on petroleum based fuels or things I would have to buy from the store. While my experiment worked, it only burned hot for about an hour. For me, an hour of cooking was not enough to justify carrying the extra weight. So my idea morphed into an emergency fire starter.
The idea is that I have a wick embedded into a hot/slow burning flammable media. This media would burn for awhile to help get a fire going. It is very similar in concept to fire starting logs. Here’s how I made my fire starter…
I collected sawdust from logs that I was sawing for firewood. I placed a small plastic sheet underneath the cutting area to collect the sawdust. I then packed the sawdust into a tuna can. I let the tuna can of sawdust sit on the wood stove for a couple of days to make sure that the sawdust was completely dry.
This picture is from when I was trying to make the Sterno can project. It only has one wick in the middle that is hard to see. In the version that I made for the fire starter, I placed 7 wicks into the sawdust before pouring in the oil. The oil being poured in is burnt. I used burnt oil to deter rodents or other critters from eating the fat/oil.
Here is the finished emergency fire starter. One wick in the center with six more in a ring around it. I pre-stiffen the seven wicks by dipping them a few times in grease or wax before letting them cool and being laid out straight.
The plan is to cut out a section from the can with a wick. Then light the wick and place the fire starter chunk into a pile of kindling and wood. The fire starter should be water-proof as it is coated in grease.
I have not yet had the opportunity to field test this invention.
Also, it might make a mess if you travel through a really hot environment that melts the grease. Be sure to pack it well.
LIGHTING COMPARISONS
Oil lamp vs …
Other lighting options:
-Kerosene lamps are toxic, a fire hazard and utilize petroleum fuels. They are not local or sustainable. You cannot use a standard kerosene lamp as a fat lamp. It doesn’t wick up the oil properly.
-Batteries, Solar Panels, LED’s, Electrical Grid, etc. are all dependent on industrial manufacture, with all the mining, pollution, shipping and so forth associated with mass production. These methods are not sustainable nor local.
-Fire place/wood stoves can be fed sustainably and locally, but are not portable.
-Torches are an option, though less practical and probably more work to construct per hour of light.
-Candles – tallow and beeswax candles are two types that can be made with local materials on a home scale. The wax can be reused. They are more work and not as bright as the oil laps.
Attributes of the fat/oil lamp (or why I consider it a superior form of lighting)
-Animal fats and olive oil are nearly smokeless. Olive oil is about 99% pure fuel and burns cleanly. If smoking occurs with these fuels the wick is either too long, there is a draft or the fuel level is too low to travel up the wick – causing the wick to burn.
-Odor free in my experience using olive oil, bacon grease, cow and goat fat.
-Olive oil and animal fats are non-toxic and hypoallergenic unlike kerosene or paraffin candles.
-Safe: when burning olive oil (and other fats) with a high flash point it is not as likely to cause a fire if knocked over. Kerosene lamps are much more dangerous.
Flashpoint of tallow: 525 °F (274 °C) Flashpoint of olive oil: 600 °F (315 °C) Flashpoint of kerosene: 100 °F (38 °C)
Auto-ignition temperature of tallow: 662 °F (350 °C) Auto-ignition temperature of olive oil: 815 °F (435 °C) Auto-ignition temperature of kerosene: 428 °F (220 °C)
-Reliable and long burning.
-Simple to make and maintain. All the materials can be locally gathered or scavenged.
-The production of renewable fat/olive oil is less harmful to the environment than petroleum based products. Both of these sources for fuel can be truly sustainable surplus materials produced or acquired on a small scale indefinitely without significantly adverse impacts on the environment. For the survivalist, fats are easily stored in bulk.
-Brighter than a good bright candle and can be made to be as bright or brighter than a kerosene lamp.
-Inexpensive. It can even be cheaper than candles depending on how you acquire your materials.
FINAL THOUGHTS
Interestingly I started following the work of Dr. Jack Kruse over the past year or so. He is a neurosurgeon that has made a compelling case that light after dark and artificial light in general is very detrimental to our biological functioning.
His perspective in a nutshell: We evolved to go to bed and rise with the sun. We also evolved to spend most of our time outdoors in nature.
Since I have considered all the ways that artificial lighting may be interfering with my health, I have stopped staying up at night. I am going to bed as it gets dark and I am spending my mornings with my skin exposed to the sun. I get up earlier and am better rested. I don’t really use much lighting anymore. Maybe I’ll use my red filtered headlamp if I need to poo or something at night. My life has become simpler as I don’t need to focus as much on producing fuel for my lamps.
So in a sense I have moved beyond the tools that I go over in this tutorial.
Still I am glad for the knowledge and experience that I have gained as it is useful.
Its funny how new pieces of information can change your whole paradigm.
Here’s a couple of good talks from Dr. Jack Kruse:
Before I first made soap I read 11 instructional articles and watched two videos online. These are linked at the end of the post.
While the articles were helpful, my lye to fat ratios were significantly different.
I also found that my lye and fat made a hard bar soap whereas most people ended up with a liquid soap. If they wanted a bar soap they had to add salt or some other additive. Something in my soil/wood/ashes led to a harder bar soap as the end result.
Additionally, I found that if I cooked off all of the water, as was advised in some of the instructions, my soap tended to crack. I now leave a little water in my soap.
This is how I think of making soap after completing a few batches…
There are three components: water, lye, and rendered fat.
You can use one of the recipes (linked below) for starting ratios but ultimately you will need to develop your own ratios because each batch of lye is different. The type of fat may effect outcomes too. Therefore it is more important to know how to identify the signs that indicate when the ratios are out of balance so you can make adjustments.
One of the other things that I learned that wasn’t very clear from the online instructions is that you can always remelt down the soap and add components until you get it right. Keep track of your ratios and adjustments as this will give you a good idea of where to start for the next batch. If you use the same ingredients and the same batch of lye, you can develop an accurate recipe.
First I’ll cover how to make and acquire the components. Then I’ll go over how to combine them.
EXTRACTING LYE WATER
I collected wood ash from deciduous trees: willow, chicai (spelling?), and some poplar. Hardwood trees are generally recommended as they produce a stronger lye from their ashes. The willow and poplar are not very dense but are considered “hardwoods.” I avoided pine and similar evergreens (“softwoods”) because the resins are not supposed to be good for soap making.
After obtaining about 8-9 gallons (36 liters) of ash, I began the leaching process.
I put the ash through a home made sifter to remove the charcoal. Some internet sources claimed that the charcoal made no difference, others claimed that removing the charcoal produced a lighter color soap and improved the quality of the lye.
This picture shows my ash sifter. There are two metal buckets, one smaller that sits inside the bigger bucket.
The bigger bottom bucket collects the sifted ashes.
The smaller top bucket has many 1/4 inch holes drilled into it. (Note: I recommend a slightly smaller hole size, as charcoal chunks bigger than I’d prefer still get through the 1/4 inch holes.)
This is a picture of the coals retained in the top bucket after the ash was sifted. The ash from the wood stove is placed in the small bucket with holes. This small bucket is shaken over the big bucket until the ash has fallen through.
In this picture above I am using a pot as a measuring device. I poured ash from the metal can into the pot. On the left is a 5-gallon (20 liter) bucket lined with a pillow case. I make sure that the pillowcase reaches the bottom of the bucket as I want the ashes to sit in the bottom for this part.
I put 3 pot-fulls of ash into the 5-gallon (20 liter) pillowcase lined bucket.
I then put three consecutive pot-fulls of boiling water into the 5-gallon (20 liter) bucket. I use the same amount of water (by volume) as ash. Three pots of ash and three pots of water per 5-gallon (20 liter) bucket load. The pot size was close to 6 quarts (6 liters). Lye is a water soluble chemical present in the ash. What you essentially want to do is create an ash tea, then drain the water with the lye in it. The hot water is supposed to more effectively extract the lye than cold water. I used spring water.
I kept the plastic 5-gallon (20 liter) bucket covered to retain the heat from the hot water. In this photo I have a metal can sitting on top of the 5-gallon bucket to act as a lid. I then let the hot water and ash mix sit over night.
I pull out the pillowcase in the morning, letting much of the water drip through into the bucket.
Then I secure a second pillowcase over the bucket. I secure it so that the bottom sits about half way down the bucket. I want the pillowcase to be above the lye water. I don’t want the new pillow case to be submerged in the lye water in the bucket.
I then place the original pillowcase with the wet ashes inside (on top of) the new pillowcase. I let the lye water drain through both pillowcases into the bucket below for a couple of more days.
CONCENTRATING THE LYE WATER
After a couple of days, I remove both pillow cases. The lye water will be a brown color in the bottom of the bucket.
Pour the lye water into a pot. I boil off 75% of the water to concentrate the lye.
As the water is boiled off the lye becomes more concentrated. Lye can reach a pH of somewhere between 11-14. It can be highly caustic. It can burn skin or even cause blindness if it gets in the eyes. Lye is used to break down grease and unclog pipes. Be sure to wear safety glasses and gloves when handling concentrated lye.
Build an outdoor fire to cook off 75% of the water in the lye solution.
Do not put your pot of ashes in water to cook on a stove indoors. Some of the online instructions show people doing this. This is dangerous for your health as the vapors can make you sick. I tried it, thinking my un-insulated drafty house had enough airflow to avoid problems with off gassing. Unfortunately, I experienced esophageal stricture from being exposed to the vapors.
In this photo I am using a stick to measure the water level. When I first started boiling the water I dipped the stick into the liquid. Then I made a notch on the stick 1/4 of the way up from the bottom of the wet part of the stick. I used this notch to gauge when to stop boiling off the water.
I now have my lye with some water in it. Next I need to prepare the fat.
MELTING FAT
I used goat fat in this case. I collected the fat surrounding the stomach and organs of the goat.
Once the fat is liquefied, I take the fat outside to mix with the concentrated lye.
COMBINING LYE AND FAT TO MAKE SOAP
The pot in the bottom left contains the fat. The pot in the bottom right has the lye water and a ladle. These will be combined in the pan above.
I used the ladle to measure my ratios. I add the lye water to the pan first. Be careful not to add lye water to very hot fat or it could splatter and sizzle, getting lye/hot oil on you.
For me my ratio was about 4 parts lye water to 1 part fat. This differed markedly from most of the recipes that I read.
I add the oil just after I put in the lye to the pan.
Stir this a bit as you bring it to a boil. I typically boil it for an hour or two.
Stir occasionally as it simmers.
This is a photo of a different batch, hence the clay pot. Toward the end of the process you will want to remove the pot from the heat. As it cools continually stir to keep things well mixed. This is pretty much how you want it to look. Notice the streaking that follows the spoon. This indicates that it has reached the correct consistency. It will be thick like pudding.
POURING THE SOAP INTO A MOLD
I cut up old plastic containers to make molds.
Here is four molds from the plastic jar.
You don’t want the soap to be too hot or too cool. If too hot it will spill through the bottom of the mold. If too cool it will come out lumpy with air pockets.
The front row in the photo had a batch that came out nice. The middle and back row batch had a bit more lye than necessary: notice the brown liquid puddles sweating out. This is not necessarily a problem. You will just have some “frosted” white powder crystallizing of the lye on the outside of the soap when it dries. Once you use the bar of soap a few times the extra lye is washed off. I would rather have a little too much lye than a little too much fat. I have read that excess fat can make for greasy soap, though I have never had this problem. For the next batch I might add a little more fat to “soak” up the extra lye.
Finished soap! My soap cleans very well and even suds up pretty good. I don’t add egg or sugar to create a suds-ing effect.
TROUBLE SHOOTING
This photo shows lye (the brown liquid near the stirring spoon) that has not yet reacted with and integrated with the fat. I would continue stirring to see if the liquid integrates. If not I would add more fat.
This is a photo from a batch that was boiled too long (too much water lost) and has too much lye. I think that the lye is what looks like brown sugar in the pot. My solution is to add some more fat and a little water, then reboil and see where things stand.
This photo has fat separated to the right and the “brown sugar” looking lye present. The way that I interpret these results is that the fat did not mix well. Looking at the lye to fat ratios, I would add a little more water, more fat and reboil it to see how it turns out.
MATERIALS I USED
Wood ash (hardwoods) Stirring stick or spoon, not plastic Stainless steel pot with lid 5 gallon bucket Pillowcase (x2) Two metal buckets Drill with 1/4” bit (I would use a slightly smaller hole size in the future) Plastic bottle molds Gloves and safety glasses
Not much had significantly changed for me when the COVID lock-down began. I was living in the mountains at a remote estancia (ranch) to get away from the insanity of modern civilization. My days were full of activities like riding horses, attempting to fish, reading, studying Spanish (Castellano in Argentina), making soft leather clothing, cooking goat, going to bed with and waking up with the sun.
Patagonia’s famous stunning sunsets.
I am putting up this blog post during my first trip off of the estancia in 9 months.
On March 19th, 2020, the Argentine government decided to shut down all “non-essential services” in response to COVID. I learned about this a few days later from someone living at the ranch.
I did not use the internet at the ranch while I was there because it is a WIFI/Satellite based system and anybody who has studied the topic of electromagnetic radiation knows that WIFI is extremely dangerous to living things. Much of my information about the virus was second hand and included the following:
All borders were closed.
All air flights had been cancelled with the exception of an occasional charter or repatriation flight out of the country. Foreigners were not supposed to be able to travel between provinces (or even between some cities) unless they were leaving. To leave required paperwork from your embassy identifying your vehicle, driver, etc. It also required proof of an airline ticket and a doctors “pass” of your current health status. One was also limited to a 24 hour travel period to arrive at the airport.
All bus service had been stopped. Later some inner-city and local buses resumed operation. Now, nine months after the lock-down began, some limited amount of national bus service has resumed.
At some point limited travel was permitted by private vehicle for medical and a few other reasons. One had to apply online for permission to travel and you needed to show your permission with a cell phone to be allowed to pass police check points. This introduction of a nationwide surveillance app allowed the tracking of the movements of people within the country. Presumably walking or riding a horse was possible with similar restrictions but I only heard about reports from people driving between towns in a car.
In my province some cities had their entrances closed off by using bulldozers to pile up dirt to make a barrier to close traffic. The remaining entrances had police stationed with one side of the road barricaded. At these check points the police would ask for your identity information. They would ask if you had any symptoms that might indicate if you were sick. They would ask if you had been around anyone who has been sick. They would take your temperature from a distance with an infrared gun. If the police decided to let you pass, you would then drive through a makeshift car wash that sprays your vehicle down with a bleach solution.
Most businesses and offices shut down. Later some businesses opened up with restrictions on the numbers of people allowed to come into the store at a time, typically 1-3 people were permitted at a time. We are supposed to keep a distance of 6 feet (2 meters) from those around us. Sanitization stations were set up at most businesses. The station was typically a table or stool with alcohol gel or spray that you were supposed to use to wash your hands with when entering the building. Many businesses would serve you through a window and were not letting people enter the shop. Some businesses like cyber cafes and long distance call centers were not permitted to allow the public to use these services because they were considered a vector for disease transfer. Many businesses put up transparent plastic barriers between the public and employees.
It is required to wear a face mask in public or you may be subject to a fine.
People were discouraged from leaving their houses and there was a curfew in Buenos Aires, possibly in other places as well.
In the future I will post on my thoughts about the Corona Virus and what I believe to be true about it. This post is about how the so-called pandemic led to me being stuck in the mountains. It also illustrates the value of remote country living in a time of global crisis.
LAND CONTEXT
There are two climates that tend to be sparse with people and thus have a reduced amount of humanities’ insanity. These are arid landscapes (i.e. deserts) and very cold regions (i.e. tundra). Between the two I think I prefer the desert. This area is arid and dry like the Southwestern US.
On the estancia they graze sheep, cattle, goats and horses. There is a small shop space, barn, vegetable garden, orchards, housing and a micro-hydro system for electricity.
The land is rocky, hilly and mountainous with some flat spots here and there. It is within a section of the Andes mountain range in South America. The temperature is moderate during the summer as it doesn’t tend to get very hot. The Fall has crisp nights and warm days. Winter gets plenty of rain, snow and cold freezing temperatures. Spring has chilly nights and warm days. It is an area suffering from a prolonged drought and is in the process of desertification.
All of the water here is from snow fed rivers and is as clean as it gets. The river is the life blood for all things living.
It is a land of vast expanses where one can see for miles without a human settlement in sight. It is the perfect kind of place to be during a plague. A perfect kind of place to hide out as humans destroy themselves.
ANIMALS
Guanaco
There are many relatives to the animals that are present in North America, such as: voles, bats, deer, skunks, rodents, rabbits, opossums, wild cats, armadillos, otters, weasels, and foxes. Plus, some more exotic species like the llama and guanaco from the camel family or the rhea (an ostrich like bird). With over 5% of the world’s bird species, Patagonia is a bird watchers paradise.
In the mountains there are no poisoness reptiles, nor dangerous animals of prey. Puma (mountain lions) are typically aloof but do feed on livestock. There are wild boar, which are probably the most dangerous non-human animal one is likely to encounter in the these mountains.
Coral snakes, rattle snakes and pit vipers are in the north of Argentina and due to increasing desertification, now range into the northern most parts of Argentine Patagonia. They are less common in their southern most range than in the subtropical north, however. The venom paralyzes the nervous system but strikes are uncommon. Death is not instantaneous and antivenin is available.
There are spiders and scorpions. The small scorpions of Patagonia are not considered very poisonous, just painful. Some areas have Black Widows (northern Patagonia to Buenos Aires).
I have not seen any snakes or Black Widow spiders in my time here.
Ants, mosquitoes, ticks, fleas, lice, beetles, and nameless biting crawlers and fliers exist. Horse flies and yellow jackets have been the greatest nuisance so far. I have read accounts of people’s houses filled with flies lining the walls and locust swarms devouring everything green in sight.
More dangerous than the animals however is the weather. The risk of hypothermia and freezing in these great mountains is real. In the Andes the weather can change unexpectedly. Sometimes people are caught unprepared in the higher altitudes.
PLANTS
Most of the landscape is covered in various thorny dry land shrubs with some bunch grasses.
Some common wild trees that are familiar to me include: willow, poplar, cottonwood, pine and acacia.
There is poison hemlock and not much of the plant life is edible.
SHELTER
I lived alone in a house of stone, wood and concrete. The house is poorly designed and constructed. There is no insulation. The roof is made of reused corrugated metal, dotted with old nail holes and is very leaky. It is missing part of it’s ridge-cap. The walls and roof block most of the wind and sun, but since there are many air gaps and holes: rain, leaves and snow blows in through the roof or walls. Unwanted critters co-habitate. There is plastic (not glass) for some windows.
Open ridge
This shelter keeps out cows and horses, but rodents, spiders, flies, bees, and other small critters are free to come and go as they please through the various openings.
The wood-stove has a hole in the back that has streaked the wall with a dark creosote burn. Creosote buildup also dribbles down the outside of the stove pipe. The original cast iron cook plate is gone and a steel round serving dish fits in it’s place. The stove can be smoky with at least 7 points where smoke vents from the stove but at least the high level of ventilation in the building allows the smoke to clear quickly.
There is a small solar panel on the roof, that is connected to an old car battery. Attached to the car battery are two 12 volt incandescent light bulbs. The battery is dead and the lights no longer work. I prefer it this way because artificial light has adverse health effects. I am thankfully mostly free of electrical appliances: no refrigeration, no air conditioning, nor any of the many other contrivances that modern humans have come to depend on. I have my laptop, a watch, a camera and a headlamp. I use rechargeable batteries for these gadgets. I have no other electronics.
In a few ways the house could qualify as “ecological”: the wood fired stove, wood fired water heater, the compost toilet, some of the building materials (wood and stone from onsite), plus my low energy requirements. I would have preferred an adobe home or another earthen structure like cob. I would have even preferred a yurt or toldo. In any case this house served as my home for my first year in Patagonia.
COMPOST TOILET
I also have access to a separate bathroom structure. I don’t use the flush toilet as it is a waste of nutrients. I use a compost toilet.
I use a five gallon bucket for pee and poo. When only peeing, I just go outside. The bucket is set inside an old beehive box and I perch on two wood boards on either side of the bucket (squat-style). I line the bucket with leaves and wood charcoal (as a way to pre-charge the charcoal to use it as biochar). Each time I use the toilet, I wash up using a wine bottle full of water, instead of using toilet paper. Then I dry up with a hand towel. I have two of these hand towels that I rotate through. I wash one each week and alternate.
Because dogs are everywhere in Latin America I made a thorny rose barrier to keep them out of my organic wastes.
Each time I use the bucket toilet I add two or three handfuls of leaves to cover my deposit when done. This adds carbon. When the bucket is full I add it to the compost pile. Then I rinse out the bucket and dump the water on the compost pile. I then add more leaves to the compost pile and reline the bucket.
I placed wet wood outside on a table (up off the ground) to dry on sunny days.
Making and stocking up on firewood was an essential task. I had a crosscut saw and axe for processing wood. Initially I used these tools more frequently. But I realized how much energy was required to cut each piece of wood by hand.
So I switched to using leverage to break branches, which required much less energy to accomplish than using the saw or axe. I used a crook between a poplar tree and it’s branch for splitting wood. I placed the tip of the branch into a pocket of the tree while applying side-ways pressure to the branch.
Branch splitting.
Pile of broken branches for firewood.
I added 4 side branches as upright supports to increase the carrying capacity of wooden produce boxes. I used these to haul in wood.
Different grades of wood (kindling and firewood) was stored inside the house, up off the ground on top of bed frames.
WATER
I have been drinking the spring water that flows from the snow melt in the Andes mountains for these past few seasons. I can’t remember a time when I drank water this pure. Thankfully there are not many pollutants in these mountains.
This water fills my body and courses through my veins. This same water courses through the veins of the Earth (it’s rivers and streams). This is the same water that has flowed through our ancestors, cycling again and again. All of the water systems on the estancia are gravity fed springs of good tasting water.
Water is one of the most important elements to work with if we are going to heal the planet and stabilize the climate. Science is now recognizing that water stores an incredible amount of information, of a much greater capacity than our most advanced silicon chips. It is said by some that water stores emotion and the memories of the Earth. It has also been discovered that when water is combined with the infrared heat from the sun, it generates a tremendous amount of energy. The energy generated from infrared light and water is greater than the amount of energy that we obtain from eating food according to Dr. Jack Kruse. Ones wonder and appreciation for life is deepened as we learn that bacteria cause rain events adding to the complexity of interactions and relationships.
Probably the only ecologically beneficial activity taking place at the estancia was the spreading of water throughout the landscape through the use of a network of irrigation ditches.
The dispersion of water supports more life.
By diverting some water from streams and rivers at the highest point possible in the landscape water is provided to a greater number of living beings. Everything below the ditches can now be periodically flooded with life-giving water. Different parts of the hillside can be irrigated in rotation. This provides lush vegetation for livestock and wildlife. It also helps build the soil carbon sponge that is necessary to stabilize the climate.
My Water System
Spring with a plastic bottle water intake in the middle.
The water systems at the estancia are simple. A particle filter (plastic bottle with holes) for sediment is slipped over a plastic polypropylene pipe and placed behind a small dam. Honestly, this pre-filter was only good for keeping out leaves. It would let small stones, sand, and other sediment into the water line. This later became a problem as the flow of the water in the line slowed down due to sediment buildup. When building a water system be sure to use a much finer sediment filter for your water intake point. If particles get into your line, you want the particles to be small enough to be carried through the water line from the gravity flow of the water moving through the pipe.
From the spring, water is gravity fed down to a small tank. This tank sits uphill from the house and provides a small amount of stored water for showers, etc. The tank is continually filled and overflows out the top.
The sink seems to go to some kind of septic system unfortunately. It would be better to have a gray-water system installed. Especially in such a dry climate, every drop of water counts.
Water Heater
This is a wood fired water tank. It is located in the separate bathroom structure. It is used for heating shower water. This heating method is using stored solar energy trapped as carbon in wood and is therefore renewable.
I mostly used the water heater in the winter as summer temperatures were warm enough for taking cold showers. During the winter season showers are less frequent and depended on whether the pipes were frozen and the availability of dry firewood.
Having a hot shower requires a lot of time to heat the water (at least 1.5 hours) and takes a lot of wood (which requires work). It saves a lot of effort and time just to take a cold shower when the ambient temperature is not too cold outside.
WASTE MANAGEMENT
Trash: I burn non-glossy paper in the stove. All other garbage is buried onsite. I try to avoid acquiring things that will add to the onsite landfill.
Ash, bones, and vegetable scraps are all composted and cycled back into the land.
I hand-wash my clothes. In this photo I am filling up plastic tubs with water in the shower. Then I will proceed to “dance” in the tub to agitate the laundry in the water. After a few minutes of this, I dump out the dirty water, squeeze out individual clothing articles and set them aside. Then I put the clothes back in the tub and refill it with water. I usually repeat this cycle about 8 times before I decide that the clothes are sufficiently clean. Initially I was using hot water from the water heater to do laundry but this used up a lot of wood and was a lot more work. So I switched to washing in cold water most of the time. If a specific clothing article felt greasy or was not getting as clean as I wanted it, I would put it in a pot on the stove with some soap and boil it for awhile. This cleaned the clothing quite well but was only used a few times over my nine months in this house.
Then I hang my clothes on a line to dry. I have a line indoors (near the wood-stove) and outdoor lines under the roof eaves, so that my clothes mostly avoid being rained on if I leave them out in a storm.
For large clothing items like my poncho I would wrap a rock around a corner and tie this off with a rope.
Then I would throw the poncho, etc. into the creek for a few hours or overnight to let the creek wash it for me. Why work when nature will do the work for you? I secure the rope to a tree along the creek bank.
TRANSIT
The property is pretty remote. It takes about 3 hours to get to the nearest small town by car. Most people in the area use horses to travel.
This is the horse that I primarily used to get around. We are crossing a river together.
This is a cable car used for crossing the river. For much of the year the river was too high to cross with a vehicle. Sometimes it was too high to cross with a horse. There is a hand crank to move the geared bobbin of cable.
Some radio stations can be picked up on the ranch. In this area, people don’t tend to have television in the mountains. The radio is the primary form of news and entertainment. Most families will listen to the radio daily. It’s like going back in time.
I don’t use the internet or a phone at the estancia. I only use wired connections (landline and ethernet) when I travel through a town a few times per year. This keeps my internet time and radiation limited.
FOOD
I eat seasonal, organic and try to eat most of my food on the raw side. I didn’t buy food while at the estancia. I ate what the land provided during my nine month stay there. It is about 7.5 hours of driving (4 wheel driving for much of it) to get to the nearest natural food store (that I know of) and the selection is dismal.
Veggies
Dandelion
The wild edible plants that I have found include: dandelion, mint, lamb’s-quarters, sheep sorrel, mallow, fennel, rose, wild celery, purslane, water cress and willow sugar (aphid excrement – technically not a plant food).
Standard garden veggies were available from spring to early winter: tomatoes, lettuce, arugula, mustard greens, chard, beets, kale, squash, basil, sage, collards, cilantro, etc.
Fruit
This is a photo of berries available in the summertime. It is actually from off the ranch, just before I arrived there. They’re from a province further south.
Planted trees include: apple, plum, cherry, quince, and pear. There are also gooseberries and raspberries. Many of these fruits are propagated by wildlife, so there’s volunteer fruit trees/bushes popping up around the land. There is lots of seasonal fruit.
Gooseberries being prepared for dehydrating.
Cherries being dried in the sun on top of shade cloth. I would have preferred not to dry my food on top of plastic but I couldn’t come up with a better option.
Meat
The river provides crawdads to eat. This photo was actually from a ranch further south when I first arrived in Patagonia.
Crawdads cooked and ready to eat.
A goat carcass in a screened in cage. There was no refrigeration so all meat was kept in screened cages. Meat would last 2-3 weeks depending on the season before it became unappealing to eat.
Goat meat was my primary food staple. Many weeks passed where I ate nearly half a goat myself.
Using an axe to cut up the goat. I didn’t have a butcher saw, so I improvised.
Rabbits and quail are the main wild animals here to hunt for food but skunks and others could be eaten. I caught one rabbit and smashed it on the ground. It was suffering from some disease that causes the rabbit’s eyes to swell up so that it can’t see, which is how I caught it. I ate another couple of rabbits that one of the estancia dogs chased down and caught.
The local folk use a can as a hand-reel for fishing. This is my fly fishing rig. I have not yet caught anything but have only tried to fish a few times.
Two rib cages from a cow being cooked in the traditional asado (bar-b-que) style. Oh my goddess, so good!
All of my cooking is done on wood-burning stoves or fire pits. There was no electricity for cooking at my house. There was some propane around but I chose not to use it. See my post on the Traditional Asado: South American Barbecue for more info on cooking with fire.
Nuts
This is one of the great foods of Patagonia, the piñon nut from the Araucaria (Monkey Puzzle) tree. It’s looks like a giant pine nut but taste like a chestnut. It’s delicious. It has served as a staple food for the indigenous Mapuche tribes of the region.
Walnuts and quince fruit. I learned that quince can be eaten raw.
I had some walnuts, quince and piñon nuts in the early part of winter. Unfortunately my supplies were not sufficient enough to last very long or take me through till spring.
WINTER
The real survival test comes in the winter when temperatures are cold and pipes freeze. When there is little vegetation available to eat.
I had not stocked up well on food because I had actually decided I was going to leave this estancia two months after I arrived. I kept thinking the COVID lockdown was going to be lifted because of rumors that would occasionally circulate. I was planning to relocate before the winter.
With the first snow the mountain passes were closed to travel.
More people stayed over winter at the estancia than normal due to the COVID lockdown. Before the full food supply was hauled in winter snows closed the access to the ranch by vehicle. The pass was closed for a few months. The only practical way to travel off the ranch when snowed in was to take a horse. It was a half-day horse ride along the river and it was best to have a few days of mild weather before traveling. As a result of the pass closure much of the food supply didn’t arrive until much later.
Additionally there was a meat scarcity the whole time I was there. For some reason that I don’t understand the owner did nothing to address this problem the entire year. He chose not to build up the herd, even though this was an ongoing source of complaints and problems. This led to ongoing tension between me and some of the others who lived there. I don’t consider processed food, canned goods, pesticide laden agricultural commodities, etc. as food. These kinds of “foods” were relied on by everyone there except me. Because I don’t eat these things I depended heavily on eating goat which is the primary meat available at the ranch. Because I ended up eating more meat than was typical, the response by some of the people at the estancia was to try to restrict my access to the meat. Rather than focusing on how to create more abundance for all (a more evolved response to scarcity) people were trying to exclude my access to my primary food staple by complaining to the owner. I was constantly having to argue and fight for access to eat food. This was one of the many reasons why I decided to leave this estancia. People were not always taken care of and not enough effort was put into food self-sufficiency. The people at this estancia are highly dependent on purchasing food from the nearest towns.
That is the context going into winter for me and it led to some interesting and undesirable outcomes.
Keeping Warm
Clothing, insulated bedding, sitting in the sun and burning wood are the ways I stayed warm.
Any heat from the wood stove escaped through the air gaps all around the house. Because there was no insulation in the house I had to sit a few feet from the stove to receive any warmth from it.
I had 2 sleeping bags and used my wool poncho as an extra blanket when the nights were cold. In sub-freezing weather I wore a woolen beanie and covered my head with the poncho, leaving a small hole to breath through.
Woodstove
In the winter the stove is the center of activity. In this photo you will see me drying out boots that are resting on sticks (to avoid melting the rubber sole) on top of the stove. I am cooking in a pot that has two metcheros (cans burning goat fat for light) on either side of the pot. In the oven I am “baking” the moisture out of wet branches. These will be fed into the fire next. There is a log fed straight into the fire box with a pair of wool socks draped over the top to dry them out. To the right of the stove are branches that I am drying out. In the foreground is goat head stew. Up next for cooking.
Yum!
At some point I stopped breaking branches and just started directly feeding them into the stove. The floor and walls are made of stone and concrete, there was nothing flammable around the stove. So if a branch fell out it was not a fire hazard. Not having to break branches into little pieces that fit into the firebox saved me lots of effort. Much of survival is about energy conservation. Anything that can be done to reduce energy use allows one to get by on less food when supplies are scarce.
Notice that the entire stove is covered with pots. I tried to use all of the heat that the fire was generating to do work for me. It was a fair bit of effort to keep firewood stocked and I didn’t want to waste all the heat just cooking one pot of food. In this photo I am heating water, cooking several different meals and experimenting with homemade glue.
A quick photo series of winter goat slaughter and butcher in the mountains:
Last of the Vegetables
Here I am cutting up the last of the vegetables. These are stems from collards and kale plants as the greens were already eaten. After these vegetables, I ate only two things for a couple of months: rose hips and meat.
Top Choice Survival Food Plant
I learned to appreciate the rose. This was the only fruit, it was the only plant food available to me for much of the winter. It is rich in vitamin C and I came to greatly appreciate the texture once I became accustomed to it. This plant above all others in Patagonia is probably the most important survival plant. It has a long fruit season and it’s fruit is preserved well on the bush. It is available to eat when there is nothing else to be found. It also is a huge help to livestock and wildlife, helping them to survive the winter.
I wore gloves to harvest the berries because they have these very small thorns on the fruit that get stuck in the hand and are irritating. Then I shake the dried berries in a colander to knock off the little thorns and debris.
I stacked the fruit in plates and filled the plates with water.
After three days the water can be poured off for one of the most delightful beverages. It tastes kind of like strawberry lemonade. It’s refreshing and sweet with a little tanginess. The fruit is also a good texture at this point.
Scavenging the Dead to Eat
One day the estancia owner came to me and said that there are two dead horses. One just died of starvation and the other was shot dead because it was starving. Every year a couple of old horses starve to death during the winter there. The owner told me that I can’t eat anymore goat meat and that I’ll have to scavenge the horses for food. The owner had caved in to the complains of others about me eating “too much” goat. Initially I embraced the challenge to salvage the horses and thought it good to make use of the meat.
Here is part of one of the horses that I salvaged.
Here I am with a horse leg in my backpack and some ribs draped over my back. Horse is heavy to carry. The horses died/were killed miles from where I lived which was highly inconvenient. While scavenging the first horse, my neighbor found a cow that had died. It had been dead for a few weeks based on how dried the stomach contents were. Some animal had torn out the guts. But luckily it was on the cold side of a hill exposed to a cold wind so much of the meat was well preserved. The beef was surprisingly excellent. Some of the best I ever ate.
I spent five days hauling salvaged horse and cow with some help from my neighbor. It was some of the most exhausting strenuous work that I have ever done. All day everyday working through the pain in my body to save as much meat as possible. We lost some of the horse meat to a wild dog and some was just way too funky by the time I got to it, after sitting out in the sun for a coupe of days.
Skinning a horse leg. Mixed with the hauling was preparation of the meat for preservation.
The horse meat was cut from the bone.
The meat was spread out initially on the roof until further processing. The sun and wind helped to start drying the meat. Putting it on the roof kept it out of reach from the cats and dogs. Luckily this was winter so there were no flies or yellow jackets around.
The meat was cut into strips for drying.
I put some boards up on the roof against a ladder and than draped meat strips over the boards. After two days I would flip and reposition the meat strips to dry the underside of the meat strip. It took about 4 days in the sun to dry the meat. There was also a ranch freezer that I was able to put a bunch of the horse meat in.
Because the horse head was too big to fit into a pot to cook whole, I removed the eyes, tongue, and cheeks to eat. The brain was saved for making soft leather clothing (more on that in a future post). The organs tend to be the most valuable parts for health and nutrition. If there is only one book that you ever read about nutrition, make it Nutrition and Physical Degeneration by Weston A. Price.
My first attempt at horse hair rope. I tried to use most of the horse.
New Foods
I learned to eat goat feet.
First I removed as much skin as I could.
Then I boiled the hooves to loosen them from their socket.
Supposedly the socket should be able to come loose after a little boiling. One can then bang them on a rock or put on a glove and pull them off. I was not able to get this to work. So I boiled them until the joint came loose. Then I made a nice bone broth with the rest of the foot, minus the hooves.
Flooding
Water flowing out my front door. When the rains were heavy my house would flood for days or weeks.
This is the view looking in from the front door. I have a couple of inches (5 cm) of water over much of my floor.
Here is a creek flowing through my bedroom. Luckily my bed was elevated, so I slept dry.
Drowning a Neighbor’s Goat
Let me just say for the record: Two months of just eating rose hips and starving horse meat is a real fucking drag. I am told that horse meat can be pretty good when slaughtered at the right time of year. Unfortunately starving old horse meat is tough and does not taste good. It has almost no fat at all and was lacking nutrients and hence the poor flavor.
I ended up eating about 75% of those two horses by myself.
I had most of the winter to work on personal projects, read, study Spanish and focus on staying warm and fed. As the seasons shifted to spring the ranch owner asked me to help out a bit on the ranch. This was a reasonable request because I had been stuck there for a long time, waiting to leave. I told him I needed my goat ration restored if I was going to start working again. He agreed to this and said that he sent a message to the grizzled old gaucho that takes care of the goats. I have to talk to the goat gaucho to get a goat. When I showed up the gaucho said he hadn’t received any message about me coming to get goat. I had to argue with him, which was typical, until he let me take a goat to eat.
The ranch owner said he would find me an alternate source for meat in the future. Based on past experience I knew I couldn’t count on him to deliver on his promise and I didn’t want to depend on him for my access to food. When I checked in with him a couple of weeks later, he had forgotten to sort out my meat supply problem. I had anticipated this.
One day I found some of the neighbor’s goats down by the river on the land of the estancia where I was living. I decided to get savage, corner some of the goats, lunged at one, dragged it into the river and drowned it. I was almost out of meat so the timing was fortunate.
Normally I wouldn’t steal a neighbors goat but there was a long history of problems with this neighbor.
In the US a property owner is responsible for fencing in their animals on their own property and can be held liable. In Argentina it’s the opposite. Animals have free reign and it is the responsibility of property owners to fence in their property to keep out unwanted animals. If animals are found on your land you can put them in a corral. You need to provide water but are not required to feed them. Than you notify the local radio station. Everyday nearly everyone tunes into the local radio station for the news: so and so got married, someone is missing their horse, etc.
Here’s a short history of some of the problems with this particular neighbor:
The neighbors property is surrounded by the estancia I was living on. The neighbor leases out her land for grazing to some people that have way too many animals for her acreage. So the animals quickly eat all of the forage available on her land which leaves only forage on the estancia where I was. So the animals spend much of their time over grazing the land where I was living. The animal owners trespass daily and graze without consent. They graze land that is not theirs without payment or any agreement.
When a fence was being built to enclose the animals in the neighbors property, the people who own the animals, stole the fencing materials. Arguments about where the boundary line was also occurred.
When animals that were trespassing were rounded up in a corral, as is legally permitted, this led to confrontations with their owners.
When animals that were trespassing were driven back onto the land where they were supposed to be, the animal owners would release their dog which then scattered the animals and sent them running back onto the estancia where I was. The dog was trained to chase the animals off of the land where the livestock were supposed to be.
Throughout various confrontations with the neighbors the police were called, nasty phone messages were left by the neighbor and in one case one of the trespassers charged through a cooking fire where someone was making mate tea and the man on horseback threatened to whip the woman who had been trying to maintain her property lines.
This kind of behavior has been going on for decades. The owner of the estancia where I was living did nothing about it because he is a coward and highly conflict avoidant.
I personally don’t tolerate that kind of behavior and would have put an end to this dispute years ago if it was my land.
So I had no qualms about taking one of their goats.
My goat “harvesting” was merely a small payment for years of unauthorized grazing and land degradation.
This is the neighbor’s goat that I drowned. I didn’t realize that she was lactating until after she was dead. I was mostly focused on grabbing a goat that I could carry back to my house. I was not thinking about whether or not they might have kids. There were no kids with these goats otherwise it might have occurred to me to grab a male.
Here I am milking the drowned goat.
This was the first time I had milked a dead animal.
I milked into the cup, then poured the milk into the stainless steel water bottle.
The water bottle was placed in the creek to cool. I placed two rocks next to the bottle to keep it from floating away. I obtained about 1.5 quarts (1.5 liters) of milk. The milk was really good. I hadn’t had milk for over a year so it was a real treat.
My first foray into eating the stomach and intestinal tract.
I washed out the intestines and stomach in the creek near my house. After washing each piece I hung it on a branch.
This is one of the four stomachs after being washed.
Drying washed intestines. The CDC and your local health department germ-a-phobe bureaucrats can suck on that. I’m sure the goat is just crawling with the corona virus too. People like me eat COVID for breakfast, lunch, and dinner. Why? Because we can. Because we’re bad ass like that. Because food tastes better with a little COVID sprinkled on top. And most importantly for funzies. (Yes, I am mocking the fearmongering about COVID.)
Boiling various pieces of stomach and intestine. This actually did not taste good. I later learned that it is recommended to very briefly blanch the stomach and remove the inner membrane/lining before cooking. This is supposed to improve the flavor. Yeah, well, you live and learn. The intestines were pretty good though, they were mostly fat and I love me some fat.
So now I can cross “Drowned a neighbor’s goat” off my bucket list.
Not too long after my poaching experience the lock-down came to an end and I left the estancia.
I am glad to be off this estancia but honestly it was a lot better there than in the outside COVID crazy world. But that story will have to wait for another blog post.
I had a good year. I refined my survival skills. It was an interesting time. I suspect that next year will also have it’s share of new experiences as the world goes through biological meltdown.
Most days the sun shines bright and life is pretty darn good here.
“Survival is 90 psychology, and 10 percent methodology and gear.”
Cody Lundin
The global crisis has been approaching an apex in these recent years. Global civilization has become vast and complex, relying on complicated technology and dwindling resources to function. The inhabitants of this planet are increasingly dependent and domesticated within a layered web of social and economic control. This social system is failing and is showing itself to be increasingly unstable. As people are becoming more aware of this, there is a growing interest in farming and survival. For most people though, this interest and concern usually doesn’t go too far beyond watching some reality TV show on survival and buying a box of emergency supplies for short term power-outages. The vast majority of people are not going to be ready for the mass extinction crisis underway. I expect that most if not all of our species will perish in the challenges ahead.
Self-sufficiency is the foundation of survival and being responsible for providing our needs is a prerequisite for freedom. If we are to be free, we must learn how to meet our needs directly from the land and be prepared to protect these lands.
Some reasons to prepare:
A desire to gain useful skills in the present while expanding individual and collective capacities to deal with future scenarios.
To use the process of preparing for survival as a group activity to help improve cohesion and establish a collective focus.
To go beyond a day-by-day way of getting by.
To create more independence from civilization and empower oneself to be self-sufficient.
To prepare together so that no individual weighs the group down too much and to be able to offer assistance to those who need it.
If you:                             You could be dead in:

panic                               3 to 4 seconds
have no oxygen                      3 to 4 minutes
have no shelter                     3 to 4 hours
have no water                       3 to 4 days
have no food                        3 to 4 weeks
fall apart as a group        3 to 4 months (or minutes, etc.)
Vision
Start with establishing a vision for your future including the social model and life way that you wish to actualize. Consider the historical settlement models of the indigenous peoples and early settlers for your area. From such accounts there will be important tips on the carrying capacity for the region, group size, building methods and lifestyle adaptions to your bioregion.
Dimitri Orlav offers some interesting insights and considerations regarding social structure for Communities That Abide.
Urban Survival Preparation is a Waste of Time
This information I present will be focused on remote rural survival because I consider urban survival an oxymoron. There is no future for those who remain in a modern technological city. Municipal water is contaminated with chlorine, fluoride and other chemicals. Commercial food is shipped in from long distances and is typically toxic with biocides and often contains genetically modified ingredients. The air and soil is polluted from exhaust and industry. Homes are built with industrial paints, wood treatments, and synthetic materials that off-gas poisons into living spaces. Modern houses are full of artificial (blue) light, microwaves from all of the wireless technology and other forms of electromagnetic radiation. The only future for electric-grid tied people is permanent infertility, neurological damage (autism, Alzheimer’s, brain damage, etc.), and DNA damage (leading to mutations and cancer). The only future for city dwellers where these pollutants are concentrated is increased stupidity, biological degeneration, and extinction. Unfortunately many of these same problems exist in modern rural dwellings too, which is why we need to fundamentally change the way we think about and live our lives.
Humanity has created highly artificial living environments that are extremely antagonistic to the continuance of life. Before we can talk seriously about survival, we need to put ourselves into a healthy and safe environment. We need to return to nature.
Skills
“The more you know, the less you need.”
Australian Aborigine saying
Make a list of qualities that are important for group social cohesion.
Then make a list of the associates that have these qualities, that you think would be good to have by your side through a crisis.
Invite these people into a process of preparation and assess the skills of each person in your group.
Make a list of what people are proficient in.
Consider the following skills…
Wilderness Survival Skills:
Techniques meant to provide the basic necessities for human life: friction fire, wilderness water purification, simple shelter construction, edible/medicinal plant identification/use, tracking, hunting, field dressing and butchering game, cooking without pots and pans, hide tanning, knife use, primitive tool/weapon making, primitive pottery, navigation/map reading, making cordage, knot tying, reading weather signs, knowledge to avoid unpleasant interactions with animals and plants.
Food Production:
-Gardening -Nursery work (trees, etc.) -Raising poultry for eggs, meat, feathers, manure -Raising livestock
Building/Fixing:
-Metal work (welding, casting, blacksmithing, etc.) -Gunsmithing -Carpentry and natural building with earth, stone and wood -Wood working (furniture, utensils, tools, etc.) -Plumbing -Electrical -Masonry
Medical skills:
-Emergency trauma care -Herbalism with local plants -Veterinary skills
Transport:
-Horsemanship -Mechanic skills -Bike repair -Boats or rafts
Social:
-Teaching (reading, writing, math) -Public speaking -Translation -Conflict resolution -Enlightened communication -Envisioning the life we want -Healthy relationships -[see comment below article]
For most people life can be broken down into a few precious categories of physical needs: shelter (clothing, heating), lighting, energy, sleep, water, food, transit, defense, sanitation, first-aid, and communications.
Ragnar Benson’s Survivalist Rule of Three:
In prepper/survivalist circles, there is the “Rule of Threes.” The idea is that for all critical functions of survival (water, food, shelter, etc.) you have at least three ways of accomplishing a task. A primary system, a back-up system and a back-up of the back up. The idea is to build resiliency into your systems by creating redundant options. An example of this could be considering options for food preparation and cooking. Wood is one option for cooking. Propane is another. Not cooking (raw food) is another. Solar ovens add another option. Considering the limited time frames for propane availability, the ecological impacts, the hauling of fuel tanks to and from town, and the ongoing cost… the solar option seems preferable to propane. Wood is a good alternate choice and eating raw food is possibly the best choice (it saves time, money, energy and is generally optimal for health).
Try to have at least three different and independent ways of meeting all of your basic needs.
In a post collapse economy, the most important services and goods will revolve around meeting basic needs. After each topic I will suggest considerations for how to develop an income source to help people meet these needs. Much of the work that people do now to earn a living will be irrelevant.
SHELTER
Is your shelter sufficient for year round comfort without electricity or petroleum based fuels?
Are there housing retrofits that could be done to increase insulation or otherwise improve energy efficiency?
Are there any repairs that could more easily be addressed now as opposed to in the future when materials may cost more or be unavailable?
Are there materials that would be good to acquire now, that you may wish to have in the future (roofing, etc.)?
Are there resources from the land that would be valuable for building materials (stone, clay, wood, etc. )? Can you collect any of these to use as items for commerce or trade?
What are the natural types of building construction used by the indigenous people and settlers for your area? Are there any good books on the topic? Are there people still building with these methods? Future generations may need to revive these building methodologies. It may be good to have someone in your group get familiar with the traditional building techniques for your area. Then practice these building techniques as a group.
Shelter (have at least 3): *Sturdy weather appropriate clothes *House *Cellar *Caves or mines *Trailer *Van or other vehicle with space to sleep *Tent with sleeping pad. *Rope plus 8-10 canvas tarps are good portable shelters. Include several sail needles and thread for repairs.
For non-sealed shelters mosquito netting may be helpful in sleeping quarters. Try to build underground. Root cellars and underground homes allow for fire resistance, better protection from nuclear hazards, or can be made to withstand mortars and other assaults. If you use a basement you can reinforce the ceiling and layer it with sandbags.
Clothing
Most of us have a closet full of clothing and with some mending from time to time, we will probably be fine with what we have for some decades.
While clothing is typically not the most pressing need to address, it is good to start learning how to make our own clothes from regionally available materials (i.e. wool and leather).
Anything that can’t be made at home can be traded or bought from local artisans.
Consider income options for those with a talent toward making or repairing clothing.
Make sure you have a nice wood burning stove for staying warm. Earthen rocket stoves and masonry heaters are efficient considerations.
Do you have a good wood or other fuel supply (dried animal manure, coal, etc.)? Consider planting trees for firewood if you don’t have a nearby source.
Be sure to have an alternative way to cut and split wood in case your can’t get fuel for the chainsaw or it breaks down. One or two-person crosscut, bow or buck saws are useful for cutting logs. Also be sure to have an axe for splitting log rounds.
Pick up some books on building earthen stoves. Steel wood burning stoves may become too expensive or difficult to acquire in the future. Metal stoves will need to be replaced eventually. Consider getting spare stove pipe because this tends to need replacing before the actual stove. Rocket mass heaters and masonry heaters are a much better option.
Evaluate if you have surplus fuel (wood, etc.) for trade or income. Consider developing and offering services as a stove builder.
LIGHTING & ENERGY
Lighting (have at least 3): *Have a supply of candles and/or beeswax with wicks. *Know how to make and use oil/fat burning lamps. Stock up on fuel for lamps. *Flashlights are helpful. Headlamps allow for the free use of hands. Rechargeable batteries are preferable. *Wood to burn *Torches *Solar panel system *Hydro power
Note about electricity: It is best to live without electricity. For an explanation of why, see the book The Invisible Rainbow. If you decide to build your own decentralized power system, DC power is best for energy efficiency, it requires less components (no inverter), and is less harmful than AC power from a health perspective. A DC system has less biologically damaging high frequency transients (from the inverter) and the body runs on and prefers DC power. Alternating Current (AC) power is more antagonistic to our biology.
Though it is best to live without artificial light, if you are going to stock up on light bulbs, incandescent bulbs are the best choice. These are closer to the natural light spectrum. Avoid LED’s and Compact Fluorescent bulbs (the light spectrum and electrical radiation from these bulbs are particularly bad for health).
Are there any trades that can be developed around lighting or energy? Making candles, etc.?
WATER
Water sources (have at least 3): springs, creeks, lakes, ocean, rain water catchment tanks, a well.
Ideally you live somewhere where you can drink the water directly. Unfortunately, there a few places now where the water is safe. In these situations it is important to know how to purify and store water.
Storage:
Reservoirs/ponds: After the storage of water in the soil (for plant growth) this is the next cheapest option to store water by volume.
Does: Filter most pathogens, sediment, and many chemical toxins. Sand Filters remove 95.0 to 99.0% of organic contaminants, including bacteria, viruses, protozoa, worms, and particles. Doesn’t: Insure total effectiveness at dealing with pathogens or chemical pollution.
Safe water produced by sand filters is free of discoloration, odor, and unpleasant taste, and can be used for drinking, food preparation, personal hygiene, and sanitation. Most common home-based models can produce between 20 and 60 liters of water per hour.
Contaminated water from rain, surface, or ground sources is poured through the top of the filter which may have a plate to disperse the stream while blocking large contaminants (e.g. stones, large twigs, leaves). The top few centimeters of the sand trap the bulk of micro-organisms, which accumulate and develop into a highly active food chain, called the Biological Layer or Schmutzdeke. The biological layer, which must remain partially wet, traps and feeds on the micro-organisms and contaminants in the water. Further filtration occurs in the lower layers of sand and gravel.
Maintenance: Over time, the top layers of sand may become clogged with material, causing flow rates to drop. A simple stirring or skimming of the top layer of sand is usually sufficient to restore optimal flow. Frequency of needed maintenance is dependent on the quality of the source water.
Boiling
Does: Kill pathogens. Doesn’t: Filter sediment or some chemical toxins. Some chemical toxins have a lower boiling temperature than water and may evaporate off. Other chemical toxins have a higher boiling temperature than water and may remain. Heavy metals and other toxins are not removed by boiling.
Boiling is the best method to make water containing pathogens safe to drink in the absence of pollutants (i.e., chemicals, heavy metals, etc.). Boiling water will kill bacteria as well as other disease-causing microorganisms like Giardia duedenalis and Cryptosporidium parvum which are commonly found in rivers and lakes. Water is heated hot enough and long enough to inactivate or kill micro-organisms that normally live in water at room temperature. Near sea level, a vigorous rolling boil for at least one minute is sufficient. At high altitudes (greater than two kilometers or 5,000 feet) three minutes is recommended. [Certain pathogens and their spores (e.g.: botulism – Clostridium botulinum) must be boiled at 100 °C for 15 minutes.]
In areas where the water is “hard” (that is, containing significant dissolved calcium salts), boiling decomposes the bicarbonate ions, resulting in partial precipitation as calcium carbonate. This is the “fur” that builds up on kettle elements, etc., in hard water areas. With the exception of calcium, boiling does not remove solutes of higher boiling point than water and in fact increases their concentration (due to some water being lost as vapor).
Boiling does not leave a residual disinfectant in the water. Therefore, water that has been boiled and then stored for any length of time may have acquired new pathogens.
Activated charcoal, however, can remove many pollutants, without removing pathogens. A combination of boiling at standard atmospheric pressure (i.e., not in a pressure cooker) plus filtering with activated charcoal can neutralize most pathogens and pollutants.
Fortunately, water drawn for cooking or for hot beverages need not be treated if brought to a rolling boil for about three minutes, longer at higher elevations (thinner air allows water to boil at a lower temperature). Water boiled for drinking will have a flat taste that can be made more tolerable by shaking it up in a closed container to re-aerate it.
UV disinfection
Does: Kill or neutralizes pathogens. Doesn’t: Filter sediment or chemical toxins.
When boiling is not an option or to save fuel, UV exposure of water to the sun is an option. While some use the SODIS method, I would personally put water for UV treatment into a glass or wood bowl in the sun to avoid phthalates from the plastic bottles.
UV-A interferes directly with the metabolism and destroys cell structures of bacteria. UV-A (wavelength 320-400nm) reacts with oxygen dissolved in the water and produces highly reactive forms of oxygen (oxygen free radicals and hydrogen peroxides), that are believed to also damage pathogens. Infrared radiation heats the water. If the water temperatures raises above 50°C, the disinfection process is three times faster.
Suggested treatment schedule for various weather conditions:
Minimum Treatment Duration sunny (less than 50% cloud cover) = 6 hours 50-100% cloudy (little to no rain) = 2 days Continuous rainfall = unsatisfactory performance, use rainwater harvesting
Does: Kill pathogens, leaves behind sediment and will evaporate some chemical contaminants. Doesn’t: Completely purify water, because of contaminants with similar boiling points and droplets of un-vaporized liquid carried with the steam. However, 99.9% pure water can be obtained by distillation.
Solar distillers are an option to consider when the weather is sunny or when purifying sea water.
If chemical pollutants are a plausible concern, run un-purified water through charcoal before adding to a distiller.
Note about Demineralized water: Distillation removes all minerals from water, and the membrane methods of reverse osmosis and nano-filtration remove most to all minerals. This results in demineralized water which is not considered ideal drinking water. The World Health Organization has investigated the health effects of demineralized water since 1980. Experiments in humans found that demineralized water increased diuresis and the elimination of electrolytes, with decreased blood serum potassium concentration. Magnesium, calcium, and other minerals in water can help to protect against nutritional deficiency. Demineralized water may also increase the risk from toxic metals because it more readily leaches materials from piping like lead and cadmium, which is prevented by dissolved minerals such as calcium and magnesium. Low-mineral water has been implicated in specific cases of lead poisoning in infants, when lead from pipes leached at especially high rates into the water. Additionally, desalination processes can increase the risk of bacterial contamination. [Wikipedia]
Comercial Water Filters
The performance of different commercial filters varies. You will need to research and look at performance reviews to get a sense of what commercial filters offer. Look for something that does not require electricity or have moving parts (that could break) in order to operate.
I have used a Berkey water filter in the past. Stock up on lots of filters. Use a sediment pre-filter process to extend the life of commercial filters. Also remove the Berky filter cartridges and pack them with padding while transporting because the carbon filter’s plastic stems tend to break easily if bonked around.
Home-made DIY Water Filter
Water filters can be made on-site using local materials such as grass, charcoal (from burned firewood), and sand. These filters have been used by soldiers and outdoor enthusiasts. Due to their low cost they can be made and used by anyone, including the poor, who often do not have access to safe drinking water.
Here’s some ideas for how to filter water from ponds and other mucky places: Let the water in collection containers (e.g. buckets) sit for several hours to allow debris to settle. Carefully pour the top 90 percent of the collected water through a version of this filtration system…
Discard the scum in the bucket. Periodically clean cloth and bucket and let them sit out in the wind and sun for a day or two to purify. Replace charcoal periodically.
Sand or grass (sediment filter) – no need for both as they both only function as a sediment filter in this tripod setup. A proper sand filter is constantly wet and is made differently. With this tripod system you don’t get the biological treatment from a Schmutzdeke layer.
Charcoal (chemical removal)
Boil or UV sterilize at the end (microbe sterilization)
This system should remove all likely threats, barring radioactive fall-out or major chemical contamination.
Storage:
1 gallon (4 liters) per person per day. One gallon used sparingly is typically enough for drinking, cooking, brushing teeth, and dish washing. For bathing, you will need additional water.
A 55-gallon plastic drum of stored drinking water will provide a family of four with a two week emergency supply of water in the case of an earthquake or other disaster. (In surviving a nuclear disaster it is recommended that you stay in your fallout shelter for the first 2 weeks after the blast to allow the particles of radiation to settle and drift away. You will need to have a stock of uncontaminated water during this time.)
Keep the container shut to prevent evaporation and keep it dark to prevent algae and bacterial growth. Polypropylene plastic is probably less toxic than galvanized steel (lined with zinc). Steel tanks are eventually destroyed by rust too. Wood would be best if you can find old wine barrels. Keep plastic tanks out of the sun, UV radiation is bad for them. Replace the water periodically.
Water stored improperly over time will tend to grow bacteria. Boiling is the simplest way to treat such water. In the event that fuel for cooking is scarce, use UV or filters.
Warning: Be careful with un-purified water. Don’t spill it around food preparation equipment or surfaces. Keep the containers used for water collection separate from containers used for the storage of purified water.
Consider getting extra pipe and fittings that may get expensive or be hard to come by in the future. Polyethelene (potable water) pipe and polypropelene fittings are probably the best plastics option for materials in terms of cost and lower toxicity. In a post plastics world, ceramic pipe, irrigation ditches and similar systems could be utilized.
Study Keyline design to improve hydrological function.
If you have a surplus of water, consider a water hauling business.
FOOD
Food (have at least 3): Storage, gardening, livestock, hunting, gathering, scrounging, purchasing, or bartering.
Humans need roughly 1-1.5 pounds (1/2 – 3/4 kilogram) of dehydrated protein, fat, and calories of dry matter per day.
Food scarcity will probably be our biggest challenge and deserves more investment with both time and money than any other area. Food production is made much easier and more efficient with a group of people.
Do:
Know what wild plants are edible. Get books and attend workshops on the topic.
Make a list of the kinds of foods that you would like to eat (eggs, veggies, nuts, etc.) and see if there can be someone dedicated to producing these foods in your social network.
Have good traps and hunting equipment and know how to use them.
Set up trades with other farmers/producers in the area. You want to establish arrangements with producers now, before things get really bad and their products will be in high demand. This will also support your local food community, allow you to see where your food is coming from and should save some money.
Stocking Up
It would be wise to store at least enough food to last for several months. Ideally you will stock 1.5 to 2 years of food to allow for a transition time in a collapse scenario to improve food growing techniques and other food procurement skills.
This may seem like a lot of food and it is but it helps to just focus on acquiring small quantities at a time. First, try to obtain a week’s worth of food. Once this is accomplished, go for two weeks, then a month, then for three months, then 6 months and so on. If you break your goals down into smaller steps, you will avoid getting overwhelmed while steadily making progress.
Keep your food choices healthy in general, you will need to be in top form in a disaster. Keep in mind that during a crisis you may be under more stress, do more physical work than you’re used to, and may be exposed to more extreme temperatures. All of these factors will cause you to burn more calories. So you should plan to store greater quantities of food than your standard consumption.
Even an inadequate food supply will buy you some time.
Acquisition
Here’s some simple suggestions on quick ways to get started on food stockpiling:
1) Every time you go to the store, obtain doubles of any non-refrigerated items on your shopping list. Include any important non-food items that you may want after a disaster (dental floss, toothbrush, soap, etc.). The first time you do this for a commodity, put one item of the pair in your stockpile and put the other where you’d normally put your food. Every following trip put both items in the stockpile and remove the oldest one for use. This keeps you rotating out old stuff, so your food will have a maximum shelf life when disaster strikes. Make sure to write the date on food items that go into your stockpile so you know which one to use next. If you are currently eating lots of fresh produce and other perishables, then I suggest buying dried bulk goods and other non-perishable equivalents for storing. There is no doubt that fresh food is preferable to dried goods but your dried goods will be there if fresh food becomes difficult to obtain.
This method allows you to accumulate food that you would normally eat in the proportions that you eat it. It also doesn’t require a major up front financial investment. If you don’t think you can afford this, consider cutting back on luxuries to free up enough surplus money. Doubling your purchases for a year should give you roughly a year’s worth of stashed food. It is important to start this as soon as possible, so that if rampant inflation hits, you’ve created a safety net.
2) Set aside a certain amount of money each month to buy bulk food. Most stores have a 10% discount for bulk purchases. Consider buying a big bag of quinoa or whatever at a discount. You can also join or set up a buyer’s club. Many food distributors, particularly health food distributors, will allow for buyer’s clubs. Most distributors will have a minimal order amount (say $500) in order to make a delivery. A buyer’s club is a group of people that periodically pool money to meet that minimal order amount in order to obtain food at wholesale costs – which is much cheaper than the 10% bulk discount. For example, if ten people each purchase $50 of bulk food per month, they could meet that minimal order and get more bang-for-their-buck. Ask local stores for their distributor’s info or search the web and ask the distributor if they allow for buyer’s club purchases, then ask about the process of setting up an account to create one.
3) Talk to local farms about gleaning or getting produce for cheap in bulk. Farms typically leave a lot of food in the field that doesn’t meet market requirements for appearance or size. Properly preserving these foods will provide you with a source of food that may last seasons or years.
Just as important as getting your supplies together is maintaining them so they are safe to use when needed. Here are some tips to keep your supplies ready and in good condition:
Keep stored foods in a dry place where the temperature is cool.
Keep food out of the sunlight.
Store boxed food in tightly closed plastic, glass, ceramic or metal containers to protect from pests and to extend its shelf life.
Use foods before they go bad, and replace them with fresh supplies.
Re-think your needs every year and update your kit as your family’s needs change.
Farming
No matter how much food you store, it will eventually run out when a crisis lasts long enough. Being able to grow your own will allow you to not only replace the stored food, but to supplement it and make it last longer. However, as important as growing your own food is, it in no way takes the place of your food storage. Like all living sources it is too vulnerable to be your only food source. It requires a lengthy period of suitable weather before producing, and it is quite vulnerable to drought, diseases, pests, and vandals.
It takes time to learn how to produce your own food and it can be challenging to meet all of your nutritional needs yourself.
The amount of space that you will need will depend greatly on the methods you use, your skills and your resources in way of climate, soil and seed varieties. In general, however, you can provide a year’s supply of vegetables from 200 square feet (19 square meters) per person with good gardening techniques. Some sources offer tables of projected yields but, although they can be helpful, they are very approximate and your experience will be a much better guide. Extensive research by Brigham Young University has shown that a family of six can be almost completely self-sufficient on 2.5 acres of decent farm land with a dozen chickens, a similar number of rabbits and two milk goats.
Tree crops are an area that deserves attention too. Tree crops can provide fruit, nuts, medicine, wood (to burn and build with), are less labor intensive to maintain than annual vegetables and typically yield high amounts of food over time. For ideas on how to incorporate tree crops, see Restoration Agriculture.
Seeds
Seed saving is an important area of work. Most farms buy seed every year through mail order from places far away. This will not be an option forever. No one can grow a garden without seeds and during a prolonged food shortage seeds will be extremely valuable.
Knowing how and when to collect seeds is essential.
Knowing how many of each type of plant to grow to avoid inbreeding and reduced vigor over time is also essential.
Maintain different garden plots of sufficient distance to avoid unwanted crosses.
When possible buy your veggie seeds in sealed cans for survival needs. When kept in sealed cans, they can be viable for many years. Seeds in small packets can be saved by placing them in an air tight jar. They should be kept dry and stored cold, the closer to freezing, the better. Seeds stored in this way will keep between two and five-plus years, depending on the seed type.
Annuals are valuable when establishing a homestead. They are particularly important in the first years if you have relocate. Though from a soil care and energy efficiency perspective perennials are better. One should strive to rely on perennial food plants as much as possible. For plant ideas see Perennial Vegetables and Plants For A Future.
Efficient Livestock
Animals recommended for husbandry because of low maintenance and high food yield are: -Guinea Pigs are prolific. See this article. Rabbits and pigeons are among the best. -Rabbits: 3 females and a buck will provide 2 rabbit meals per week. -Pigeons: 15 pigeons will provide two meals per week. -Goats tend to eat anything and everything and take care of themselves, though they are not especially prolific. You will need access to several acres of forage for goats. -Poultry
Fishing
Survival fishing techniques to be considered in a wilderness emergency situation are line, spear, trap and net. All of these are important to become familiar with. For line fishing, be sure to stock up on line, leaders, sinkers, lures and especially hooks that are appropriate for the types of fish in your area. Use whatever fishing equipment you can make work. Select the most effective fishing tackle, not what is used for sport or simply required by regulations. Consider gill nets or a using a fishing weir. Some freshwater sources of fish will run out very quickly in the event of major food shortages.
Know how to collect food from the ocean: seaweed, shellfish (crab, mussels, etc.), ocean fishing, etc. Proficiency with swimming and using water-craft are valuable.
A fishing device for the rocky coast that is simple and effective is the poke pole. It is used for catching fish, eel, and crab. It can be made of any pole, like a length of bamboo, with a well affixed short length of strong line and a j-shaped hook at the end. Dive shops sometimes sell telescoping versions of the poke-pole for about $35 and they are a good investment. To use it, you bait the hook and go to an area with tide pools. It is best to use when the tide is just starting to come in because the fish trapped in tide pools are likely to be more hungry. Simply place the end of the baited pole in any tunnels, under rocks, and in any other hiding spots that are underwater. Leave it dangling in each spot for about a minute. If there is anything in the hole, it should bite pretty quickly. After trying one spot, go to the next. For bait you can use muscles or small fish. Scoop the small fish up with a net. Hold the net under the water and scoop upward. Use all the guts from birds and fish for bait. When using bait, try to keep it moving in the water to give it the appearance of being alive.
Preserving
Get ceramic crocks for fermenting produce. Fermenting is the healthiest way to preserve food.
Dehydrating: Dehydrate fruits, vegetables and meats. Obtain a set a stainless steel screen racks and a screened-in cabinet (for bugs and pests) that blocks direct sunlight to use as a drying rack system. This is a simple way to preserve and store food for cheap. Drying preserves most of the nutrition (about 90%) and is good for pack trips and transport because it is light weight. For solar dehydrator ideas for different climates see Build It Solar.
I wouldn’t bother with canning because it’s: lots of work, requires the purchase of lots of jars with one-time-use lids, uses lots of fuel/energy in the canning process, there is a risk of botulism, and much of the nutritional value 60-80% is lost in the heating process. I would also avoid smoking if air drying works. Smoking is used in humid climates where air drying is difficult. It requires wood burning and can thus be carcinogenic from the smoke. Packing meats in coarse salt (for dry packing) or a salt brine (also good for veggies) is not a complex process but uses lots of salt and if consumed regularly can overload you with sodium. Preserving in vinegar is okay but is inferior to wild fermentation. You would probably want to use apple cider vinegar and get a cider press to process the apples if pursuing this method.
Solar Cooker I don’t usually advocate high-tech gadgets like this Solar cooker but I think it is worth considering. You can also look into DIY options.
I like using wood to cook but with the harmful respiratory effects of smoke and the carbon emissions, it might be better for health and reducing ongoing pollution by using these solar cookers.
Also, there is a strong labor savings argument for getting solar ovens. Collecting wood and making a fire takes time. Throwing your meal into one of these solar ovens and putting it out in the sun is easy-peasy.
Long term, if fuel gets to be too expensive or we otherwise don’t have the use of chainsaws, having something like this would be a life saver. Cutting rounds with a hand saw and splitting wood with an axe/maul is a lot of work. Wood branches that don’t require splitting or sawing to fit into a stove will become increasingly scarce as the easy pickings are used up around our living quarters.
Solar ovens could be used to reduce wood consumption (for cooking) significantly and thus allow stock piled wood supplies to be re-allocated primarily for winter heating.
Woodstove (with wood, animal manure, etc. to burn). It is recommended to have a 1 year supply of fuel in storage.
Methane digester: sewage processing option that captures methane gas for cooking if you live in the tropics or can otherwise keep the digester warm for part of the year – in a greenhouse, etc.
Kitchen Implements
*Large stainless steel pot.
*Mills I don’t eat grains and pulses but a quality grain mill is handy for breaking down bulk grains and beans for those that eat them. Breaking down these staples into smaller pieces, reduces their cook time, increases their digestibility, and saves fuel. It’s also handy for processing acorns. I recommend a hand mill with a metal burr plate. Hand mills are generally cheaper than electric mills, don’t require electricity, and some can be adapted to be powered by bicycle or a motor. I prefer a metal burr plate over grinding stones because they’re more versatile, being able to handle many oily or wet substances without clogging or absorbing the oil. Some metal burr plates will take peanuts, and a few will even grind dry bones into bone meal. If they do gum up they can be washed and they can be sharpened when they become dull. Get quality, however, since the cheaper plated models often flake off into the product.
Grinding stones are more temperamental. Grinding grains or legumes containing more than 10-12% moisture creates a gluey substance that glazes the stone – reducing the grinding action – and can clog the machine. It may burn on fast turning stones in electric mills, ruining the stone. Oily legumes like soy beans and peanuts will gum up the stone and make it useless. And although you can clean it somewhat by running a handful of popcorn through on a course setting, you should never wash the stone. Stones also produce more powder when cracking grain or splitting peas. Most importantly, there have been studies that show that people who rely on stone grinders often get bits of the stone in their food which slowly wears away their teeth.
*Pressure Cooker This will cut the cooking time for beans and dehydrated foods, saving fuel. If you plan on cooking over an open fire, get a model that doesn’t have plastic handles that could melt. Don’t ever cook over a large flame with a pressure cooker. Cook over coals to avoid melting the gasket seal or creating burn spots on the pot. Avoid aluminum pressure cookers, this is not a good metal to cook with from a health perspective. A pressure cooker will also allow you to preserve food via canning and sterilize water and medical implements.
Food will always have value for trade and for sale. Consider commercial food production options for your area.
TRANSIT
Horse Riders on Ridge
Transportation (have at least 3): *Walking *Horse or other pack animal. It is recommended to have at least a 1 year supply of feed in storage. *Bikes *Watercraft: kayak, sailboat, etc. *Stock up on fuel for a motor vehicle (petrol/ethanol/biodiesel). It is recommended to have a 1 year supply of fuel in storage.
Consider your transportation needs. How will you continue to operate if fossil fuels are no longer available?
Will you use horses or mules? Do you have all of the packing gear that you would want for this?
Is there value in having a boat to travel down river?
Is there a need to haul bigger loads with a trailer? Can you use a team of horses to pull a trailer/wagon? What equipment would you need for this? Get it together and use it now to refine the process.
Is there transportation services that you could offer as an enterprise?
DEFENSE
Develop good strength, flexibility, and body coordination. This could be facilitated by yoga, martial arts, strength building, running, etc.
Be familiar with firearms handling and safety. Know how to aim and shoot a variety of firearms. Know practical marksmanship and defensive shooting.
Shooting
The “ideal survival gun” doesn’t exist because the answer depends on the specific task required. Likewise, an untrained person won’t accomplish much with the best gun, while an expert can do a lot with a mediocre firearm. That said, some guns are better than others.
Get duplicates of the same guns for each member willing to defend or hunt, so that weapon familiarity and handling is made easier. It is important to have uniformity in calibers and guns within your group to simplify the types of ammo you need to acquire. Limiting the number of firearm models will make it easier to stockpile spare parts, and non-working guns can be scavenged for parts if necessary. Also, in combat, if you use the same model of gun for fighting there are moments where part interchangeability will be essential. For example, if one member in your group runs out of ammunition in a firefight. If another member is using the same magazine-fed rifle, they can pass the person without ammo a spare magazine. This allows the person who ran out of ammunition to keep fighting.
Guns can be divided into two categories, those for defense/combat and those for hunting. Handguns are limited to about 50 yards (50 meters) or less, while shotguns can be very good defensive weapons at ranges under 40 meters (with a slug best for over 35 meters) and are useful for bird hunting. Rifles are used for ranges beyond the limits of these guns. Rifles are your choice for most hunting and combat applications.
First, choose the caliber. It will be easier to obtain ammunition for the most popular calibers and those used by the military and police. What follows are my recommendations:
Firearms: Rifle:
1) .22 Magnum rifle. All around use gun. Can be used to put down any class of livestock (cows, pigs, sheep, etc.) with a shot to the head and will do the same for people.
2) Long-range high-power rifle (FN-FAL or other battle rifle in .308 caliber).
Sidearm:
3) Pick a sidearm: .22 Magnum pistol, .38 Special/.357 Magnum revolver, or 9mm Glock 17
The .22 Magnum pistol uses the same ammo as the .22 rifle, making ammo interchangeability easy. The Magnum load has a bit more power than the standard .22 round and thus overcomes some of the penetration limits of the .22. Also, this is a less expensive round to practice with.
The revolver is a reliable option with the best stopping power of these three options (especially when using the .357 Magnum load).
The Glock is the best semi-automatic handgun manufacturer and the 9mm round is the standard issue caliber for police and military, making ammunition widely available. It has good stopping power with higher ammo capacity than the revolver.
Have good holsters for all handguns. Rifles should be scoped and have shooting slings. Get extra magazines and at least 1,000 rounds of ammo per weapon. Get a cleaning kit with brushes, cleaning rod, oil, solvent, and patches. Stock up on this stuff. Obtain spare parts for components that commonly break. Consult a gunsmith for suggestions on which parts. Get a gunsmithing tool kit to do basic repairs.
Ammunition
Lay in lots of ammunition (for practice and use). Lead-free steel rounds are preferable from an environmental point of view (less Condor and other birds of prey dying from lead toxicity from game that got away). Ammunition will make a great barter item. Stored in a cool and dry location away from ammonia and oil based solvents, ammo will be usable for decades. Store in airtight containers, preferably sealed in plastic then stored in a military ammo can.
You may want to reload your own ammunition to save money.
Have a defense plan for a variety of worst case scenarios:
Vaxx Policiá
Zombie apocalypse (happening right now, folks)
Raiders
Property takeover
Martial law
New World Order (NWO) Thugs
SANITATION & HYGIENE
In times past there was a different attitude toward human excrement. It has been valued as a source of rich nutrients. Along the Silk Road farmers would set up toilets in order to collect the poop and pee from travelers. The farmers would compete to make the most enticing latrine in order to attract more users. In ancient Japan farmers would come to collect your shit for free and would actually pay a Samurai for their droppings. The Samurai ate the best and richest foods and thus their excrement had the highest nutrient density.
These days though, with all the toxic crap that people eat, I wouldn’t want their shit used to grow my food. But for those of us that have a clean diet, we can turn our waste into a resource. See The Humanure Handbook for more info.
There may come a time for life without toilet paper. I know, the thought might be terrifying for some of you. But once you get over this fact, you may want to try washing with water. It feels a lot cleaner than toilet paper – which tends to smear things around. Plus if you stop using toilet paper it is one less thing to buy (polluting the planet) and to store, taking up space. Much of Europe, Asia and elsewhere use water instead of toilet paper.
Trash: I burn non-glossy paper in the stove. All other garbage can be buried onsite. (Tip: if you have trash service, you live too close to civilization.) I try to avoid acquiring things that will add to the onsite landfill.
Ash, bones, and vegetable scraps all have ways in which they are used and cycled back into the ecosystem.
Clothes washing: Have a hand-washing system for clothes and a drying line, both indoor (near the wood-stove) and outdoor.
Cleaning: Know how to make your own soap. See my post Making soap from water, fat, and wood ash. Make your own lye (“the original bleach”) for an alkaline cleaner and make your own vinegar for an acid cleaner. Search the internet for how to do this (while we still can).
MEDICAL
Consider taking a First-aid and CPR course.
Consider Wilderness EMT training, this is typically a month-long course.
Cultivate knowledge on herbology, pregnancy (prevention and delivery), know how to deal with common ailments.
Advanced – pursue schooling in advanced levels of EMT and paramedic training. Attend a tactical medic training or acquire some type of medical degree.
Network with local paramedics, dentists and doctors for services that can’t be provided “in-house.”
Consider income potential for medical services that you can provide.
A ‘Store and Ignore Disaster Survival Box’ is a tool for use in preparation for disasters, be they natural or human-made. It’s purpose is a container for non-perishable items of everyday use, stored as a long term investment in case of a shortage, desperate need, or no re-supply in the foreseeable future.
The primary concern is that it be filled with important, everyday necessities that cannot be manufactured by crafts-folk or easily repaired. The secondary concern is that it be filled with non-perishable items; meaning it can be left unattended indefinitely, until the need arises. The most important consideration is that it must contain a good number of the individual item types, secured so that they do not risk damage from other items in the box. To facilitate use of the box at night, glow sticks may be included (as batteries eventually lose charge). It may also be useful to secure it shut with handles or belts, although they may deform some boxes.
Tertiary concerns may include: ensuring that the container is of a tough and non-biodegradable make, preferably plastic. It must be able to withstand neglect for an indefinite period. It should also be strong enough to take direct pressure or blunt force impacts in multiple areas. The container may be useful as a small step ladder or seat. You might choose a waterproof container that will allow it to float in case of a flood or when emptied. Waterproof containers can also be used to contain any liquid or fine sand. When filled with sand or stones, the box can act as a sandbag. With the addition of log/pipe rollers it can serve as a wheelbarrow.
It would also be wise to arrange the items in order of most need, to help prepare for emergency action.
The box may include duplicates of any of the supplies from the ‘Survival Gear List’ or any of these items:
Among the best trade items are basic foods (particularly oil), garden seeds, toilet paper, hand sewing needles and thread, ammo (common calibers), matches, razor blades, wire, and cloth. It could also include: soap, gunpowder, contraceptives, primers, bullets, medicine, syringes, toothpaste, toothbrushes, shaving supplies, mirrors, shoes, socks, underwear, pens, pencils, paper, salt, baking soda, wire snares, blasting caps, gloves, tape, knives, sharpening stones, saws, files, chain saw parts, garden hose, motor oil, engine filters, canning lids, plastic freezer bags, electrical supplies, nylon rope, tea, welding rod, detergent, watches, steel wool, nails, screws, bolts, candles, flashlights, rechargeable batteries, bulbs, tires, spices, boot oil, tools, fishing line, insect repellent, and shoelaces all have potential as stockpiled goods.
Trade Goods
All of these items may also be useful for trade. Realize that paper money has value only in a working economy that accepts it and that it may be absolutely worthless in the future. Then your storage of real goods for barter will be crucial. By starting now, you may be able build up a good inventory of trade goods. As a general rule only trade labor for labor or your labor for goods. Don’t give away your goods unless absolutely necessary.
When stocking up on goods to trade or to keep for yourself consider all of the items you use on a regular basis, the items you would want for self-sufficiency, and the types of consumables that your average household uses. Make a list of these. Then go to the hardware and grocery store and write down any items that you forgot. This will give you a good set of goods to consider stocking up on. I wouldn’t store anything my family wouldn’t use and I’d stock up on a variety of items. The Lehman’s Hardware Store catalog has some ideas for equipment to acquire.
Storage Ideas
Outdoor shed
Sturdy, decorative footlocker or chest (keep it near the front door or patio).
Rubbermaid Rough-Neck Totes – food in one tote, blankets in another, etc.
Underground storage for valuables (extra ammunition, etc. )
Getting a length of wide diameter water pipe with two end caps can serve as an underground storage container for most items. Seal one end with a cap, pack your items in with a punctured tin of some dried rice. The rice will help absorb moisture inside the pipe. Grease up any metal objects and seal things in water-tight containers to be placed in the pipe. Grease the other outside end of the pipe and place a slip cap over it. Wheel-bearing grease should work fine. Bury it and check it annually (replace the rice, etc.). Don’t forget where you buried it!
If you need a larger container, try a 208 liter (55 gallon) plastic barrel with a screw top lid. Bury the barrel and apply a thick layer of grease on the threads and seal it tight. Place a small piece of plastic over the lid before covering with soil. This will help keep the greasy threads on the lid cleaner. Make sure to put enough soil on top of the barrel to avoid flotation in the case of high ground water from rain. Avoid placing it in areas that flood.
The one device I do recommend is a solar/crank powered emergency radio. These are only receivers and are not microwaving you, unlike basically every other electronic communications device. The radio is a good way to get emergency news bulletins, weather forecasts, etc. Eton is said to be a good brand.
For those who chose to stay connected to the communications web of our dying global civilization be sure to have a wired internet connection and a corded phone (not cordless) with a speaker phone option – to keep the magnetic field of the earpiece away from your head. You can read about the adverse health impacts of telephony in The Invisible Rainbow. You might also choose to do like me and get rid of these things altogether, only using them a few times per year in a nearby town.
After you assess your particular situation, adjust this as necessary.
Priority 1: The most essential storage items to sustain life.
Set up a basic food plan for 1-2 years with recipes
Water for 2 weeks (14 gal/person) and purifier
Garden seeds for at least one season
Basic medical supplies and medicines
Minimal sanitation needs
Clothing to last a full turn of the seasons
Bedding to keep warm without additional heat
Method to cook and heat, with fuel for at least one year
Basic survival library
Priority 2: Portable storage for minimal needs for 72 hours.
Emergency evacuation kit (See Survival Gear & Evacuation section below)
Priority 3: Storage and other items necessary for a more normal lifestyle. This priority includes equipment, tools, supplies and other items needed for a self-sufficient homestead or survival retreat.
Once your priorities are determined you need to set specific goals. Set a target date for each item on your list. It takes most families/groups months and even years to build an adequate plan and to learn the skills to use it effectively.
Survival Gear & Evacuation
Individual Survival Gear List
The following is a list of recommended supplies that will assist you in surviving a long-term emergency. You may want to acquire military versions of this equipment because it is often of higher quality, comes in camouflage colors, and surplus gear is often cheap. Alternately, you may want to choose backpacking gear to look more civilian. In most cases you will want to shelter in place. But in some scenarios you may decide it is best to abandon home. This kit is meant to help you in the case that you need to flee.
Bug Out Bag
The primary purpose of a bug-out bag (BOB) is to allow one to evacuate quickly if a disaster should strike. It is therefore prudent to gather all of the materials and supplies that might be required to do this into a single place, such as a backpack. Duffle bags or storage containers can work but are cumbersome to carry over long distances. These kits are designed specifically to be more easily carried by the individual in case alternate forms of transportation are unavailable or impossible to use. It can be thrown into a vehicle or onto a horse when the situation allows you to drive/ride away from the area. It also provides you with a kit that can be carried out of an affected area if the damage is too great to drive a vehicle over rubble or obstacles, such as when found after a severe earthquake. The Bug-Out Bag is presented by many to be the first level of preparedness that anyone should put together, simply by virtue of its overall usefulness.
In addition to allowing one to survive a disaster evacuation, a BOB may also be utilized when sheltering in place. These survival kits come in a variety of sizes, contain supplies and tools to provide a person with basic shelter against the elements, helps them keep warm, meets their health and first aid needs; and provides enough food and water. In some cases a survival kit could contain items used to signal to rescuers or assist you in finding your way back to help.
This BOB must provide:
Water for one person for three days
The ability to procure and purify water for an indefinite period thereafter
Food for one person for three days
The ability to procure and prepare food for an indefinite period thereafter
Appropriate clothing for any season
A means of making shelter
Multiple, redundant means of making fire
A radio to receive relevant emergency information
Currency or items for barter
Versatile tools, equipment, and materials to meet unanticipated needs
I have included many items in the list below, it may be difficult to fit everything into a single bag. You will have to use your judgement, depending on your circumstances, skills, budget, preferences, etc. when selecting your gear. There is an endless list of items that “would be good to have,” so you will have to make some tough compromises. Don’t over pack, a person in average shape can carry about one-fourth to one-third of their body weight fairly comfortably, you should try not to exceed that in your planning. As a family you can have some items as duplicates (each person should have their own knife and water bottle, for example), but other items can be distributed among the group’s supplies as a whole.
Key to Notations:
*: Items for a compact survival kit. A compact survival kit is a survival kit which consists of those most essential outdoor survival tools and supplies which are the hardest to improvise or replace. A mini survival kit is intended to be carried all the time or at least when traveling and is usually designed to complement other survival tools carried in a larger, separate bag. A compact survival kit is intended to remain always upon one’s person, be appropriate to all environments, and be a comprehensive kit. Other personal gear will primarily offer additional serviceability and ease of use, but the mini survival kit should provide for the basic needs of a survival situation. This small basic kit can fit into the pouch of a pack. Soldiers are issued these kits to help them stay alive if they get lost in the wild. Various survival outfits and military surplus distributors sell these types of kits. They often come in small tins.
+: The Ten Essentials, this is a list of essential items hiking authorities promote as recommended for safe travel in the back country.
I recommend putting the Ten Essentials, any other very important items, and your compact survival kit into a single bag in case you can only carry one bag with you.
Survival Kit
Books and Information
A survival reference book (try to get different ones than the ones your friends/family have).
A field guide to edible and perhaps medicinal plants in the area (try to get a variety of these too).
A disaster plan including location of meet-up points, contact information, possible evacuation routes, maps, travel information, etc.
Professional emergency literature explaining what to do in various types of disaster, studied and understood before the actual disaster, but kept for reference.
Shelter and Warmth
Sleeping gear:
Bivvy sac or small tent
Tarp with grommets or tie-tapes (nylon or polyester is lightweight).
Good sleeping bag
Sleeping pad
Wool blanket
Reflective “aluminized” (Mylar coated) space blanket or survival blanket to retain body heat (or use as a signal for rescuers)
Mosquito net
Optional: Heavy-duty garbage bags (as poncho, pack cover, expedient shelter roof, for carrying forest duff to make a bed, black bags can be used to heat water out in the sun, as waterproof storage, for garbage collection, etc.)
Clothing: +Good outdoor clothing layers for all seasons, wool is best.
Survival clothing should be durable, warm and comfortable work clothing of various kinds to suit your situation, climate and seasons. Good-quality outdoor clothing is often the best choice. Tightly woven fabric is more snag and tear resistant and wears longer but loosely woven fabric is warmer. Natural fabrics like wool and cotton are more absorbent, and wool retains its insulating properties even when wet. Synthetics resist abrasion and mildew better, and dry more quickly. Waterproof but breathable Gore-Tex and similar fabrics should be considered for pertinent items.
A good woolen hat “beanie” to insulate the area of greatest heat loss, 25% of body heat is lost through your head.
Pants – find some that are tough, fast drying and cheap (in bushcraft you spend a lot of time grubbing around on your knees, so pants get a lot of wear). Cheap woolen pants from a thrift store are warm and you can get lots of thin ones (always dress loose and in layers).
Lightweight poncho or rain jacket/rain pants for protection against wind and rain – preferably either a set that fits over the backpack or is accompanied by a separate pack liner or cover. A rain-poncho is a handy thing. It can be used as shelter, for gathering rainwater, and if you have to, you can put a rock or two in it, and you’ve got a last ditch weapon.
Sturdy, comfortable shoes, both light-weight foot ware and heavy-duty foot ware (with several pairs of socks). If you have the money to get some good boots, do so. Keep coating them with veggie oil or fat until the leather won’t take any more. This makes them supple and very waterproof. Get only well-fitting shoes and boots with quality leather uppers and heavy nylon hand stitching (not glued). Other features to look for are full bellows tongue to keep dirt out, steel shanks to protect the foot and Vibram soles for long wear.
Basic Clothing Per Person For One Year
8 sets underwear (2 long)
2 t-shirts
2 turtle-neck shirts
1 wide-brimmed hat for sun protection
1 beanie or balaclava
1 heavy-duty work belt
1-2 sweaters
2 pr leather work gloves
1 pr winter gloves or mittens
2 pr work shoes or boots
1 pr waterproof boots
2 pr shoelaces
12 pr socks (8 light, 4 heavy)
4 pr jeans, pants, overalls
1 pr heavy wool pants
2-4 work shirts
2 flannel shirts
2 heavy wool shirts
1 water-repellant windbreaker
1 winter work coat
1 heavy-duty winter parka and snow pants
Fire:
+Waterproof/windproof matches in waterproof case (include striker — facing away from matches, if not “strike anywhere” matches)
*Candle (use for starting fire with damp materials, may be cut square to fit into small container).
*Magnesium bar/artificial flint and steel striker for fire-starting.
*Magnifying glass (sometimes comes with a compass or Swiss Army Knife).
Butane lighters (won’t work when freezing – carry inside clothing pocket).
+Tinder (cotton balls soaked in fat) in Ziploc bag. Keep away from rodents.
Food and Water
+Water:
Have an initial supply of 1 gallon (4 liters) of water per person per day for 3 days – approximately 8 pounds (3.6 kg) per person per day: two quarts for drinking, two quarts for food preparation/sanitation.
Portable water filter.
A metal container to boil water if the source is questionable (see mess kit).
Collapsible (empty) water bags or containers, water bladders, canteens, etc.
*Non-lubricated condom (emergency water bottle when supported in a sock or bag)
Food:
+3-day (or more) supply of non-perishable food which does not require refrigeration, preparation, cooking and little or no water: jerky, dried fruit, lard, nuts, nut butter, etc.
Mess kit (small pot/bowl set). Try to find a set made of lightweight spun stainless steel, avoid aluminum.
Utensils: Hobo Knife (spoon, fork, knife combo) or a Spork (cheap, tough, light).
*An assortment of fishhooks, split shot lead sinkers and as much fishing line as manageable (typically 30 feet to 100 feet or all that will fit on a bobbin).
*Several feet of snare wire (at least 3-5 feet): copper or brass wire is best for workability without tools, steel ‘trip wire’ or utility wire is more durable (wire is also useful for repairs).
Gill Net (for emergency fishing).
Optional: Larger cooking pots. Stainless steel 18/0 is a fairly non-toxic metal for cooking in, is durable, and doesn’t rust like cast iron does; but food tends to stick and burn more easily.
First Aid and Hygiene
Feminine hygiene products (e.g. a Keeper), reusable washable cotton fabric pads, etc. (some cotton/paper products are also useful for fire-starting).
Toilet paper (or nature-based alternative, i.e. water).
Soap
Dental floss
Toothbrush
Comb
Scissors
Small mirror
Optional:
Sanitary towelettes
Razor
Nail clippers
+First Aid kit:
Common Ailments and Treatment
A first aid kit usually contains items to treat cuts, abrasions (blisters), punctures and burns. Additional items might address broken fingers, limbs, cardiac conditions, hypothermia, frostbite, hyperthermia, hypoxia, insect and snake bites, allergic reactions, and other wounds. Vary the contents based on your skill and needs.
First aid (wilderness first aid in particular) can help a person survive and function with injuries and illnesses that would otherwise kill or incapacitate him/her. Common and dangerous injuries include:
Lacerations, which may become infected
Bites or stings from venomous animals, such as: snakes, scorpions, spiders, bees, stingrays, jellyfish, catfish, stargazers, etc.
Bites leading to disease/septicemia, such as: mosquitoes, fleas, ticks, sand flies, animals infected with rabies, komodo dragons, crocodilians, etc.
Infection through food, animal contact, or drinking non-potable water
Bone fractures
Sprains, particularly of the ankle
Burns
Poisoning from consumption of, or contact with, poisonous plants or poisonous fungi.
Hypothermia (too cold) and hyperthermia (too hot)
Heart attack
Hemorrhage
Kit
First-aid manual
Personal protective equipment:
Nitrile rubber gloves (several pairs)
Mouth shield for mouth-to-mouth resuscitation (precaution against tuberculosis and hepatitis)
Bandages:
*Band-Aids. One box of adhesive bandages (at least 12 Band-Aids) of varying sizes, with at least two 2-inch or larger square bandages. Try to stock waterproof band-aids; for covering minor wounds and keeping them clean. Fingertip and knuckle varieties are highly recommended. All can be cut to make wound closure strips.
Two ace bandages
Six wound closure strips
One large roll of 2-inch cloth adhesive tape (may be torn or cut to smaller widths)
Several 4-inch-by-4-inch sterile, non-adhesive dressings
Three 3-inch wide gauze rolls
Two triangular bandages
Burn gel and “second skin” bandages
Medication:
Pack loose medicines in airtight containers with cotton balls to prevent powdering and rattling. The following list, which is a rough guide, will cover most needs. Substitute herbal remedies where desirable or in addition to pharmaceuticals. The medicines listed below are from a fairly conventional list that I copied. I wouldn’t use most of the products myself, but would use it as a guide to find herbal equivalents. Check expiration dates and rotate stock every year. Any material in the kit that may be damaged or rendered ineffective by water should be wrapped or sealed in plastic.
A supply of any special prescription medication you may need every day such as insulin, heart medicine or asthma inhalers. Keep a copy of your prescription and use instructions with these supplies.
*Mild pain reliever. Pack at least ten of your favorite Aspirin, Ibuprofen, Tylenol, or other pain reliever. Consider packing fever-reducing (Tylenol) and anti-inflammatory (Ibuprofen, Nuprin, Motrin, Advil) types.
Systemic analgesics such as Aspirin, Acetaminophen, Vicodine (a prescription pain killer).
*Antibiotics. For general infections. People who are sensitive to penicillin can use oxytetracycline. Carry enough for a full course of 5 to 7 days.
Echinacea, colloidal silver, spilanthes-usnea, tea tree oil, and grapefruit seed extract are natural antibiotics and anti-fungal medicines (some internal, some external).
Antibiotic cream (also fire-starting)
Antacid – for upset stomach (i.e. Pepto Bismol)
Activated charcoal (for poisoning)
Syrup of ipecac (to induce vomiting)
*Diarrhea medicine. At least ten doses. Loperamide Immodium is usually favored. Take two capsules initially, and then one each time a loose stool is passed.
Laxative
Epinephrine (prescription counter-anaphylactic shock med) and antihistamines (example “Benadryl” diphenhydramine) for allergic reactions, primarily for insect bites and stings.
Hand sanitizer (also topical antibiotic and fire-starting)
*Potassium permanganate or iodine solution/tablets: wound treatment/water treatment/antiseptic. Potassium permanganate has several uses. Add to water and mix until water becomes bright pink to sterilize it, a deeper pink to make a topical antiseptic, and a full red to treat fungal diseases, such as athlete’s foot.
Rubbing alcohol, alcohol wipes or povidone-iodine prep pad: wound cleaning, alcohol pads may also be used as fire tinder.
Oral re-hydration salts. Salt depletion can lead to muscle cramps and loss of energy. Carry 5 to 10 packets.
Bleeding stopper – Quikclot or powdered goldenseal herb does a good job at stopping bleeding from wounds.
Saline solution to flush the eyes or as a general decontaminant.
Insect repellent (or clothing designed for this purpose)
Lip balm.
Equipment:
Three sterile applicator sticks, cotton-tipped
Instant cold-pack/icepack
Thermometer
Safety pins and sterile needle
Scissors: surgical blunt-tip
Tweezers
*Single-edged surgical blades and scalpel kit. At least 2 blades of different sizes. A handle can be made of wood if required.
A supply of money in small denominations in your kit helps for situations such as telephone calls (if the lines still operate) or vendors selling various goods. Banking transactions may not be available. About $200 in emergency money per person is recommended.
Signaling, Navigation and Reference
Pen/pencil and paper
*+Two high-quality compasses, preferably ones that glow in the dark – one is a backup compass (Silva orienteering compasses are among the best). Know how to use these. Note: Some compasses are calibrated for either the northern or southern hemisphere.
+Map(s) of the region, or charts if at sea (on land topographic maps are best for studying the terrain). Consider water proofing or laminating them.
+Light: headlamp (with red-light option: this is better for health or other flashlight (solar/hand-crank powered preferred), torch, or glow sticks (good for situations like earthquakes when gas leaks occur because flashlights may cause an explosion).
*Micro-flashlight
Optional: Whistle to signal for help when weak or short of breath. Optional: Mirror – especially those designed for signaling. Optional: Smoke or illumination flares.
Duplicates of necessary items that may be hard to get (multiple pairs of eye glasses, etc.).
+Steel Survival Knife (stout 6″ fixed blade with a safety sheath).
Sharpening tools. Get soft and hard whetstones for use with knives, axes and other edged tools. A file is used to take out nicks and for rough sharpening. You’ll need a saw set tool and a saw gauge for straightening and sharpening saw teeth. Sharpening steels, ceramic sticks, and strop straps are used to straighten the edges on knives.
Can opener (usually on a multi-tool) if bringing canned food (not me).
Spare rechargeable batteries for anything that might need them, with a solar recharger.
*Sewing kit (w/ heavy-duty needle and thread – dental floss doubles as strong waxed thread).
Bandanna or scarf for filtering water, bandage, sun protection, and signaling.
50 feet (15 meters) of sturdy cord or “550” parachute cord for setting up a tarpaulin and snaring small animals.
Rifle and ammo – for hunting and defense. Getting a rifle and pistol that use the same ammo, i.e. .22 Magnum caliber, reduces the variety of ammo that you need to carry.
Hatchet
Binoculars
Carabineers – for attaching gear to your pack.
Collapsible military spade shovel. Glock makes a good telescoping one with a saw.
*Folding saw or cable saw.
Wash cloth or towel.
Permanent marker – marking trees, labeling, etc.
Portable radio (solar/hand-crank preferred) with the weather band. Eton makes a few types.
Sacks: Waterproof bags for valuables or carrying water. Also, pillow cases are good for filtering liquids, wrapping meat from insects, carrying things, etc.
Repair Gear:
Repair kit (additional wire, super-glue, duct tape, nails, cord, awl, pliers, hammer, hand drill, zip ties, extra buckles for pack).
Tent sealer – seals seams to keep water out.
Some Optional Tools (when sheltering in place or having transportation):
Extra sets of round cotton shoe laces (these double as a good string for bow drill fires, synthetic fibers are too slippery)
In addition to setting up a Compact Survival Kit and a Bug-Out-Bag there are a couple of other bags to consider: a Get Home Bag (GHB) and an I’m Not Coming Home (INCH) bag. The GHB is fairly self-explanatory. These are typically located at ones place of work or in their vehicle. Should disaster strike while working, the GHB is designed to help you get home or to some other pre-planned location where your primary set of supplies and gear is at. The INCH is a slightly modified BOB, oriented towards long term survival. To look at examples of all of these types of bags, check out: zombiehunters.org.
Bug Out Vehicle
A bug-out vehicle (BOV) is a vehicle that the owner keeps prepared in the event of the need for an emergency evacuation. Keep your gas tank full, refill it every time it gets half-empty as disaster can strike at anytime and you don’t want to have a nearly empty tank in a crisis. Vehicles that can achieve at least 30 miles per gallon or with extended range fuel tanks are gaining popularity because of the lessons from events like Hurricane Katrina in which publicly available commercial fuel supplies were quickly exhausted.
If you are concerned about getting to a retreat, you should pick the toughest and most dependable vehicle you can find. Select one capable of carrying the expected load of passengers and gear. It must be capable of traveling off-road in the worst weather imaginable with plenty of ground clearance for rocks and other obstacles. It must also have the needed range under full load with expected road conditions (test to make sure). These criteria virtually eliminate all passenger cars and suggest a sturdy truck type of vehicle. Around the homestead a vehicle is used basically to haul load and do other work, again pointing to some type of truck. The vehicle should still be tough, but fuel economy becomes more important than it is for just getting to a retreat. And, because you may have to service and maintain the vehicle in either case, it should be as simple as possible and easy to maintain and repair with plenty of spare parts available such as would be the case with a fairly common model.
Typically the vehicles that fit this criteria are SUV’s, full-size pickups and vans. Pick the one that best fits the combination of passengers and cargo you anticipate. A 3/4 ton pickup or van is built much stronger than a 1/2 ton, and the 1-ton is perhaps heaver-duty than necessary.
Although newer models have the advantage of newer parts, they also have computer chips that increase complexity and might be hard to diagnose and fix in a survival context. One option might be to rebuild an older model. To rebuild doesn’t mean to make cosmetically appealing, but to effectively bring all the components like the engine, transmission, differential, drive line, wiring, suspension, braking and cooling systems to like-new condition. If you have time to do it yourself you will also become intimately knowledgeable of your vehicle and probably do it for less than half the cost of a new machine.
Typically a BOV is equipped with a variation on the bug-out bag that includes additional automotive supplies, clothing, food and water. Evacuations in the wake of Hurricanes Katrina and Rita stimulated interest in the use of dual-sport or on/off road touring motorcycles as BOVs due to the massive traffic jams and fuel shortages. In many places people are now considering “bugging out” with their entire families and accordingly are changing from driving 4×4 cars and SUVs, instead using converted panel trucks (trucks with an integrated and enclosed rear cargo section). Both two-wheel drive and four-wheel drive panel trucks can be fitted out as BOVs and stealth campers (campers with no side windows). The interior of these BOVs are fitted out like mobile homes and expedition vehicles, but without any of the frills, usually with a kitchen, refrigerator, cooking stove, toilet, dining area plus enough berths (beds) for all the family. The inside of the vehicle will also contain enough food, water, clothing, tools, medical supplies, weapons, etc. to sustain a family for a significant period of time. Extra fuel and water containers are built into or under the vehicle to extend its operational range, but from the outside the vehicle is indistinguishable from a panel truck.
Vehicle Survival Kits
In some cases, supplies and equipment may be loaded into a vehicle such as a van or truck with bicycle racks and an extra “reserve” gas tank. Some survivalists also carry a small (e.g., 250 cc) off-road-capable motorcycle in the van or truck.
Food supplies would include provisions for several months.
The transportation items may include bicycles with off-road tires, emergency tools and spare auto parts (e.g., fuses, batteries, fan belts, light bulbs, spark plugs, head light, spare oil, tire pump, etc.), and an inflatable raft with paddles.
The communications equipment may include a multi-band receiver/scanner and radio.
The power supplies may include a gasoline generator with a one-month fuel supply, an auto battery and charger, extension cord, flashlights, rechargeable batteries (with re-charger), an electric multi-meter, and a test light.
Tools may include cutting tools such as saws, axes and hatchets; mechanical advantage aids such as a pry bar or wrecking bar, rope/cord/twine, pulleys, or a ‘come-a-long’ hand-operated winch; construction tools such as pliers, chisels, a hammer, screwdrivers, a hand-operated twist drill, vise grip pliers, glue, nails, nuts, bolts, and screws; mechanical repair tools such as an arc welder, an oxyacetylene torch, a propane torch with a spark lighter, a solder iron and flux, wrench set, a nut driver, a tap and die set, a socket set, and a fire extinguisher.
In addition, the kits may contain typical individual “survival kit” items.
The subject of having a retreat separate from your actual home is a controversial one. Some feel it is the only viable alternative while others question its value. I find myself among the latter. If the retreat is located in a small rural community far enough away from your present home to do some good, what is the probability that you will reach it safely in a time of crisis? Will you be able to drive through the roads clogged with frightened, angry and possibly violent people? Is your vehicle capable of making it without any roads? Will there be enough fuel to get to your destination? And will you find someone else already there, willing to fight for what they have found? Face it, getting to a distant retreat in a time of crisis could be difficult at best and depend on a great deal of luck. And making the decision to leave for the retreat would be a most difficult one. On top of that, a working retreat takes years to develop adequately.
What about storing all of your stuff in your current home, planning on packing it all up and taking it with you when the crisis develops? I’m afraid this has even less chance of succeeding. The amount of supplies that you would want to survive when you got somewhere safe can be enormous. Thinking that you will have time to pack it up and the capability to move it ahead of the panicked masses is wishful thinking.
The only safe and sane solution for those living in major metropolitan areas is to decide now, no matter what the resulting difficulties, to relocate to a suitable location as soon as possible. True, it could mean substantial changes in lifestyle. But not anywhere near as drastic as staying put might mean one day. Everything done now will greatly lessen the impact later.
The definition of a retreat can also be broader to include any hidden shelter and could include basements or even a secret spot in the wilderness.
I have read Survival Retreat, The Modern Survival Retreat, and Urban Survival by Ragnar Benson. All of his books are worth a read and offer varying perspectives on survival theory. I’m sure there are loads more books on the topic since I read those books many years ago. The notes that follow are from these three books by Ragnar:
Basic Rules:
Survival Thermodynamics: When burning calories to obtain food, don’t expend more energy/calories than you will receive from procuring, preparing, and digesting it.
The best defense is obscurity, unobtrusiveness, and silence.
Don’t let it appear as if you have anything valuable at your retreat.
No matter how well-armed or hardened your retreat, you cannot hold out even briefly against a well-trained, well-armed military force.
Don’t become a refugee. You must not put yourself into the care of government agencies or NGO’s.
Never give up your ability or desire to defend your freedom.
Stay in the terrain you know and defend your territory. (Evacuate only if you have a plan and a place to go to.)
Try to avoid conflict in your region.
Don’t openly harbor political targets and don’t let your retreat become the center for any sort of resistance movement unless absolutely necessary.
Don’t have raiders operate out of your retreat if possible. If they are captured, enemies might be traced back to you.
Make a plan and stick to it even when its weaknesses start to show up.
Two years is typical for destabilization in a collapse. Expect things to break down for longer.
List what you need to stay alive. Make sure you have it and know how to use it. Also, consider articles of personal encouragement (music, art, books, etc.).
The rest of this post is traditional survivalist fare. In general I would suggest preparing in a way that allows you to take in outsiders. To create abundance so that you can share and help your fellow humans. To be open and caring. But you may find yourself in a situation where hiding away and closing off your social group to outsiders may be the decision you make. The following considerations are for a situation where you would want to isolate your group.
Location:
Think about how to use the geography to your advantage. In times of war high ground might be used as an observation post or mortar position. Tall buildings will also likely become gun positions, and mortar/rocket launching positions.
In cities, the sewers are the first area secured by military forces because of their strategic role. Avoid them and cities in general.
Can you close off your area by taking out a bridge, closing a road, cutting down some trees, knocking over a building?
Where will the access routes be?
How will you deal with the cold?
Hunger?
Thirst?
Wind?
High water or flooding?
Drought?
Insect and animal disease?
Waste: Cooking and waste smells often give away hideouts. In standoffs the police may cut off sewer service and try to get their victims to give up due to filthy conditions. Living with waste can be very demoralizing and unsanitary. Have a plan to deal with waste within your retreat.
Top Dangers (roughly in order of importance):
1) Hunger and Thirst
2) Disease
3) Fire
4) Thieves, refugees, people (armed and organized or not). Ex-military renegades could be a major problem. Think of what has happened in Africa…
5) Natural disaster clusters, and patterns of planetary crises or Earth changes, such as tornadoes, hurricanes, earthquakes, blizzards, and severe thunderstorms, etc.
6) NBC (Nuclear, Biological, Chemical Warfare) threats – (useful items include: decontamination suits, filter breathing apparatuses, survey meters, dosimeters, Geiger counters, clean up equipment, shielded sleeping area, provisions for protecting food and water, and necessary medical supplies)
7) Occupying army
Getting to your retreat:
Have three different ways of getting to your retreat from where you may be at any given time (work, home, etc.) using independent forms of transport. Learn how to use many types of transportation in case you need to take a vehicle to get to your retreat. Learn to fly, use boats, drive trucks, buses, subway trains, motorcycles, etc. Stay informed: if the banking system starts to fail coupled with failures in the food distribution system, look out. Um, yep. Check.
Deterrents:
Blocking off the routes a mile or so away from your retreat by blowing up a bridge, placing burned out buses and trucks, piles of rubble, downed electrical lines, or even having a group between you and outsiders who will duke it out with intruders.
Using fifty pounds of roofing nails on the roads can prevent vehicles from entering your area or placing some heavy electrical wires up around can deter helicopters from landing.
Having an unhealthy-looking unkempt person come up to visitors ranting and raving can send people away.
Putting out signs of death and destruction (radiation levels, chemical contamination), covering the area in smoke, warning of the plague, etc. may be worth a try.
You could try placing carcasses out in the roads down the way to discourage intruders.
Don’t set traps in a way that leads to your retreat or causes people to think that you have something valuable to hide.
Concealment considerations:
Consider ways to camouflage water catchment, buildings, gardens (avoid planting in rows), animal pens; these will give away your location. Consider turning out livestock to graze at night under close supervision and possibly keeping pens far away from your retreat. Maybe don’t stack up your wood in a pile or hang your laundry out on a line, keep it hidden.
Maintaining your zone (ideas):
If you are faced with a standoff, communication with the outside public may be critical. If you cannot communicate it will be easier for the intruder to kill you and if it’s the police/government they can put whatever spin they want on it.
You may want an alarm system for thieves (electric, dogs, geese, guinea hens)
Form protective associations with allies.
Lay out spiked sticks at an angle in the earth or barbed wire.
Do regular patrols.
Have sentries.
Have a plan of resistance with a basic defense network. Know clearly when to attack and under what circumstances.
Don’t fire from your retreat unless absolutely necessary and then do so from from scattered hidden positions within your area that are hard to pinpoint.
Concluding Thoughts
The notes from Ragnar’s books are from a time before the threat of universal surveillance by drone or satellite as Bill Gates is planning. If biometric identification like facial recognition is linked to satellites then it may be near impossible to hide anywhere on Earth. This would effect the strategy one would employ to stay free. Our concern then shifts from the wandering zombie hoards to the eyes in the sky. Such technologies must be stopped if we are to remain free.
The first book on this list will give you a good foundation of knowledge to stay alive, the second is a great tool for your broader community, the third to help you consider preparations for a major social meltdown, and the fourth to solidify your food storage program. These four books will give you a well-rounded overview of preparedness. From there you can read books that specifically address topics that you wish to explore further. Good luck.
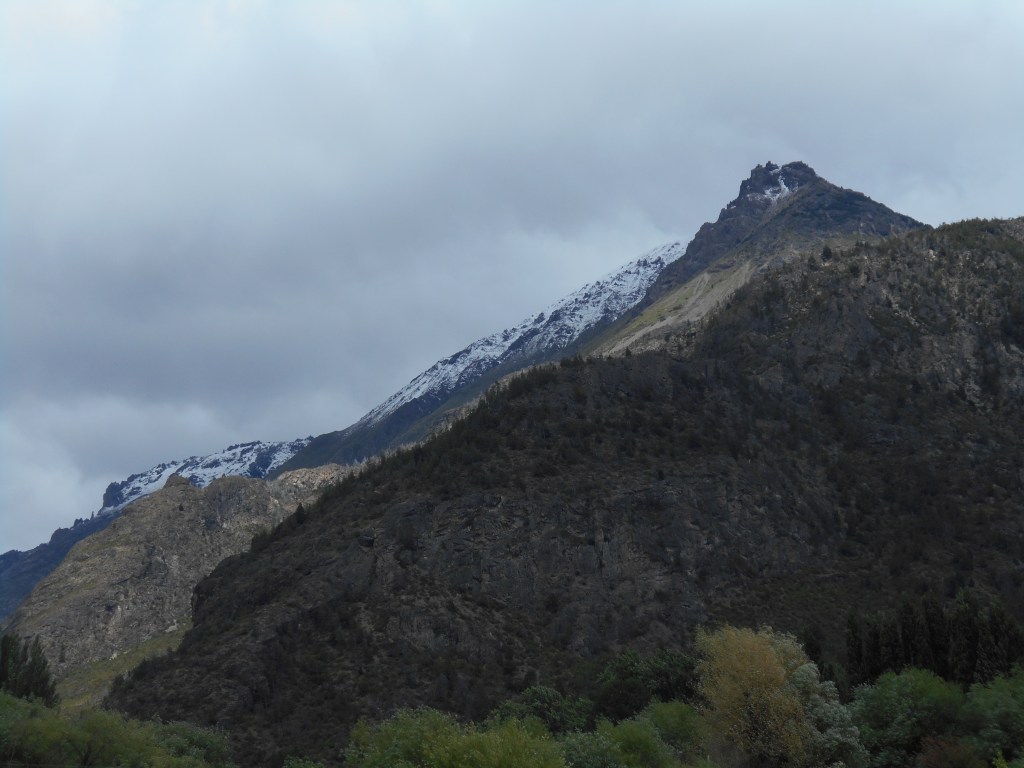
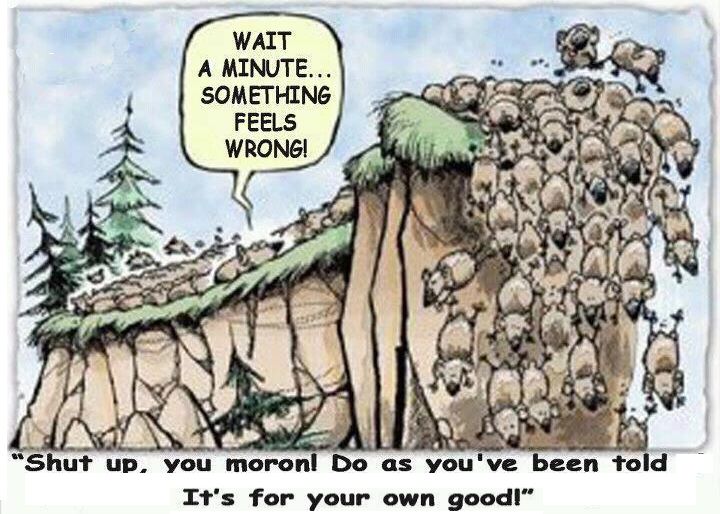
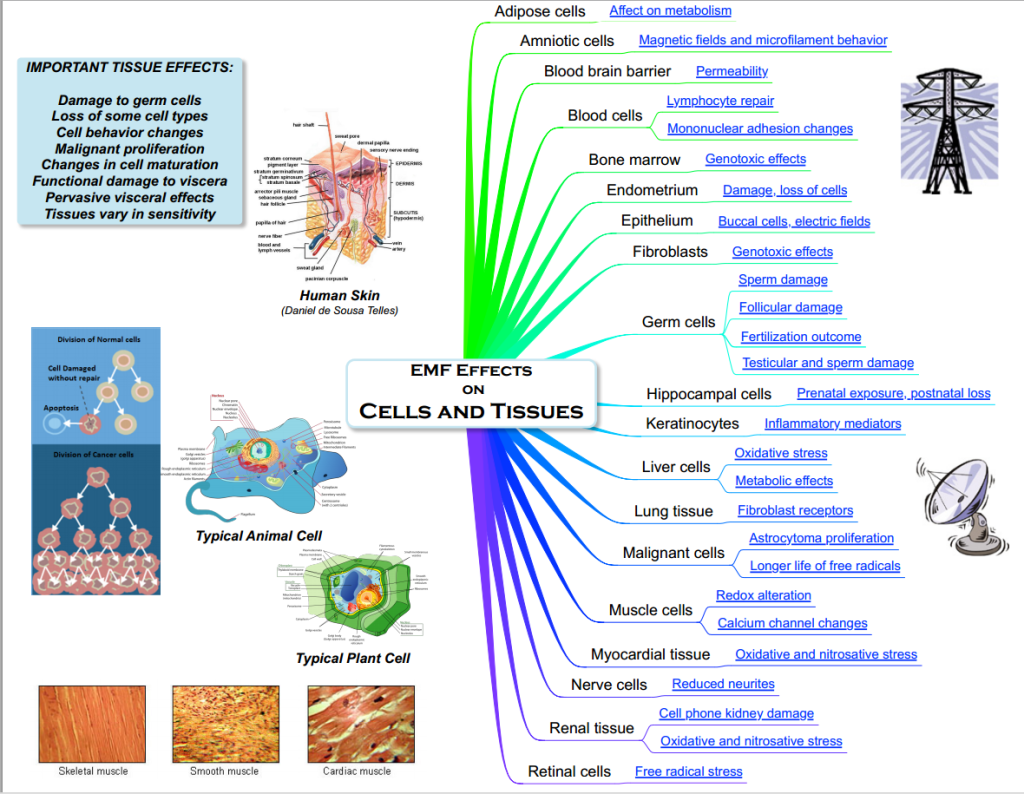
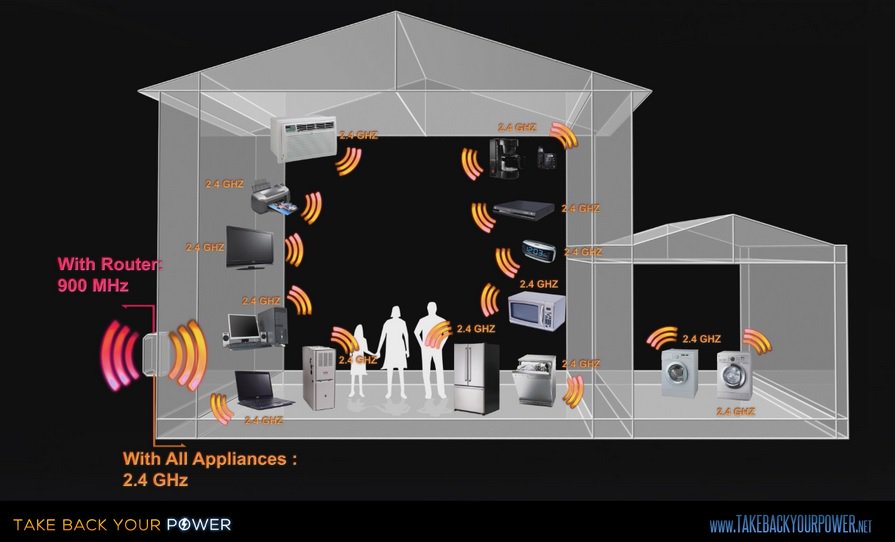


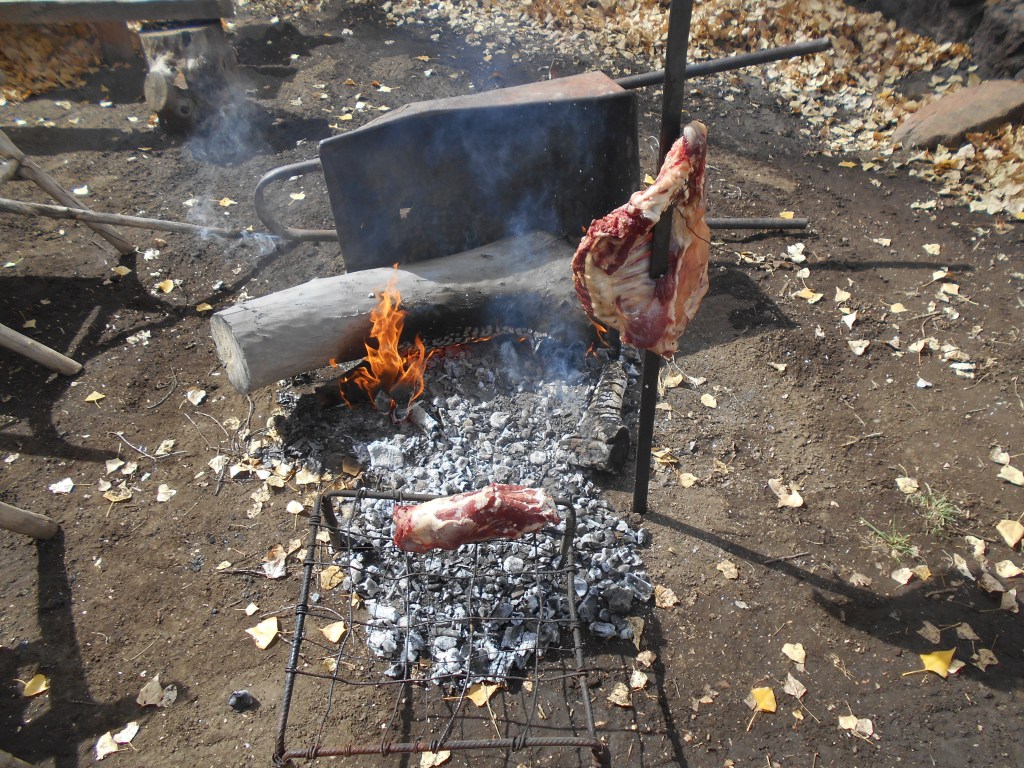
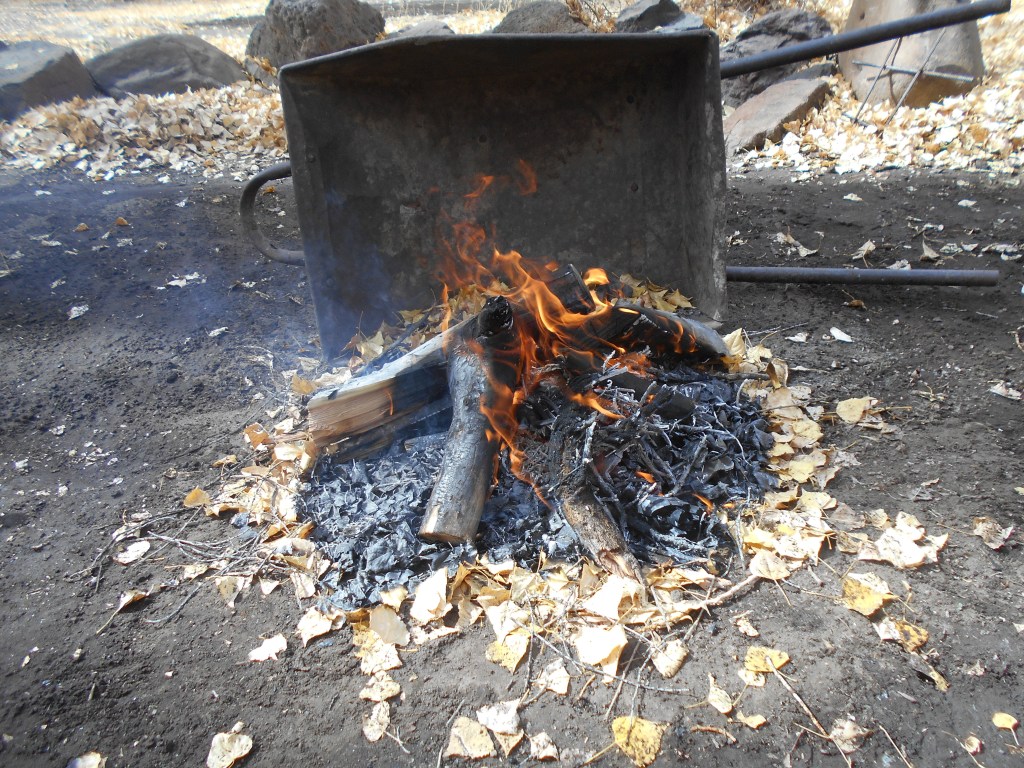
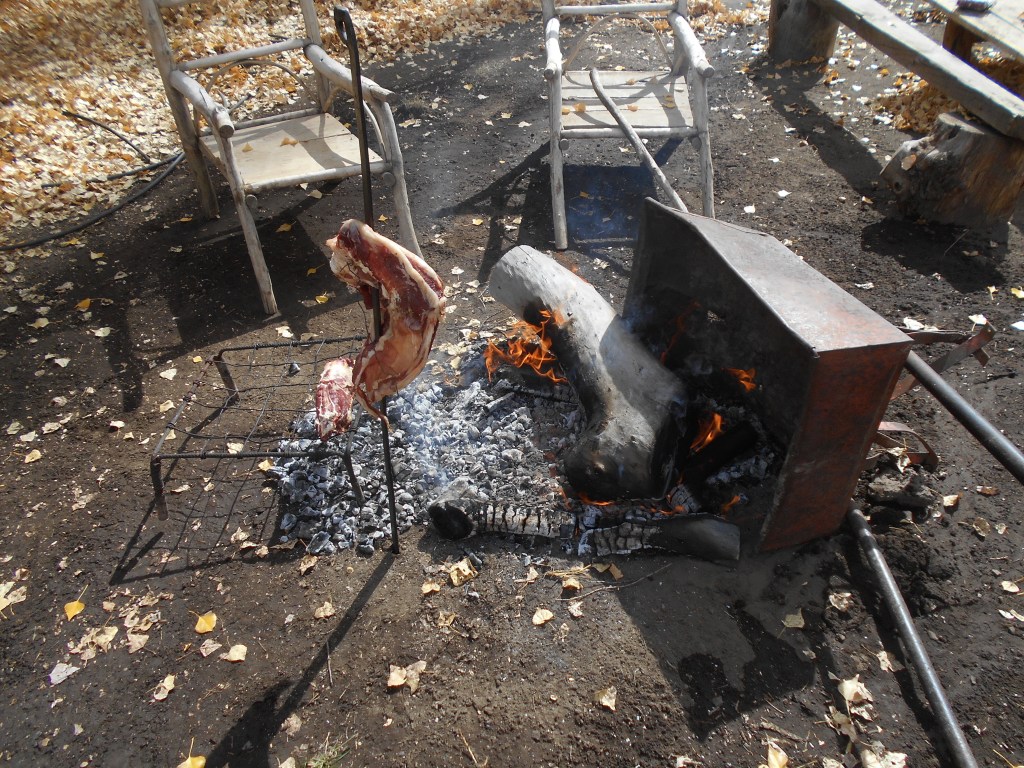
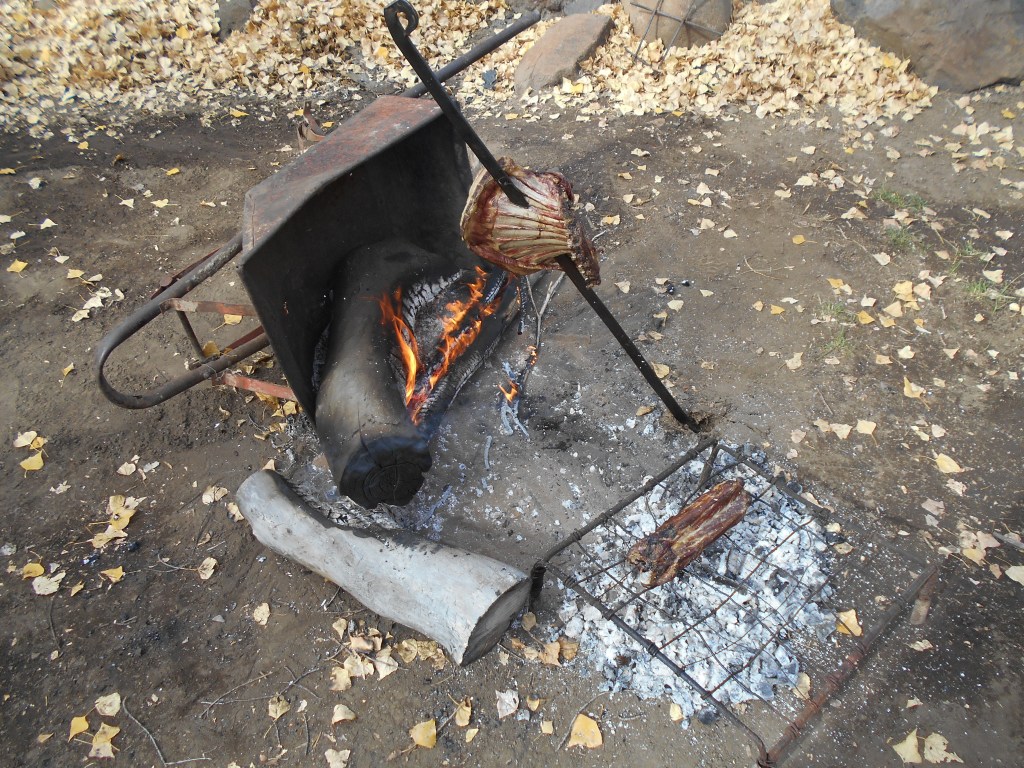
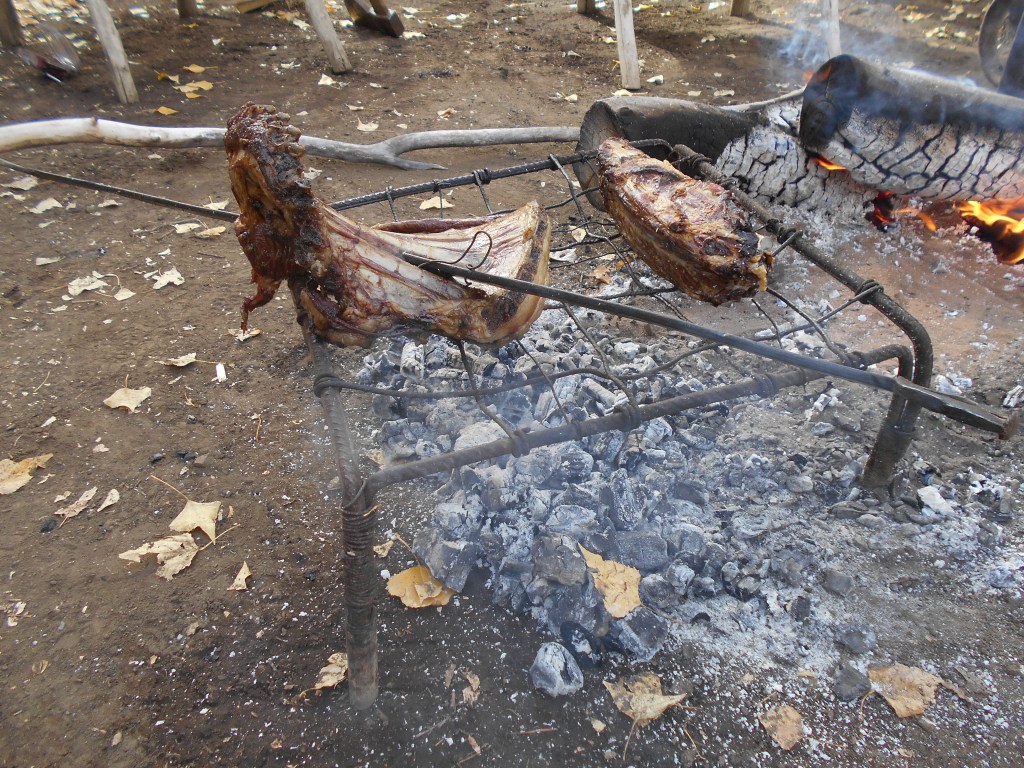
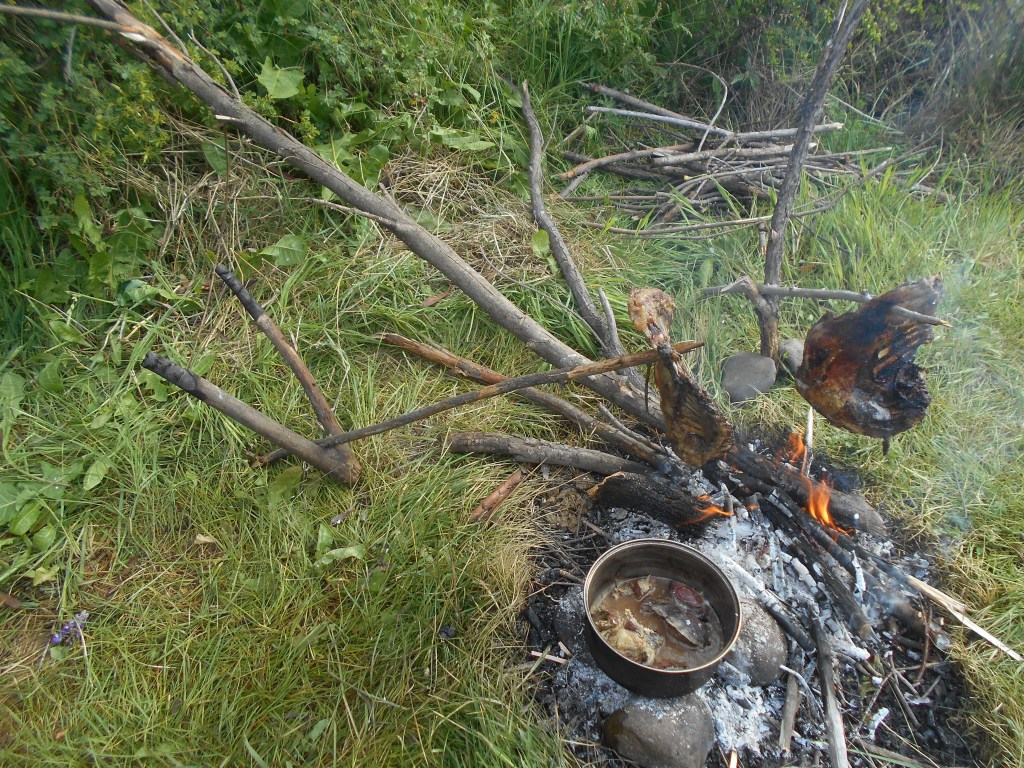
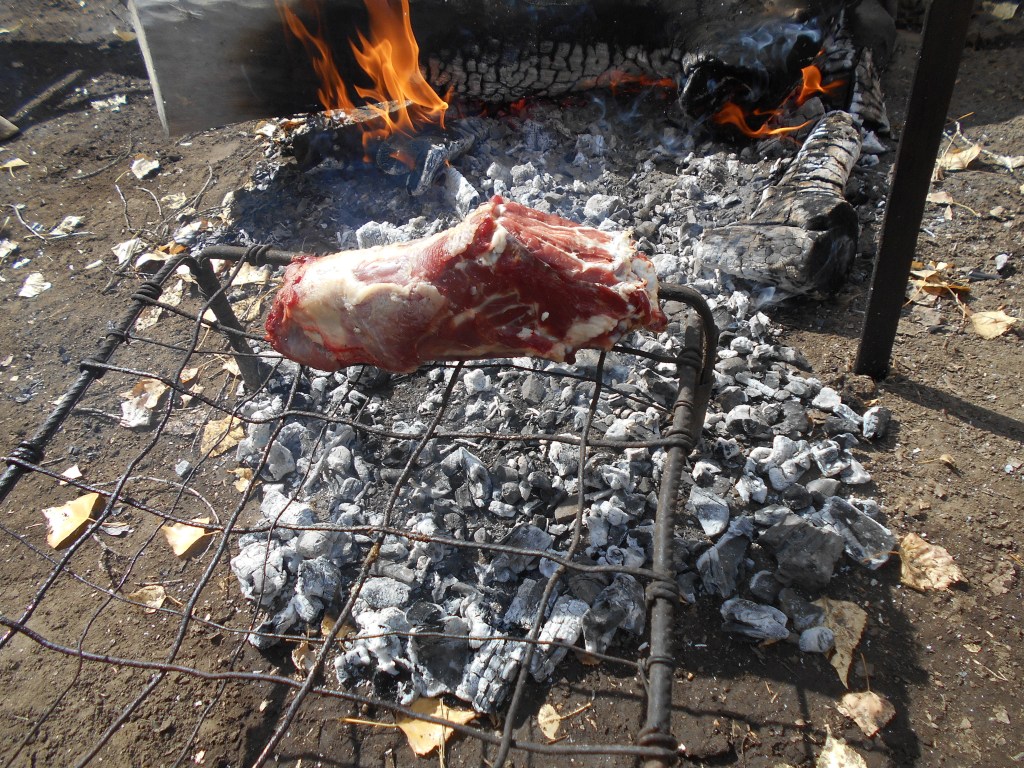
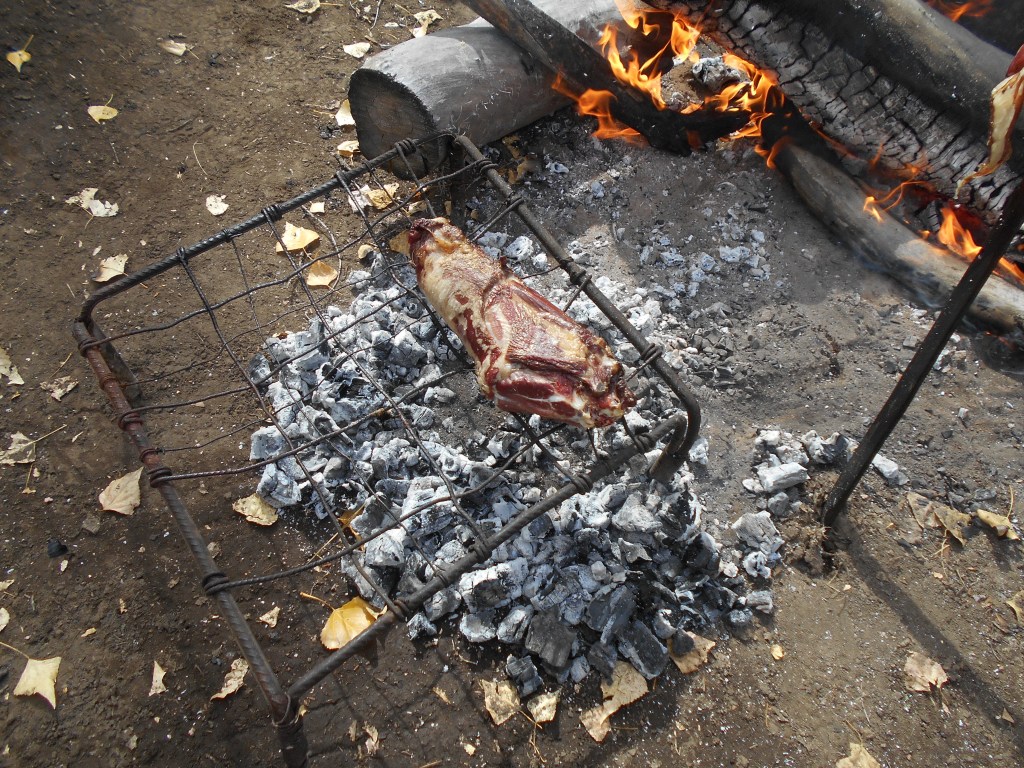
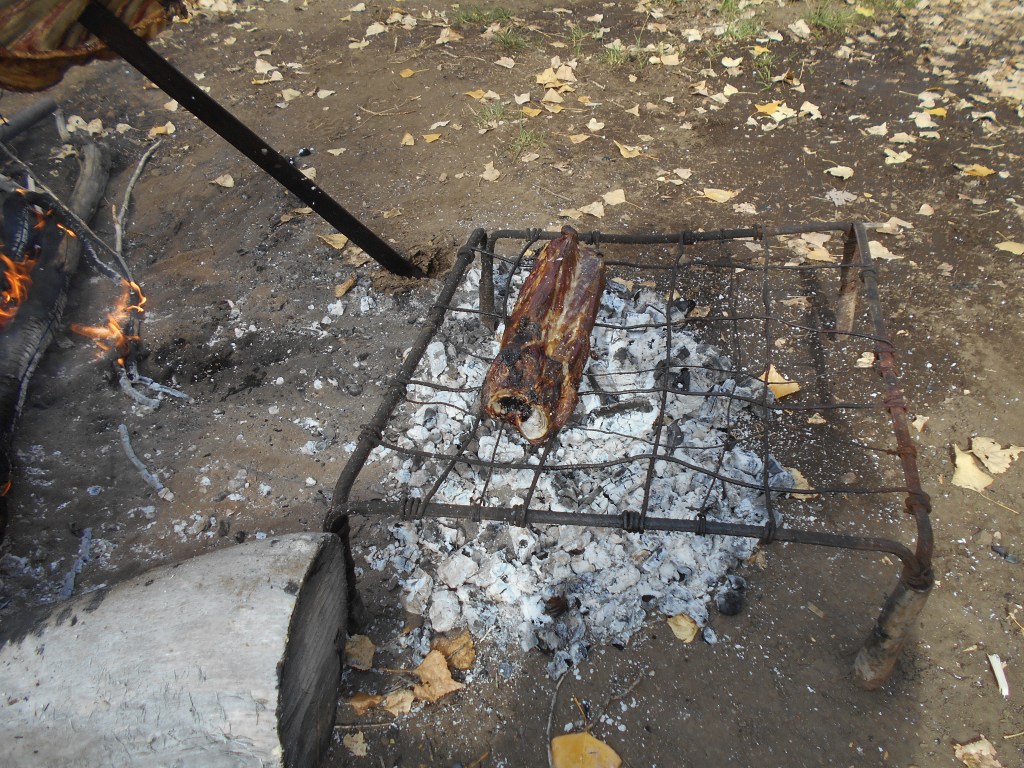
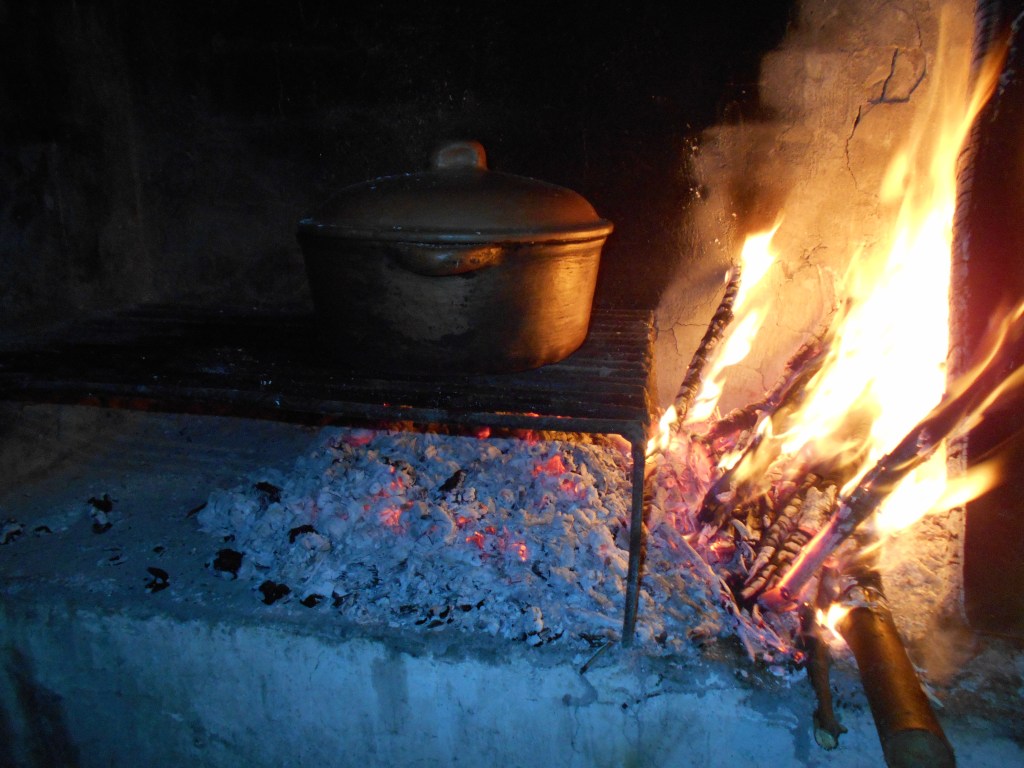

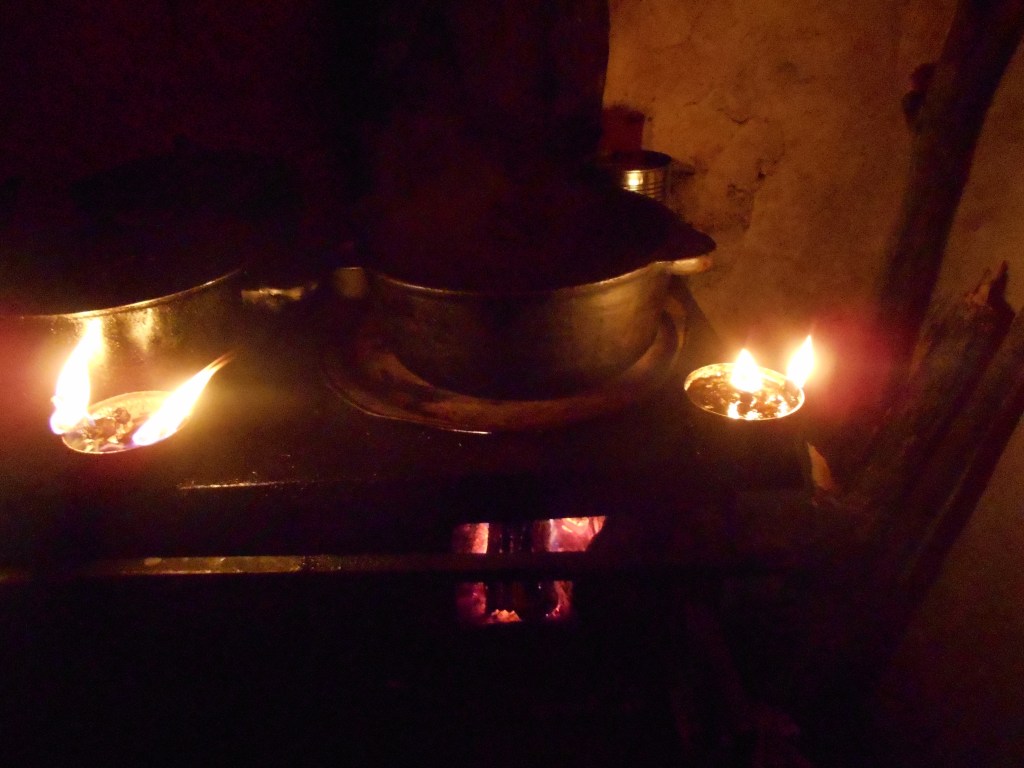
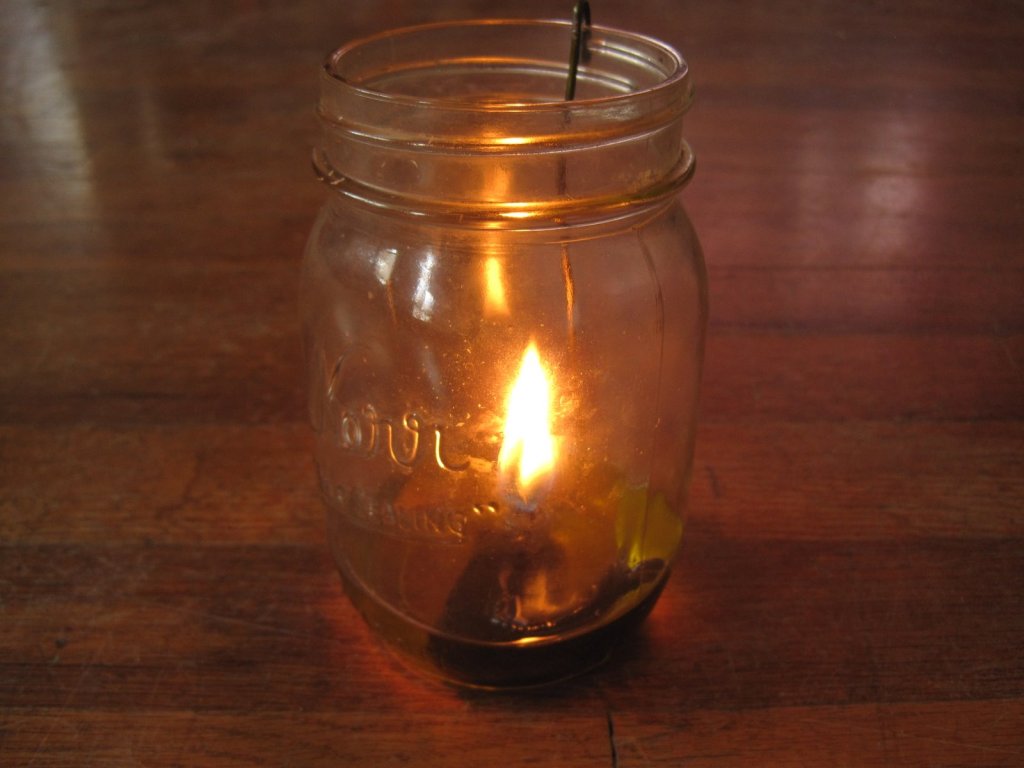
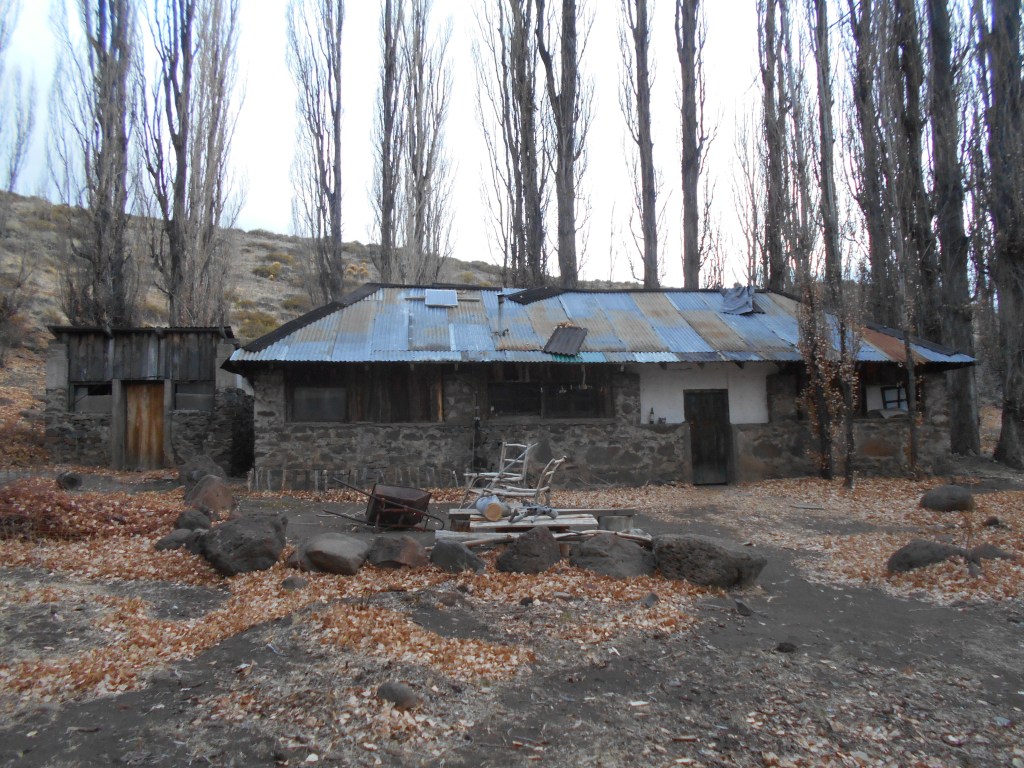
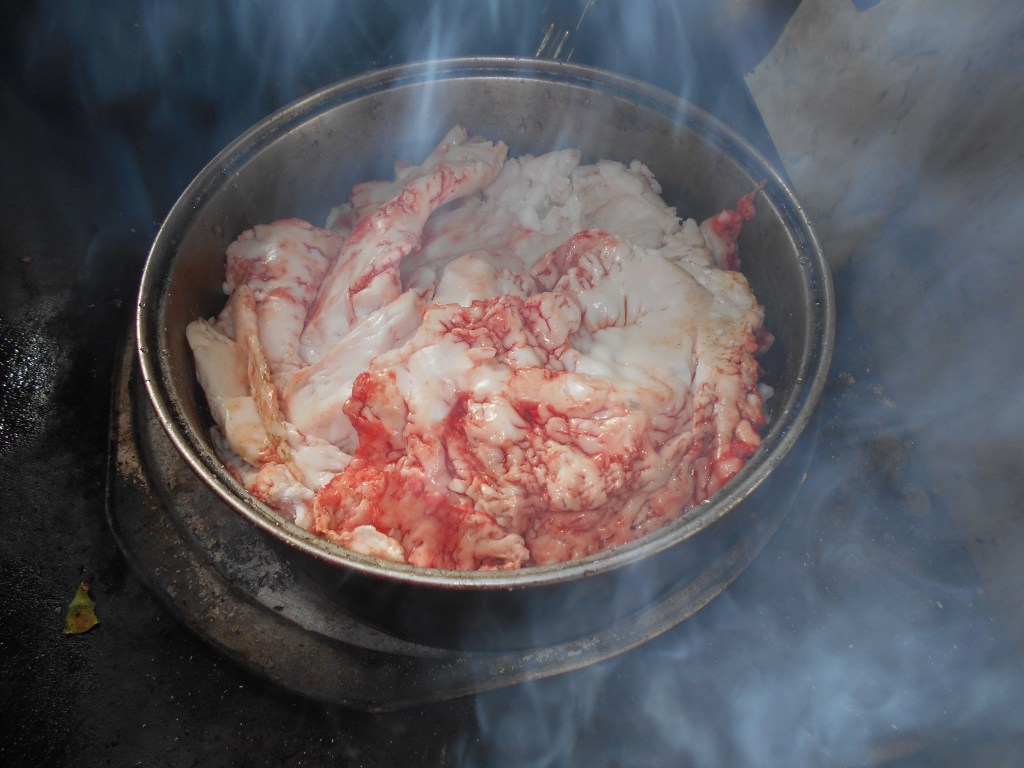
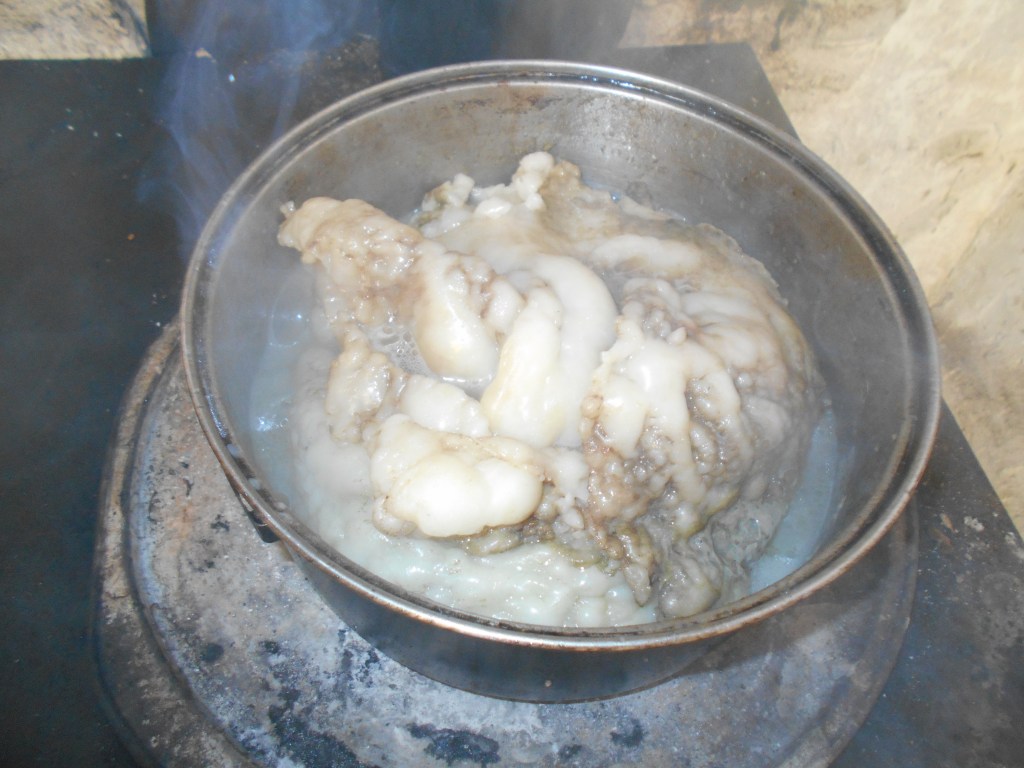
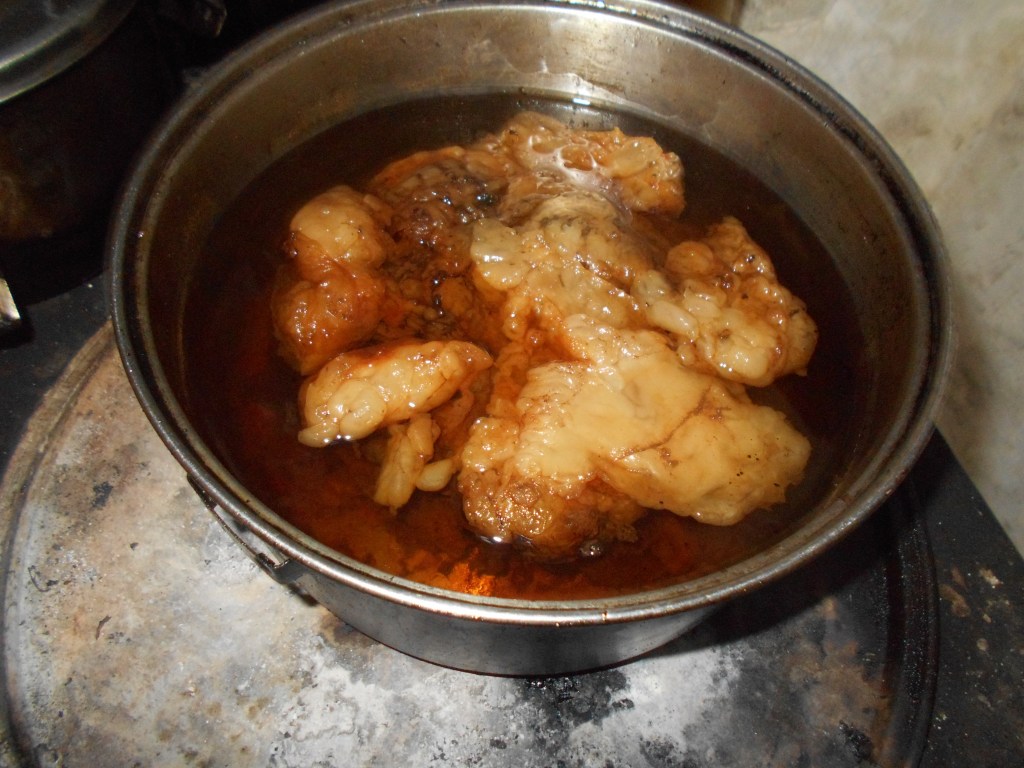
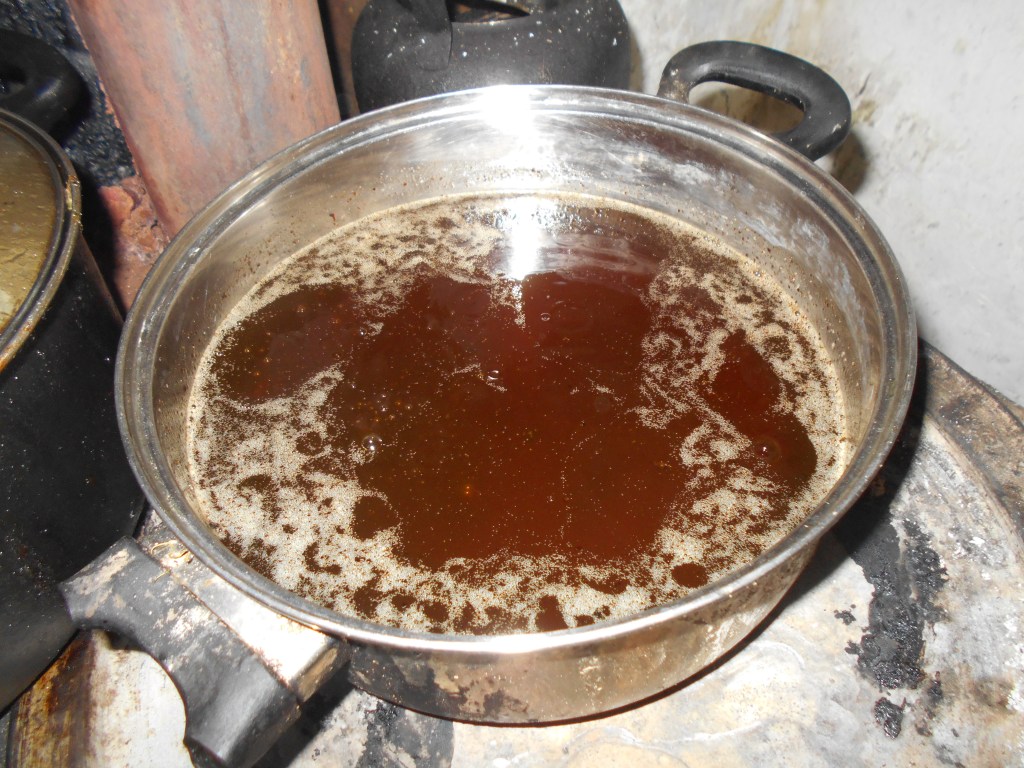
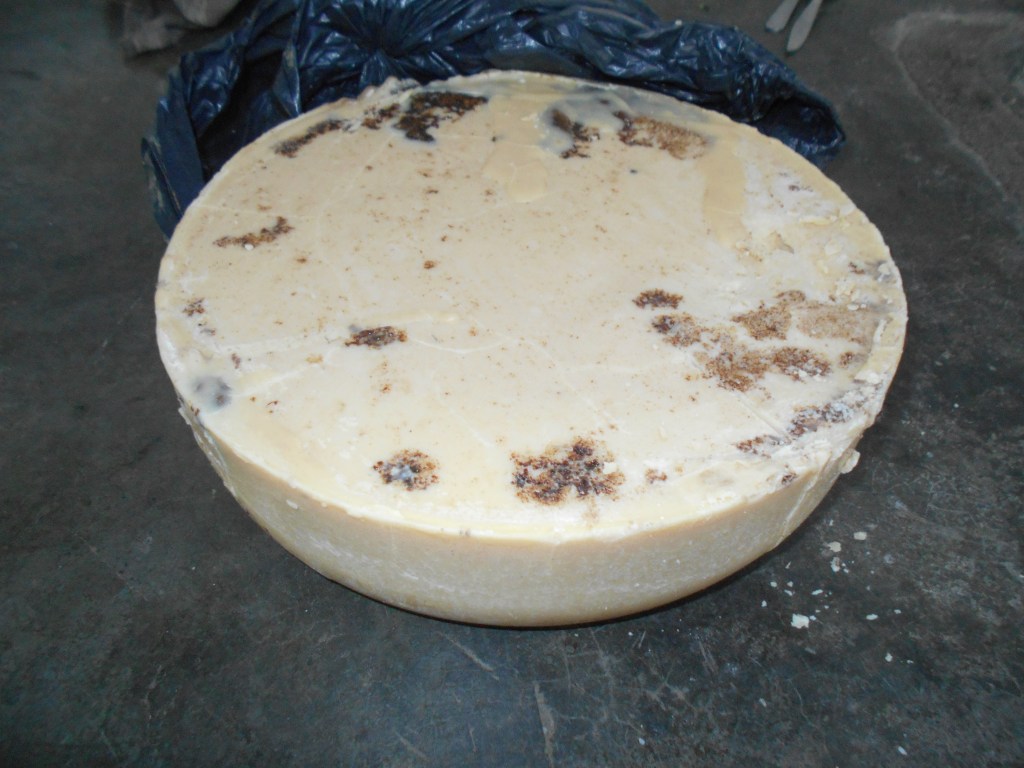
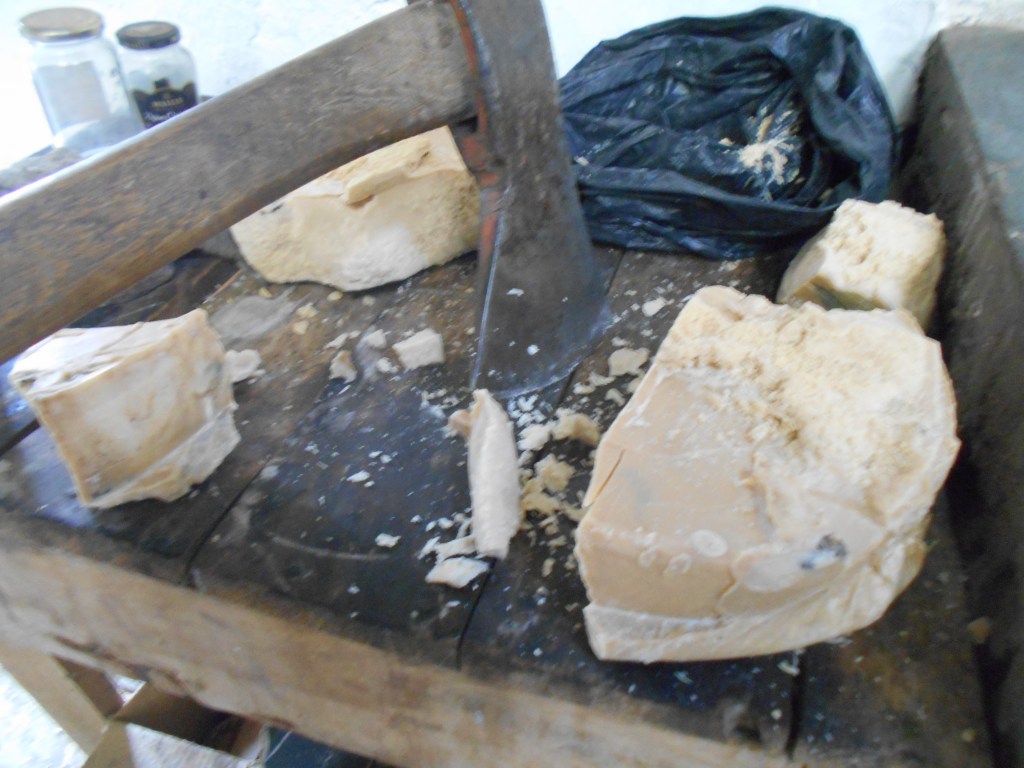
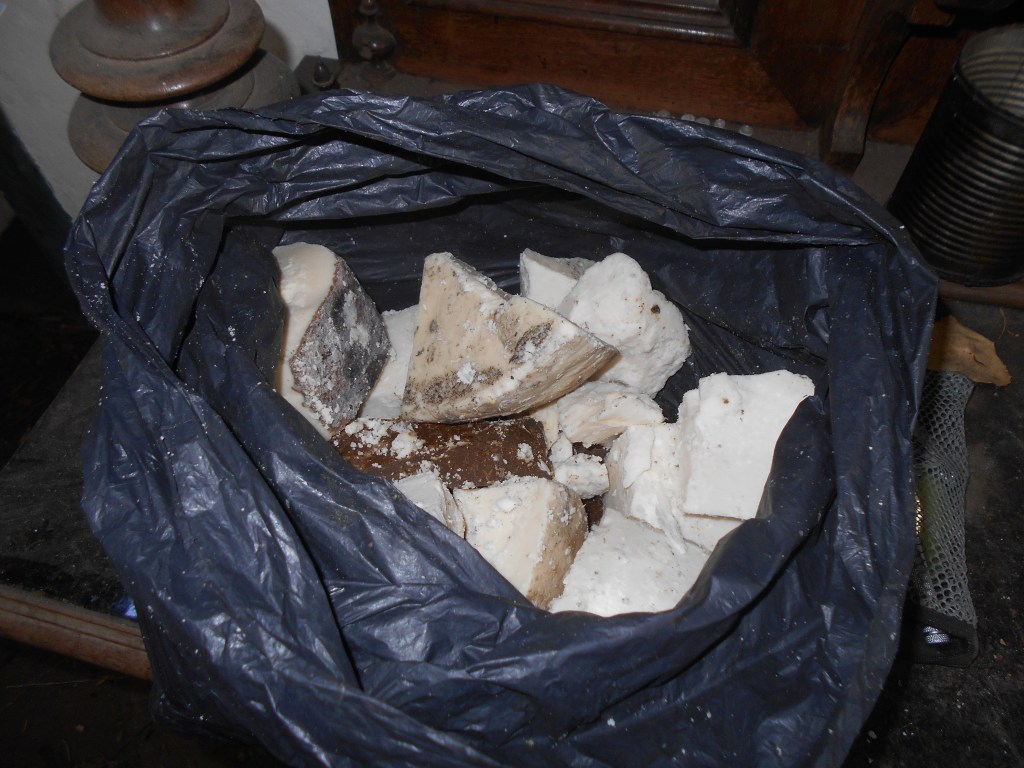
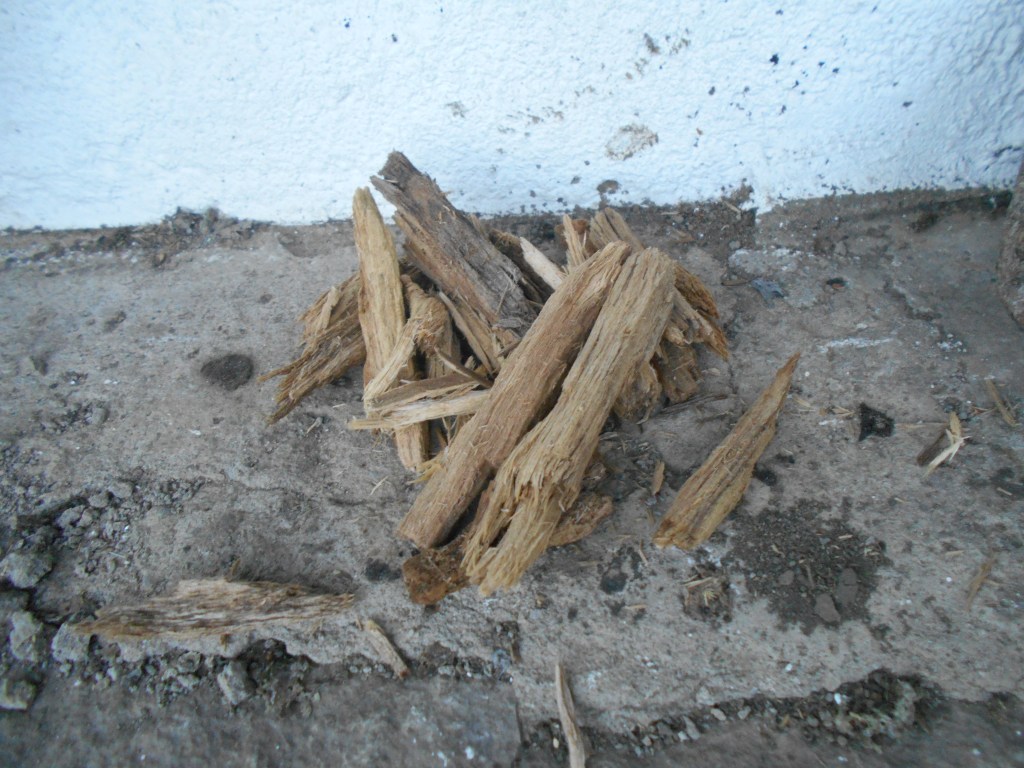

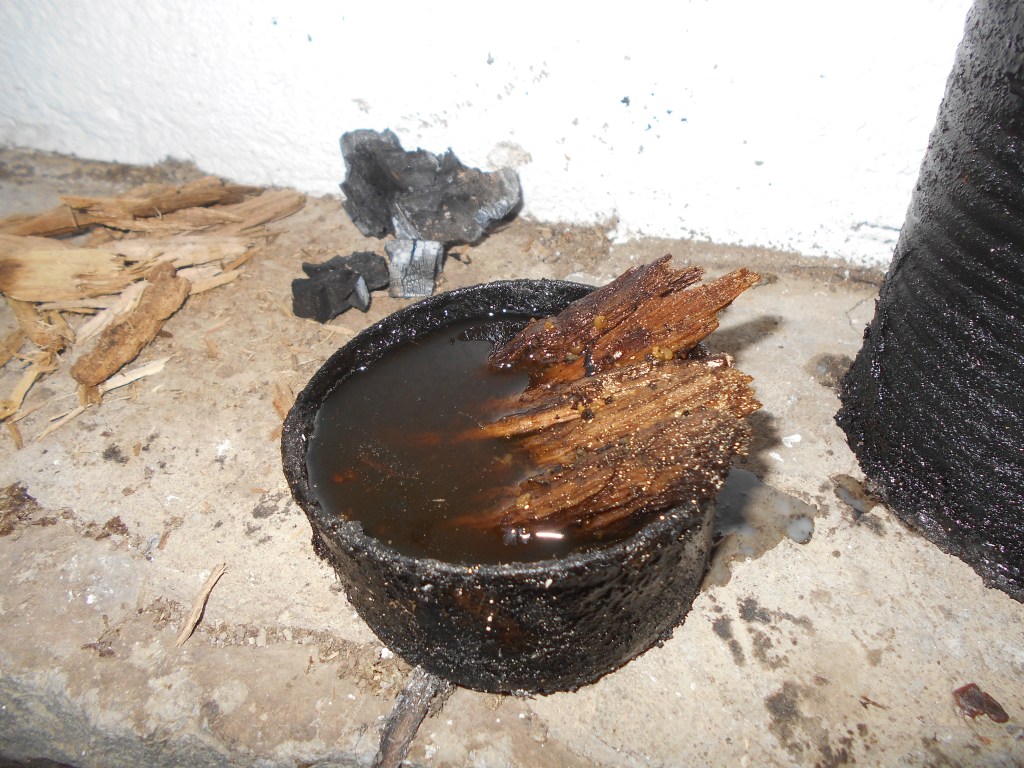
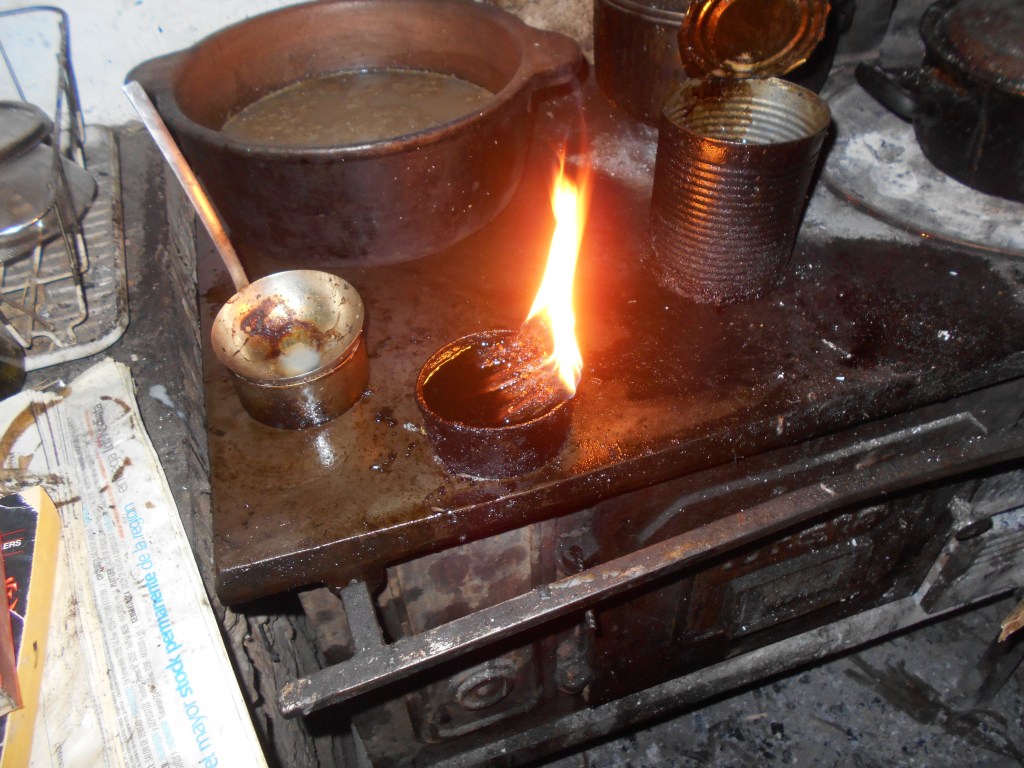
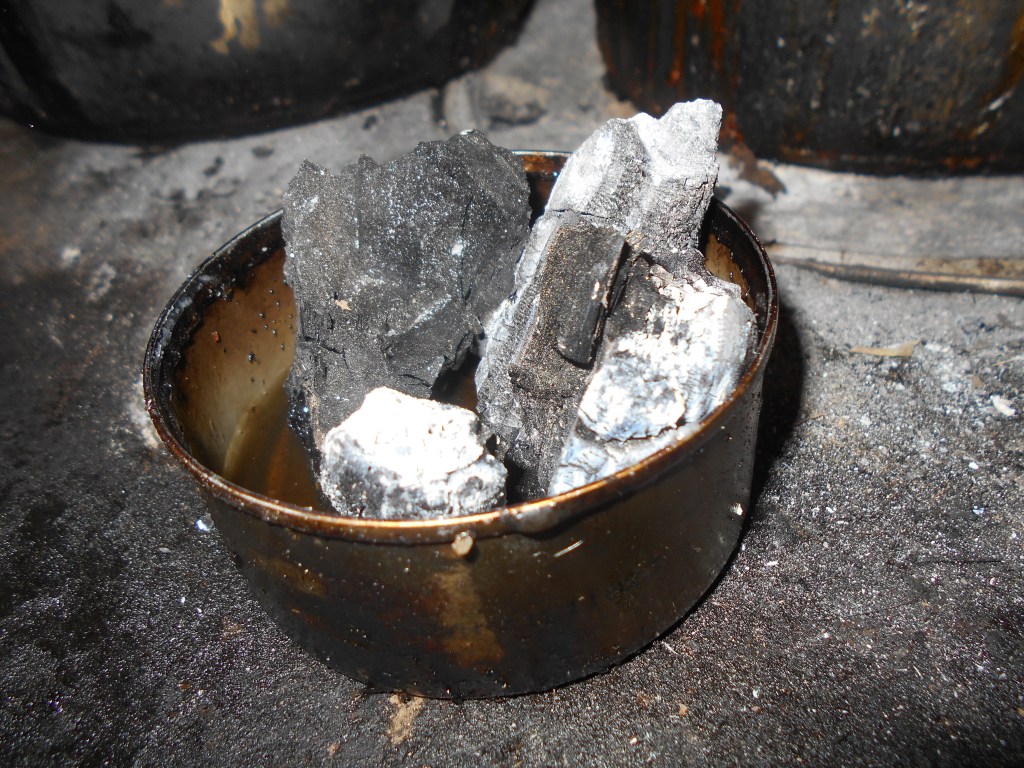
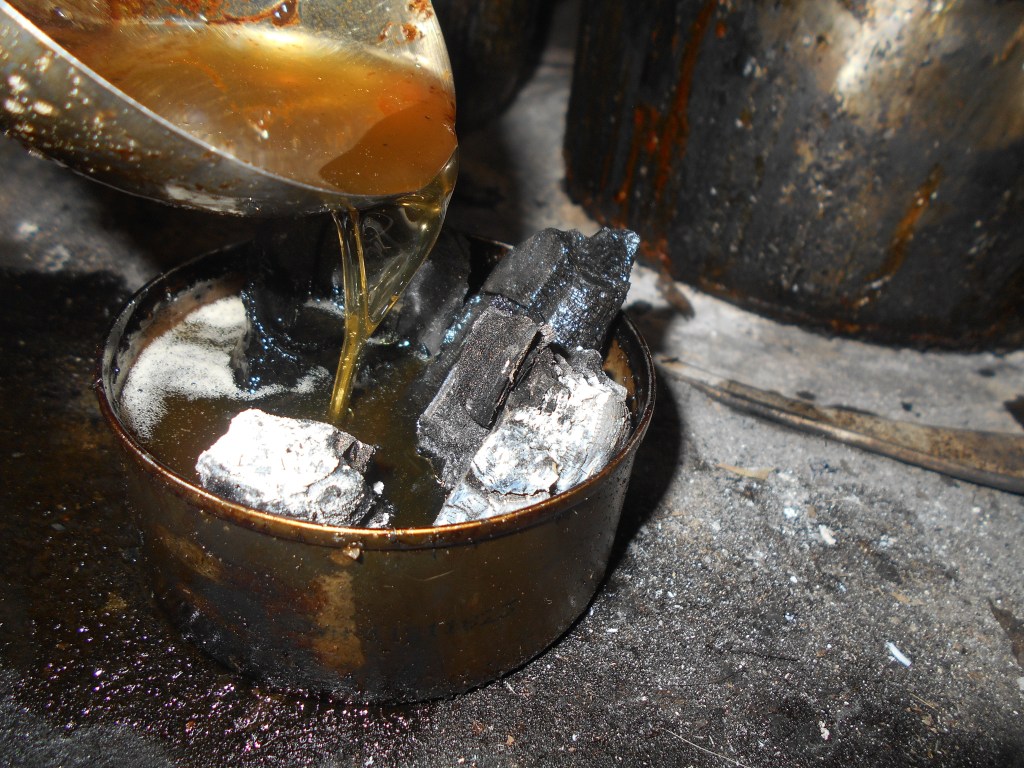
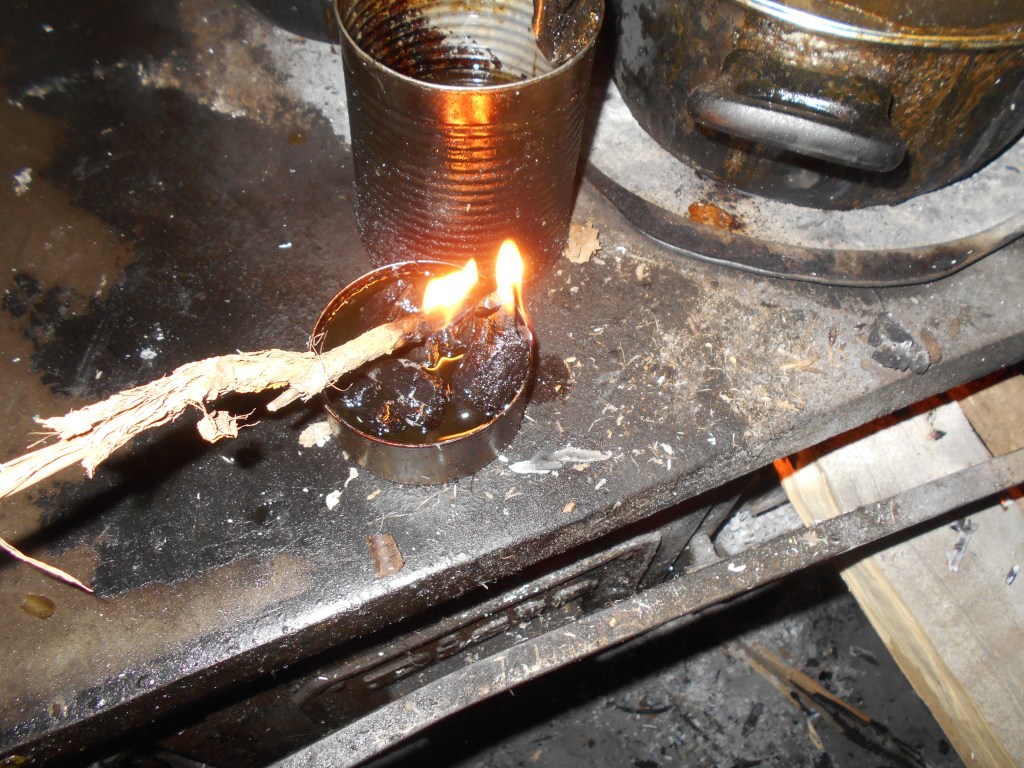
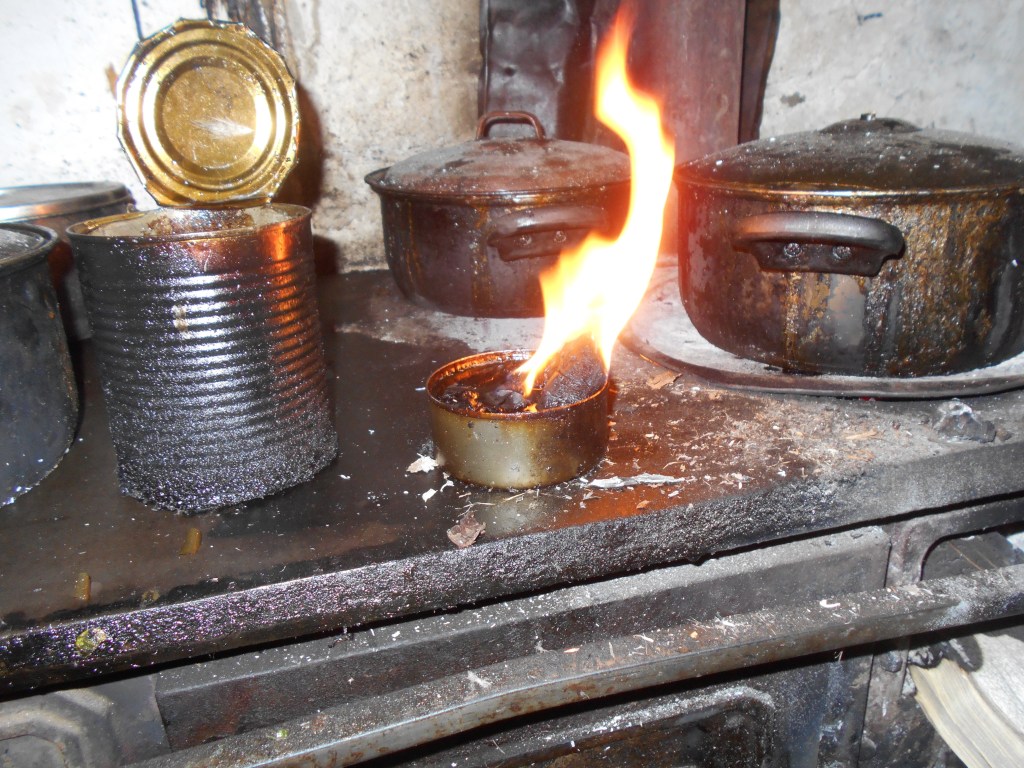
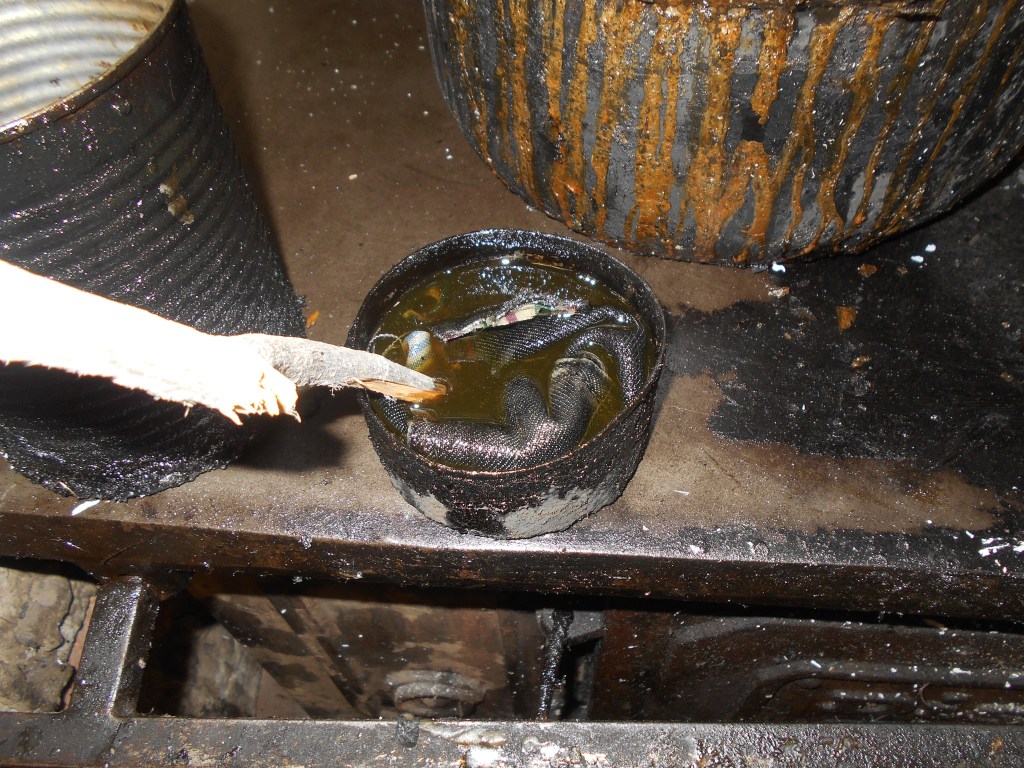
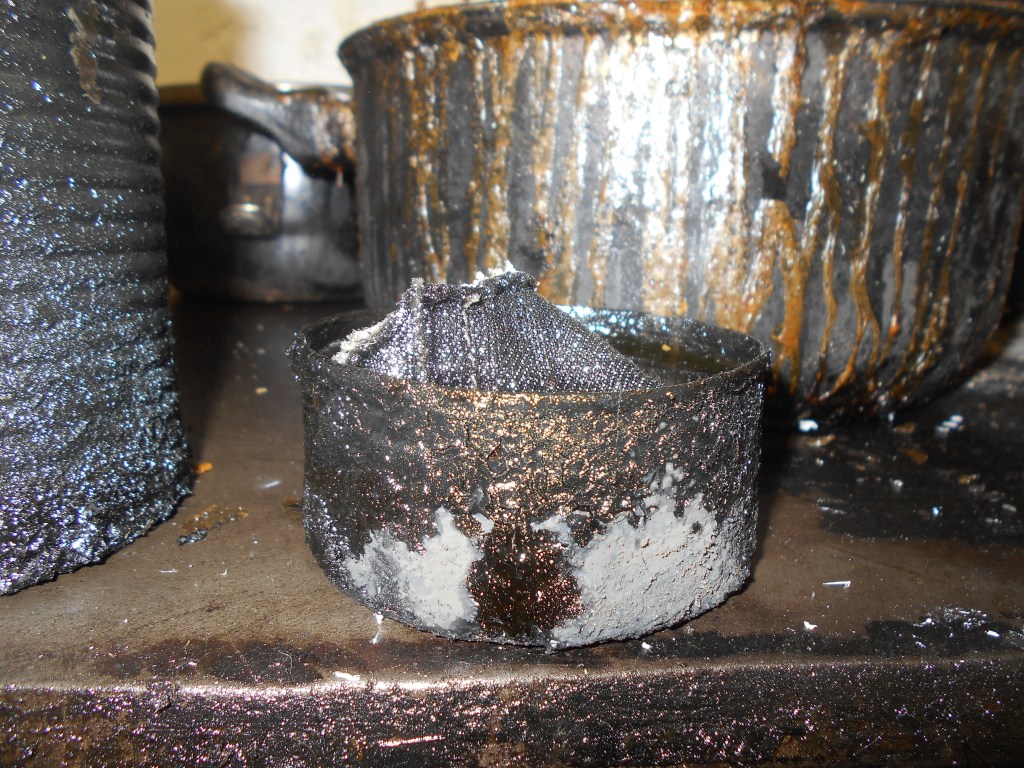
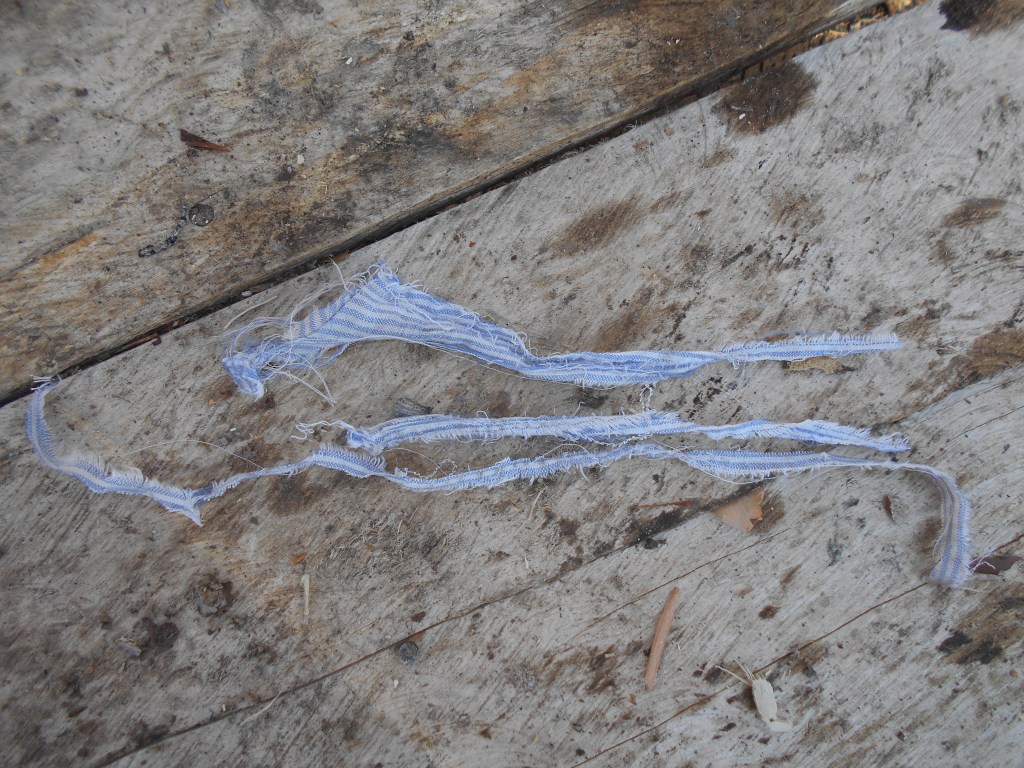
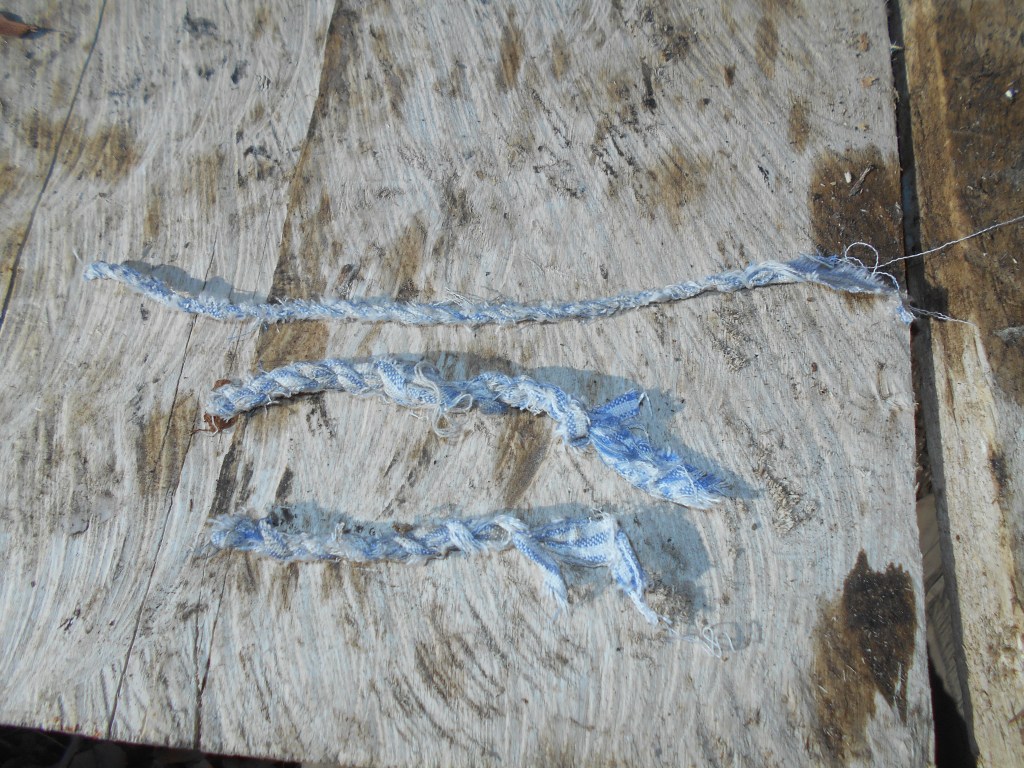
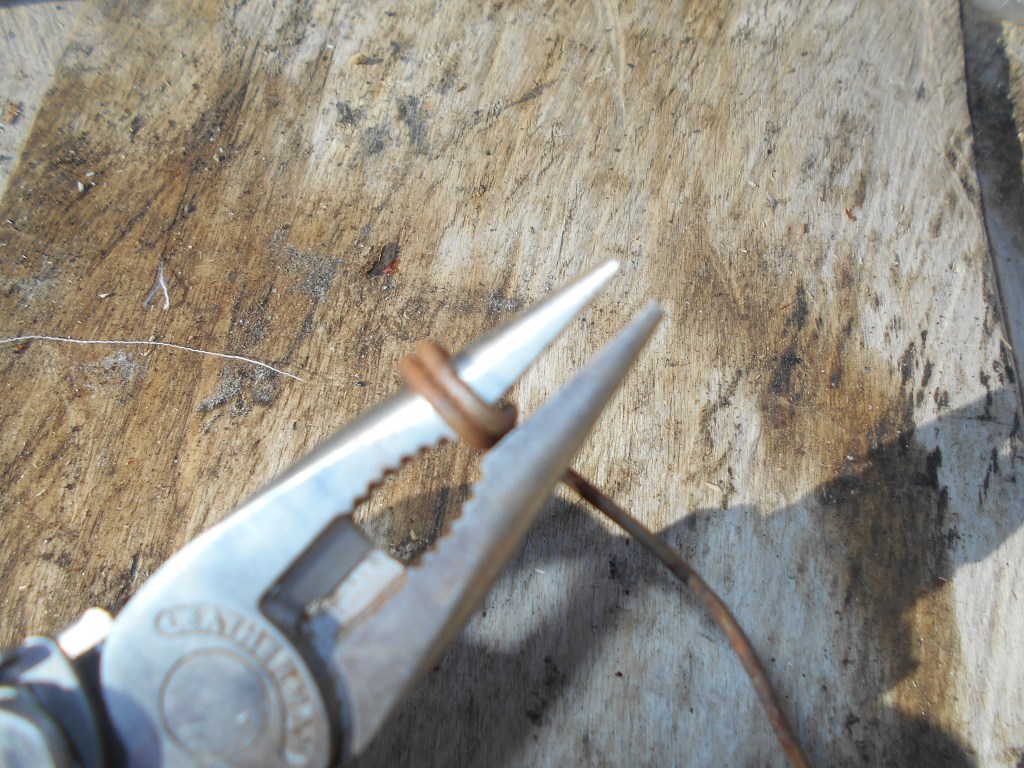
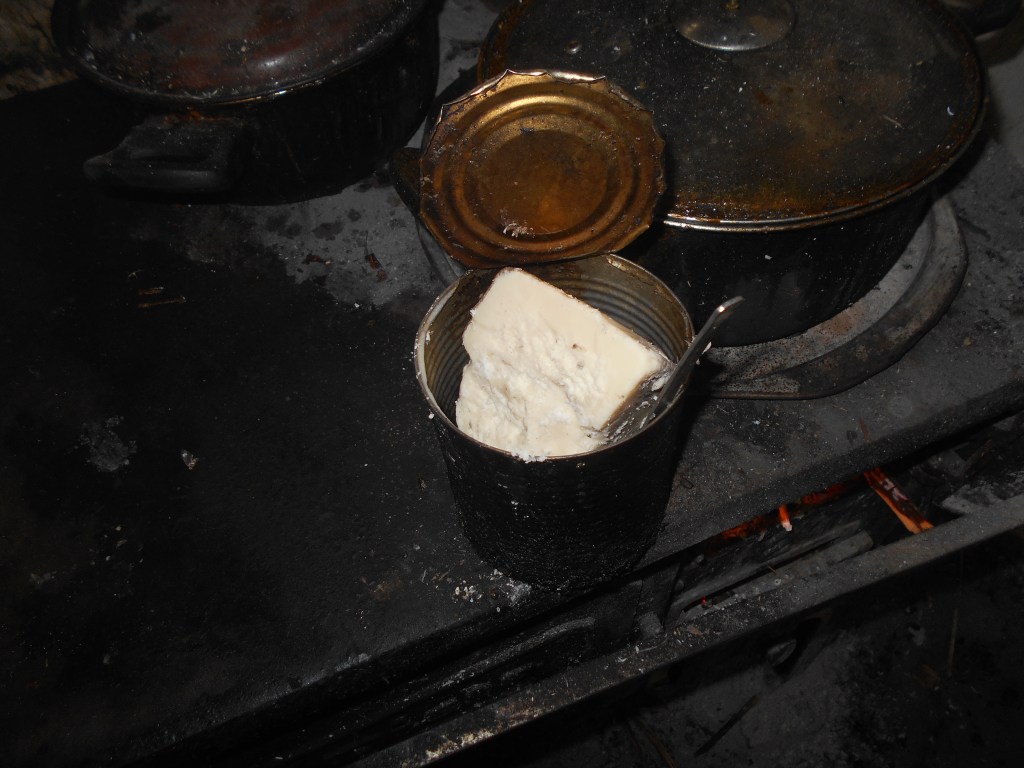
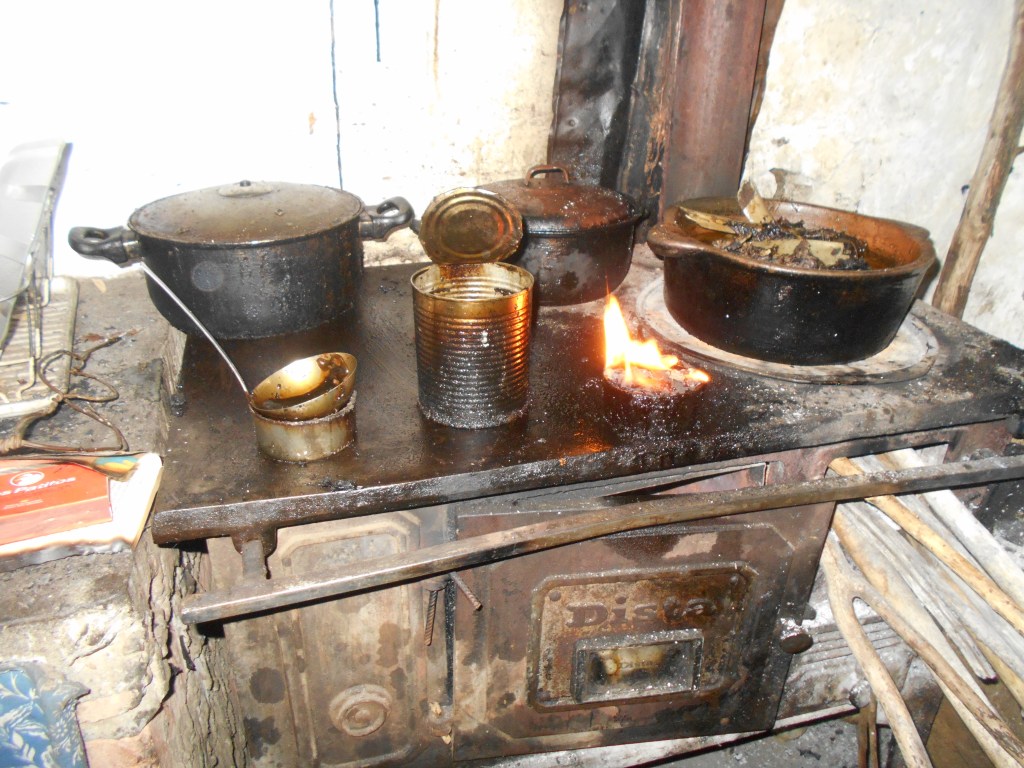
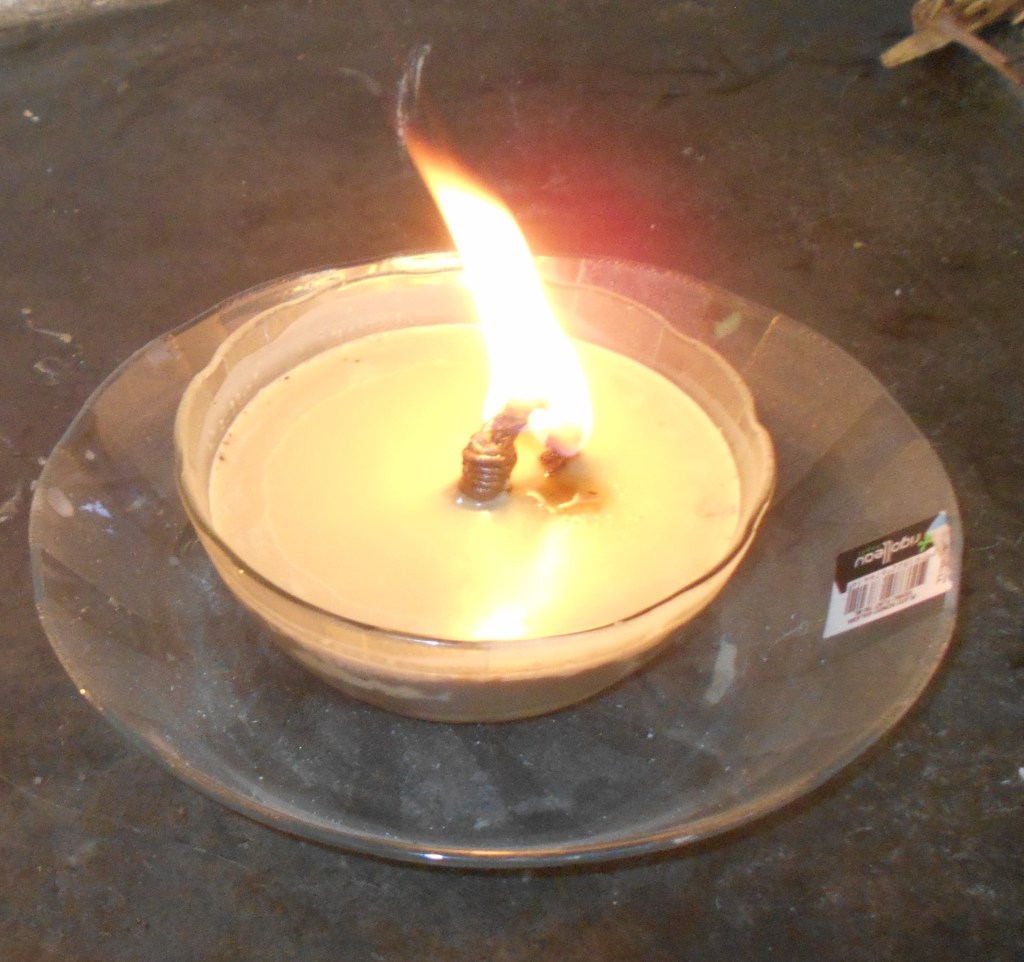
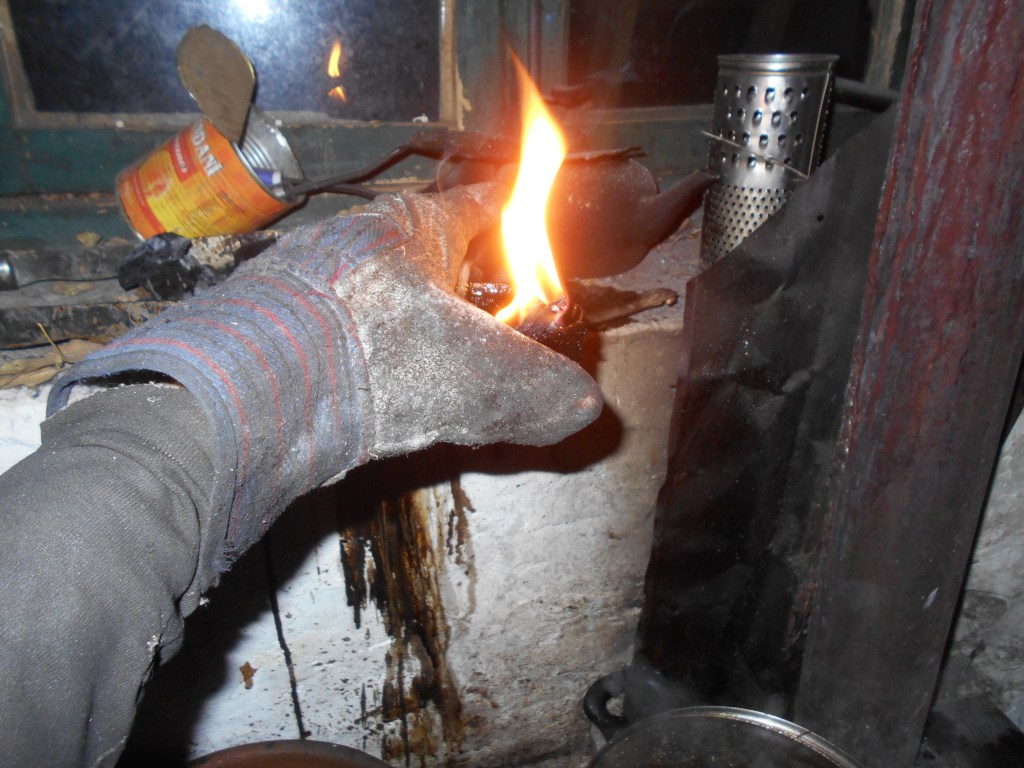
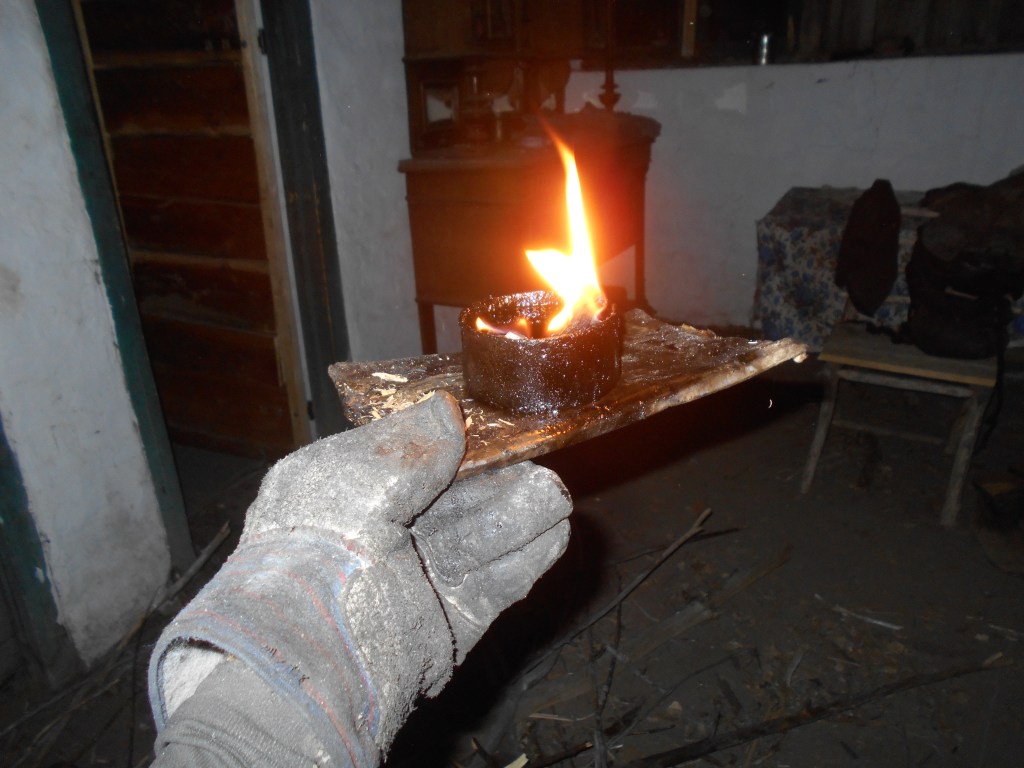
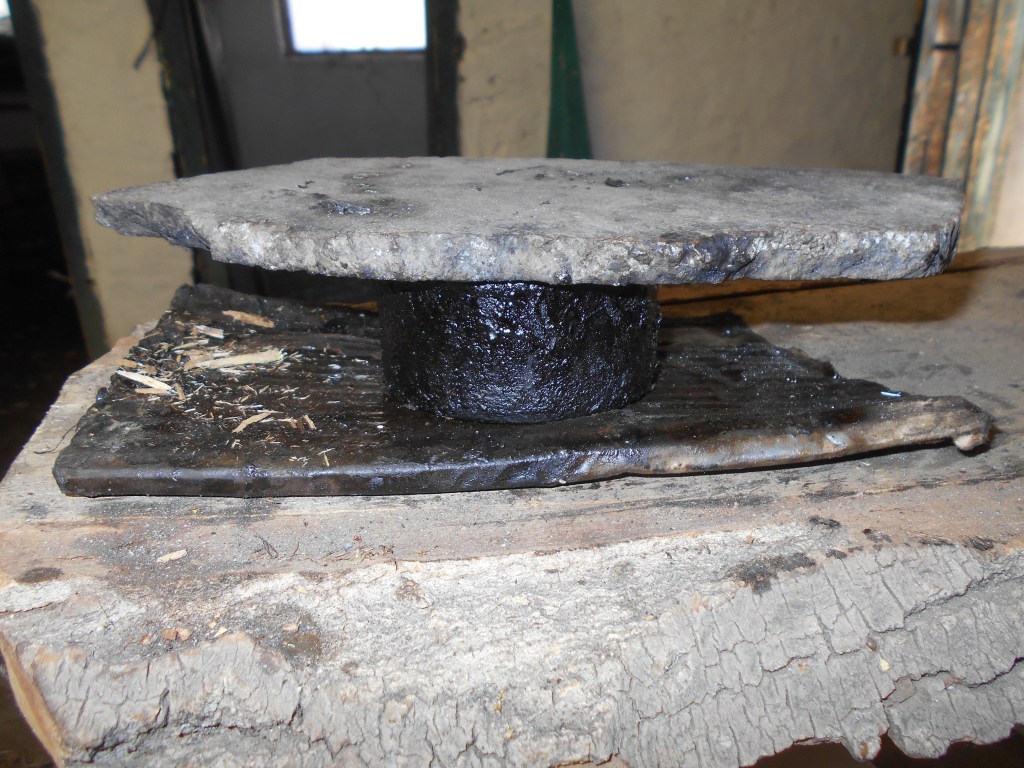
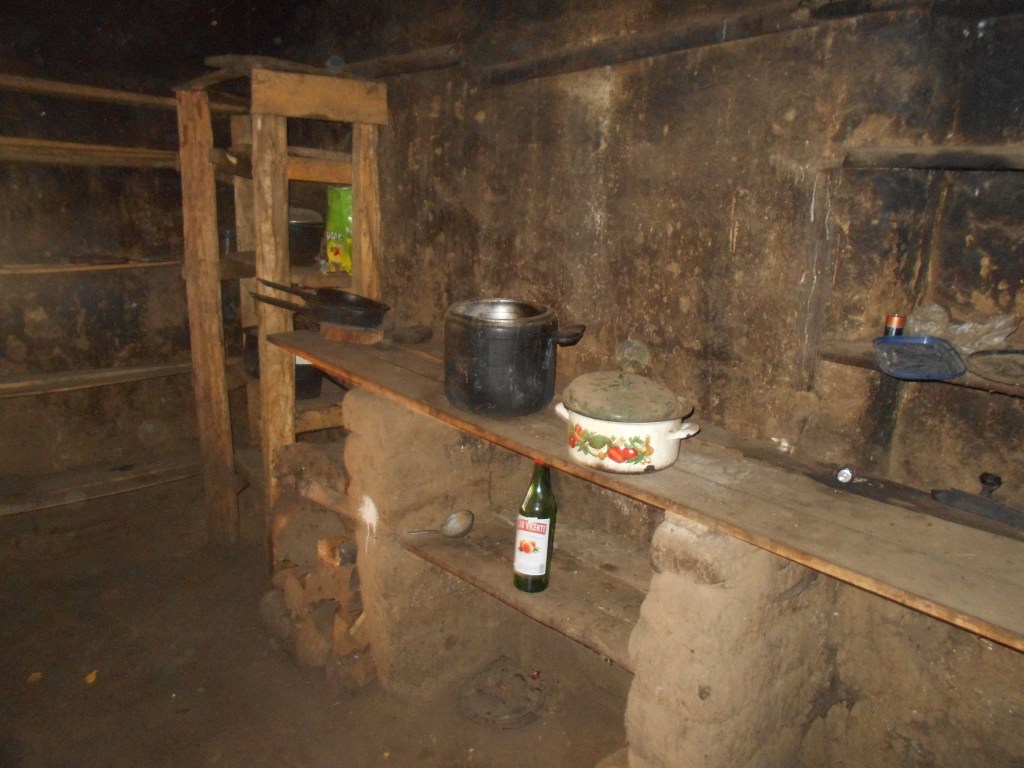
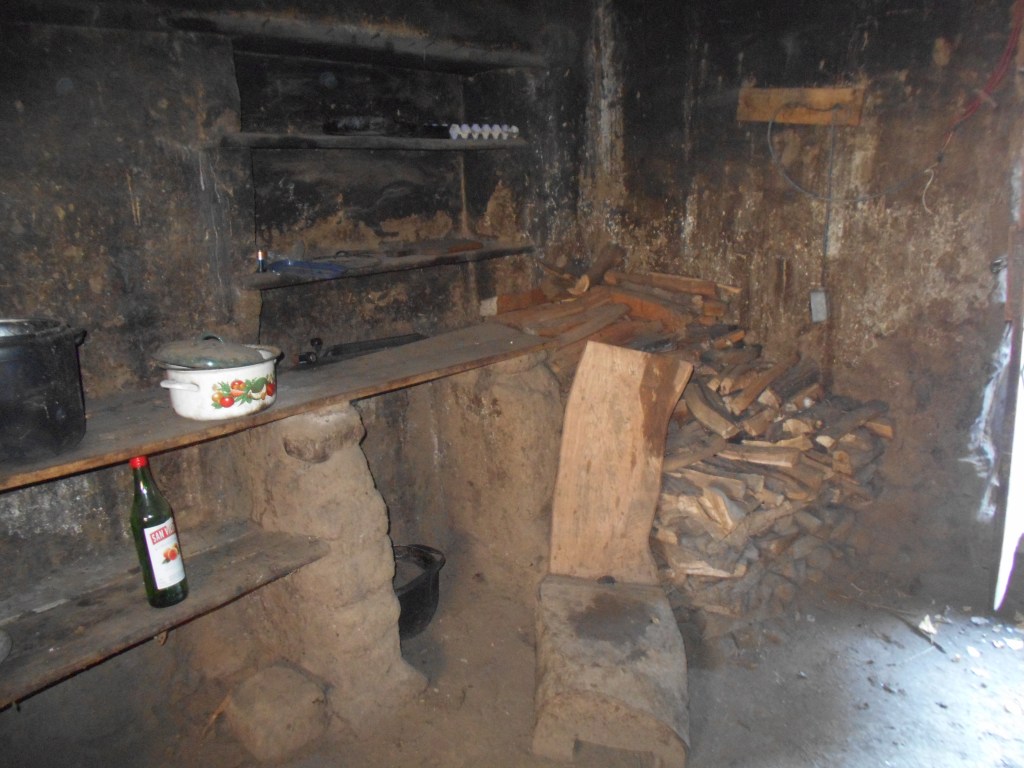


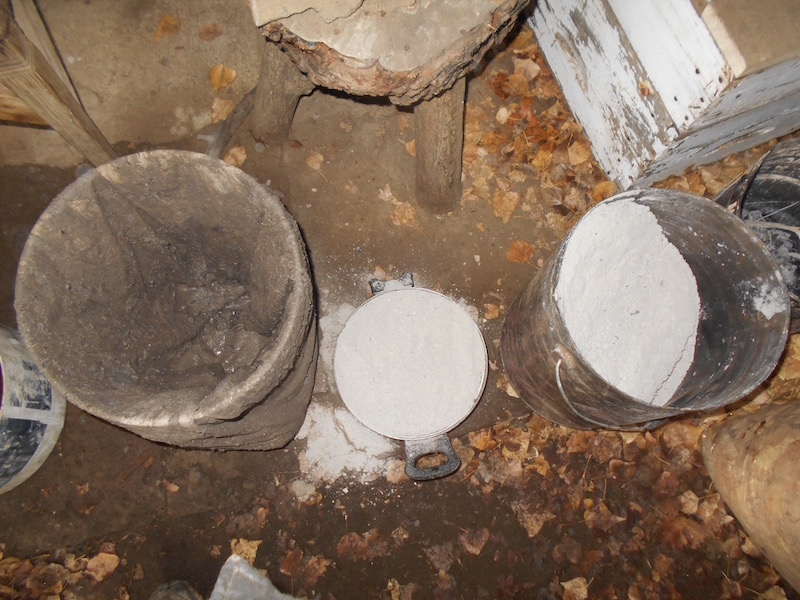
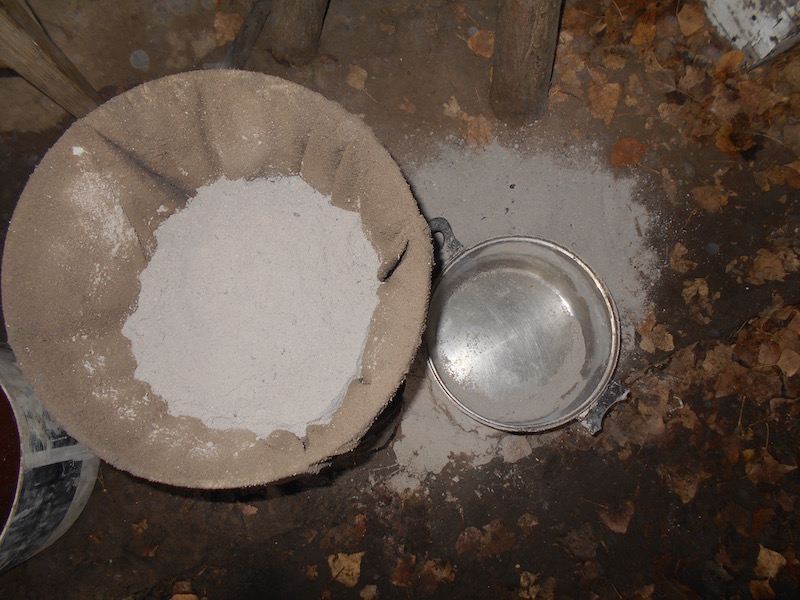

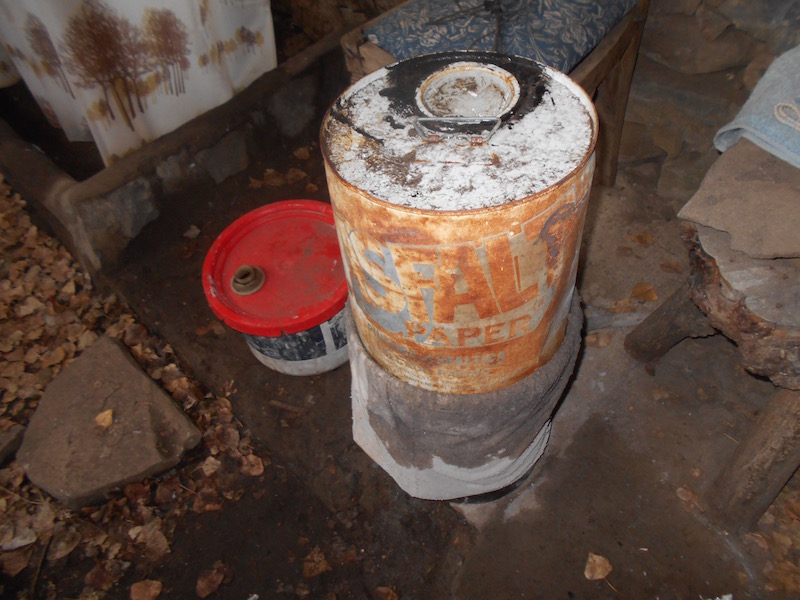
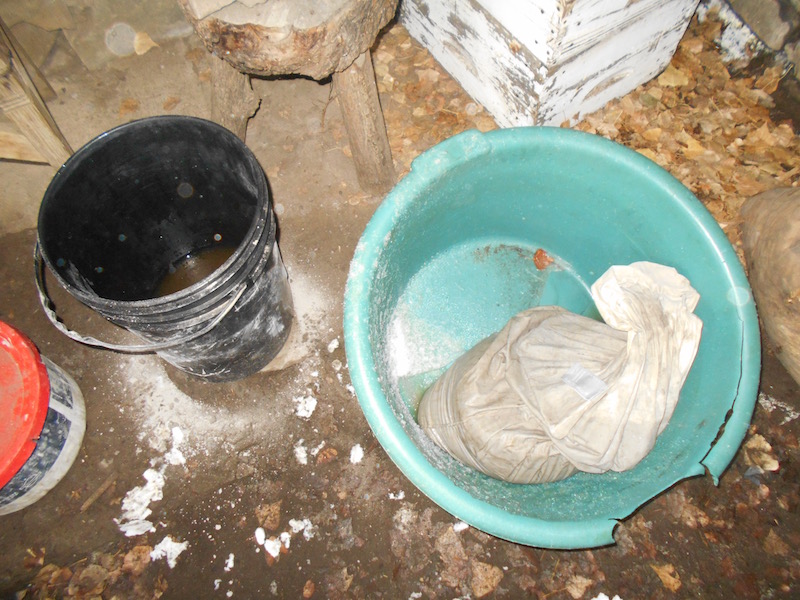
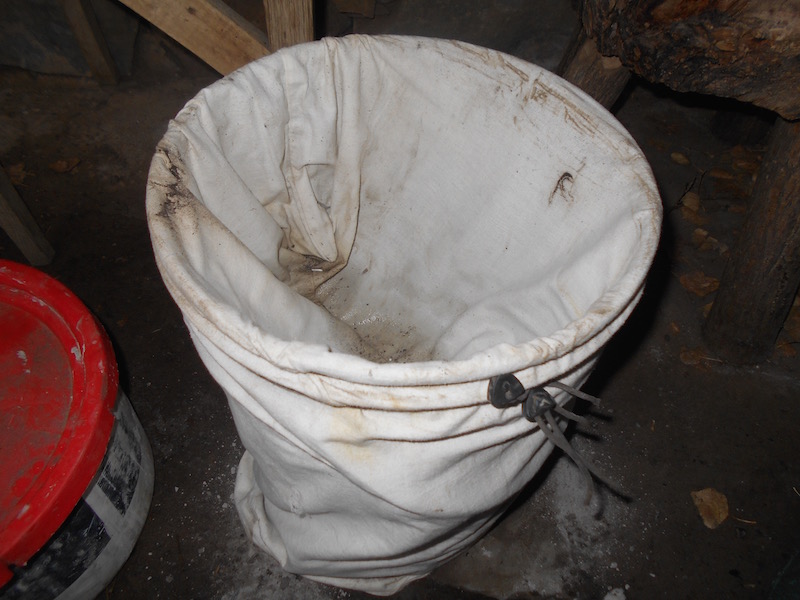
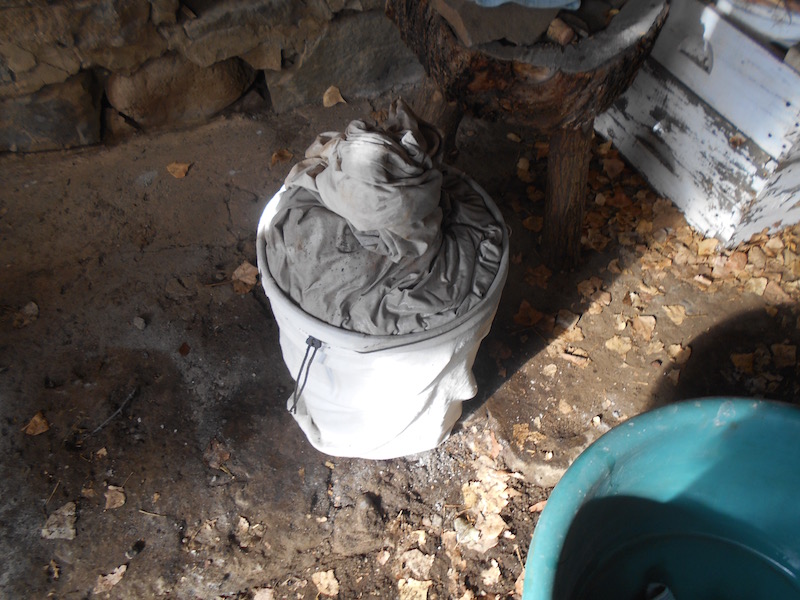
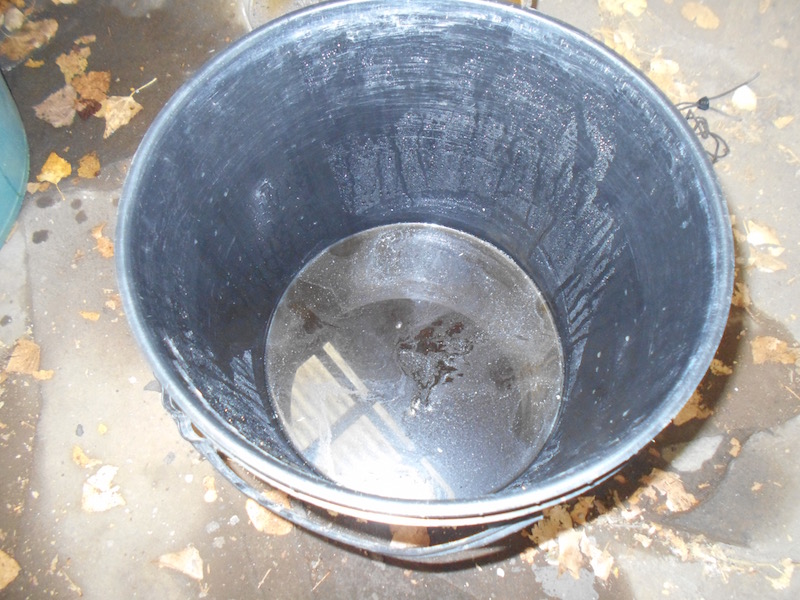
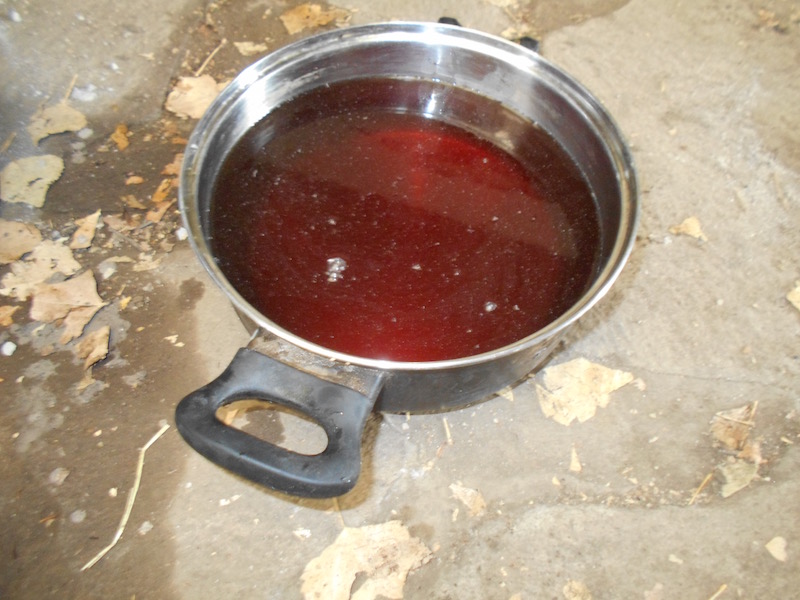
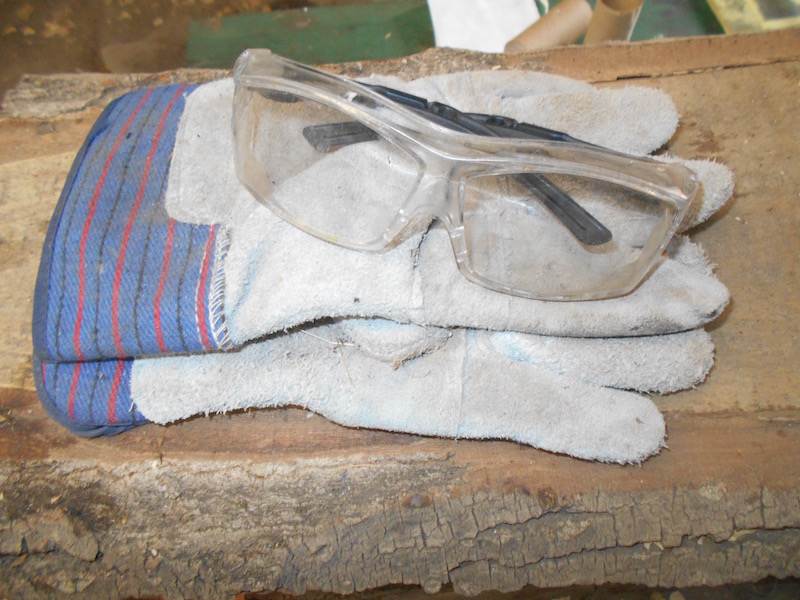
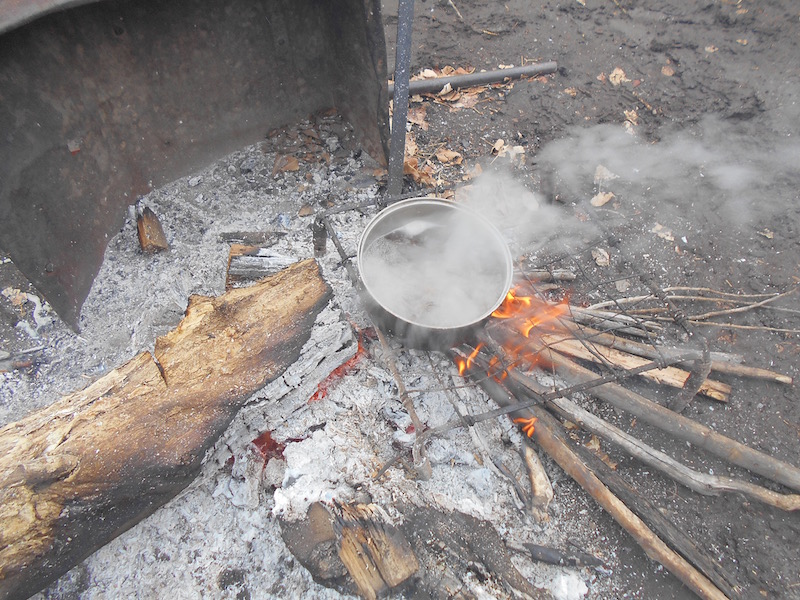
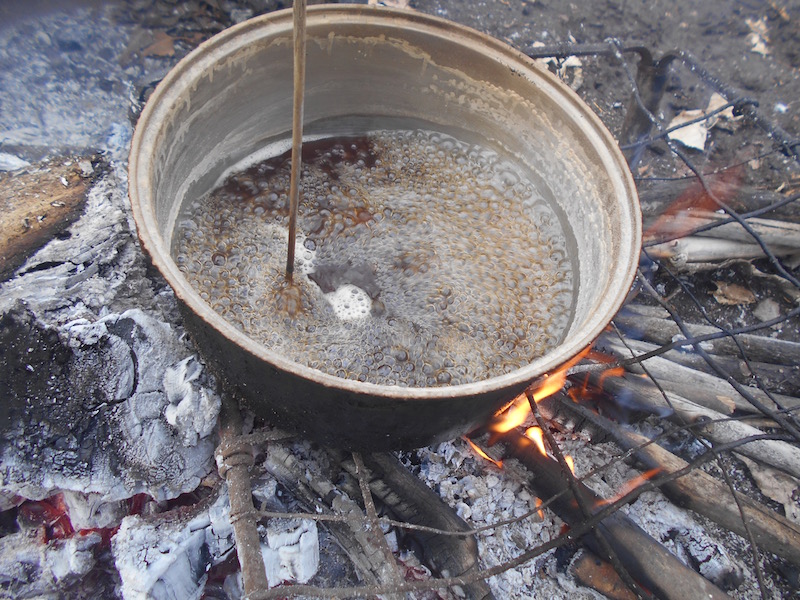
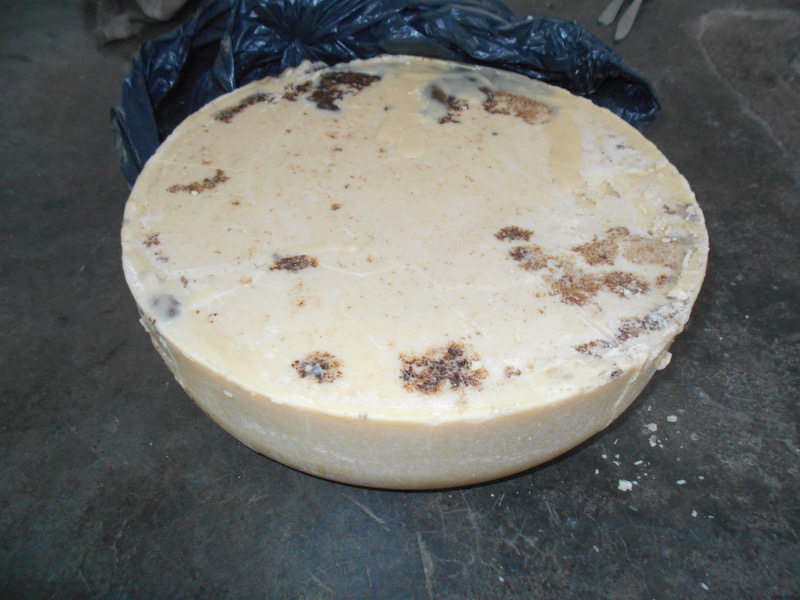
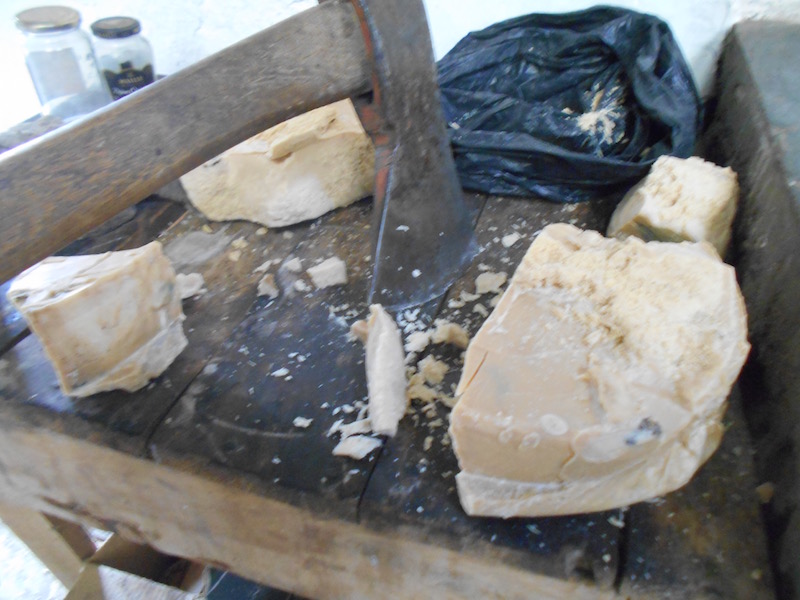
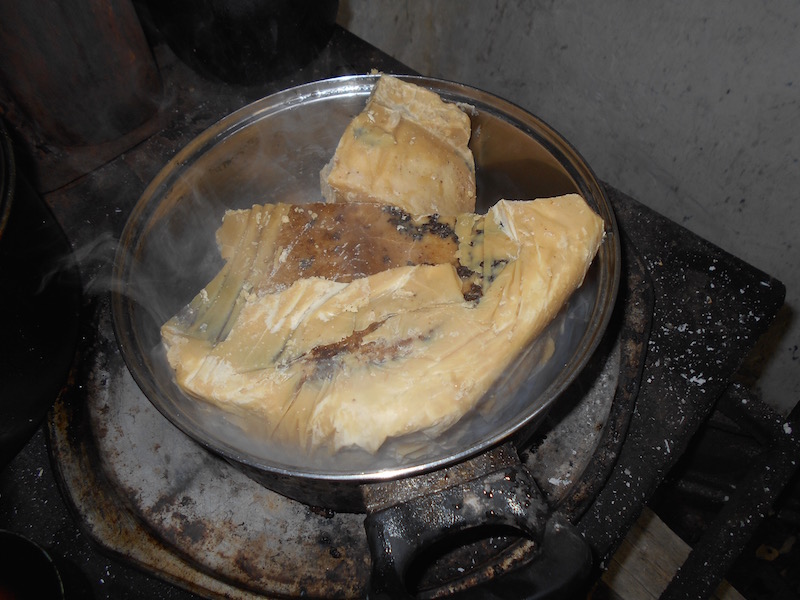

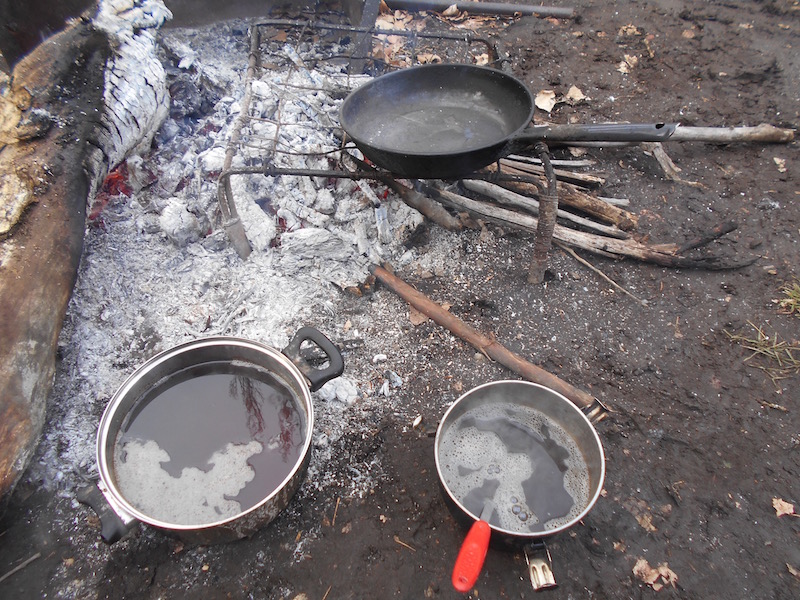
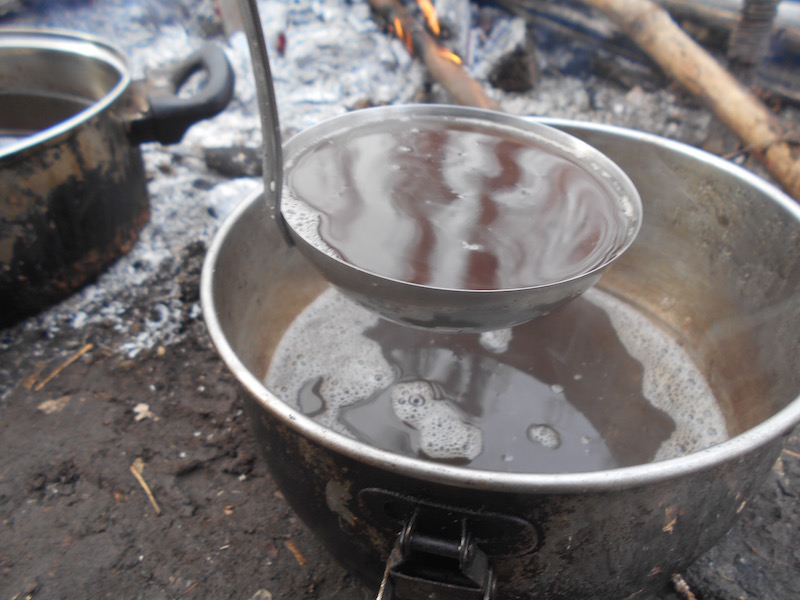
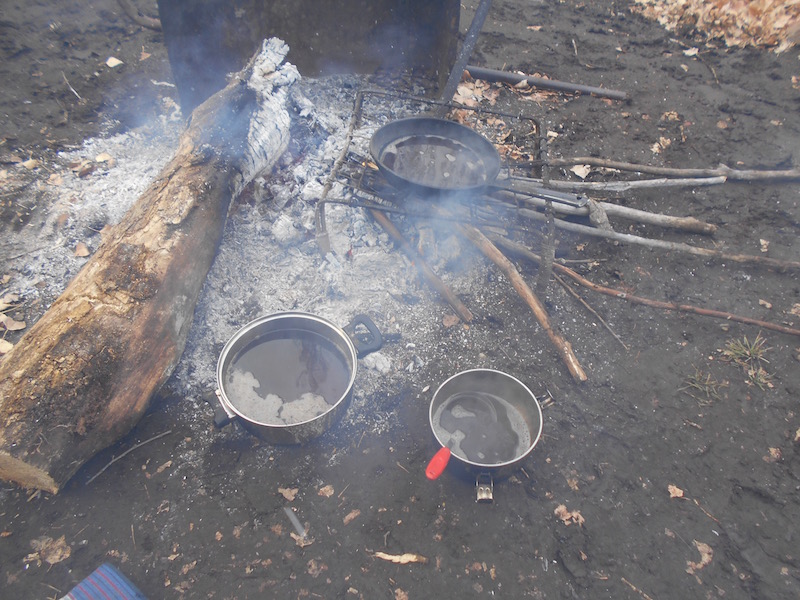
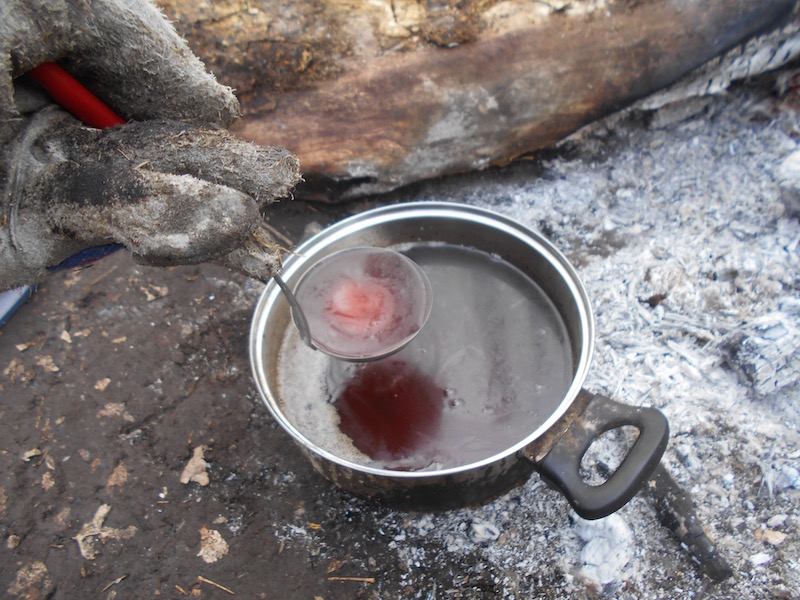
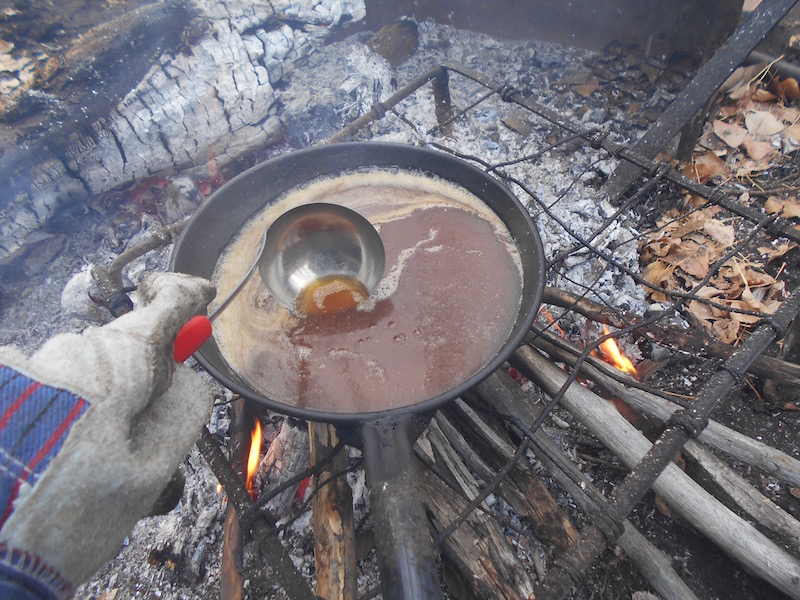
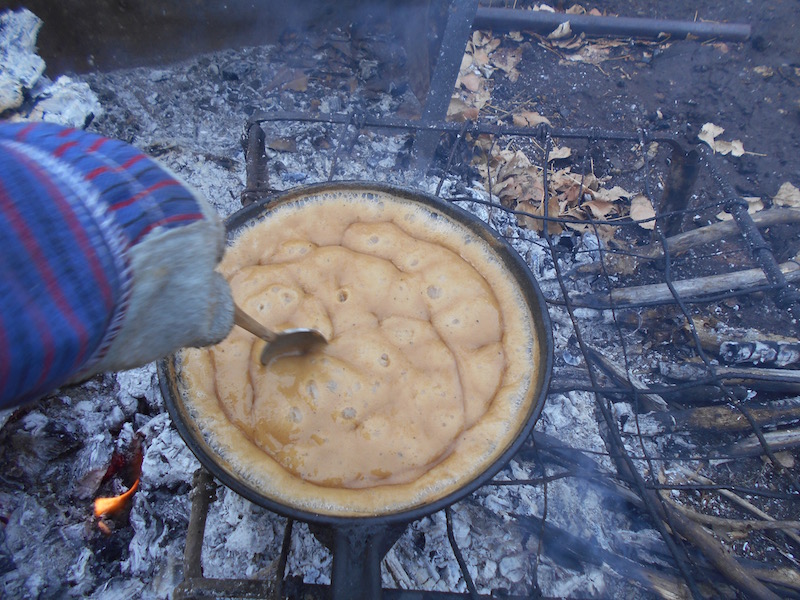
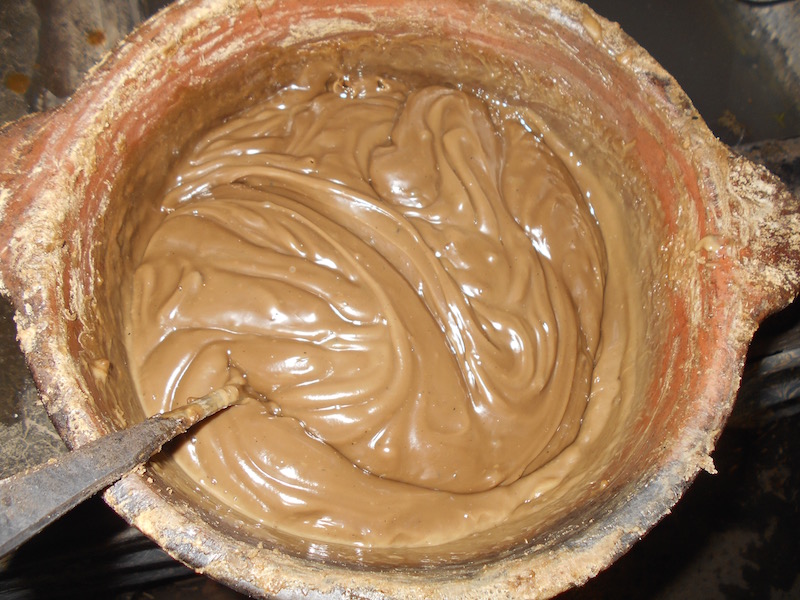
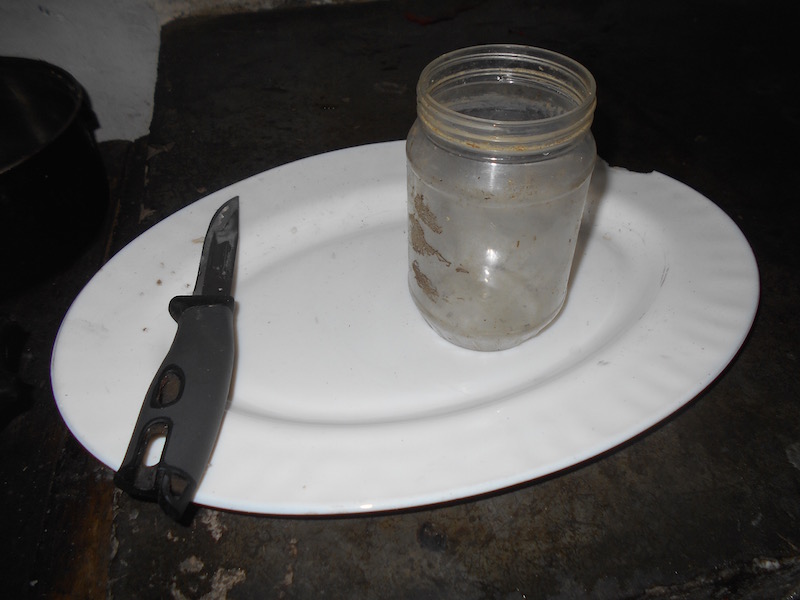
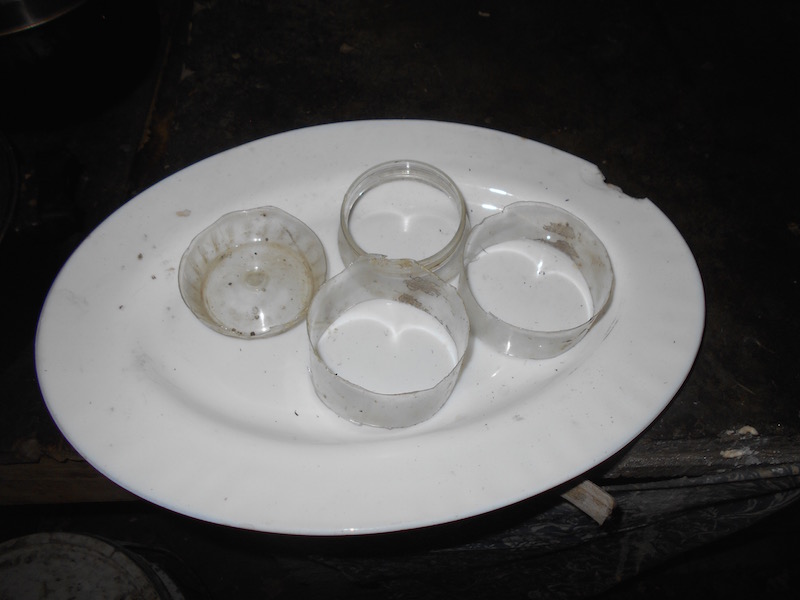
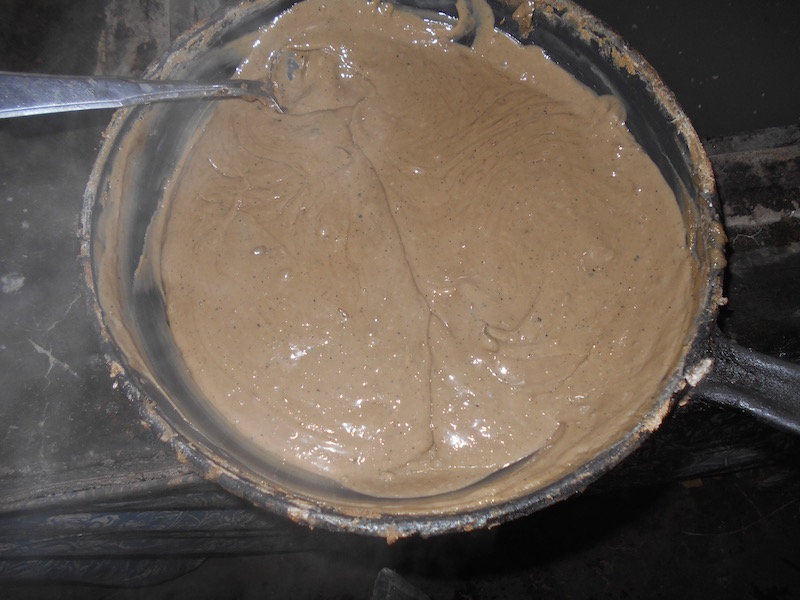
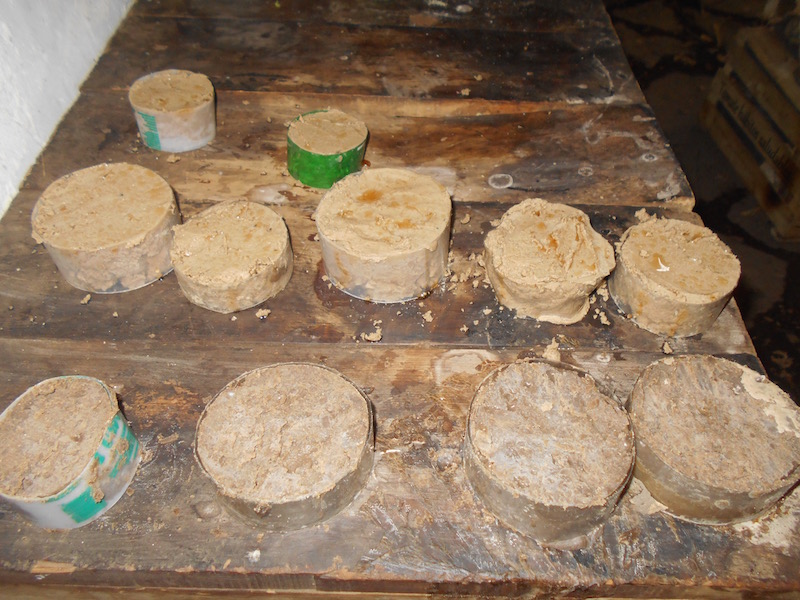
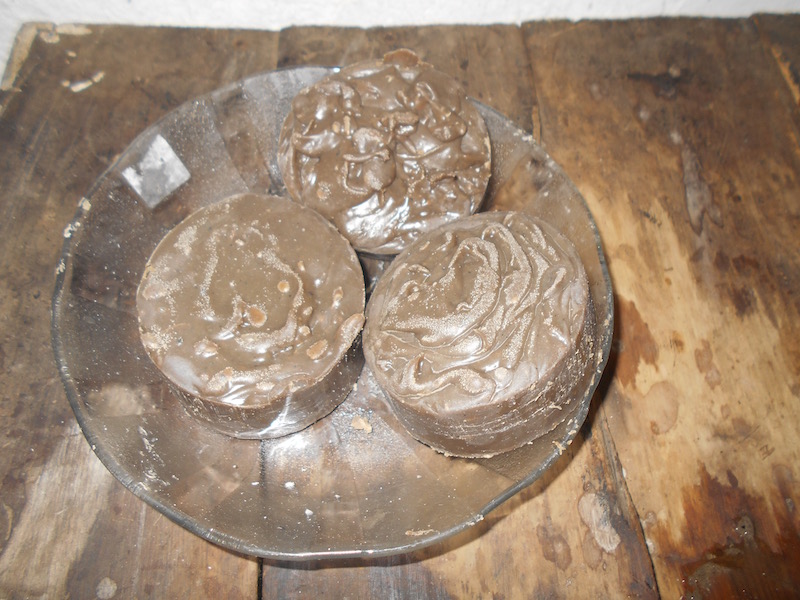
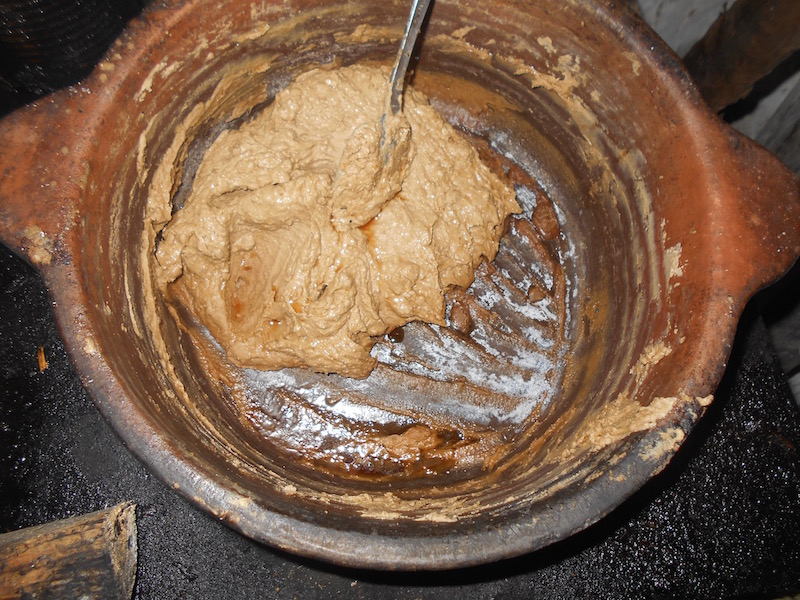
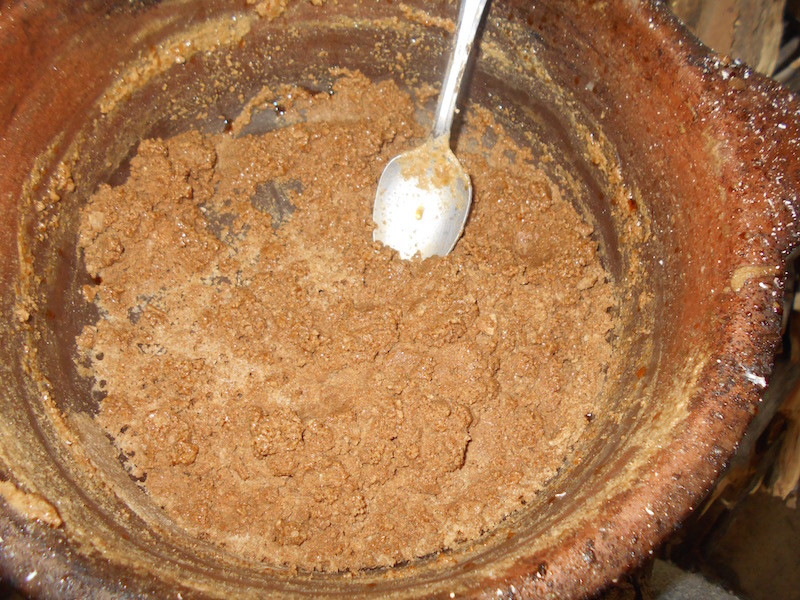
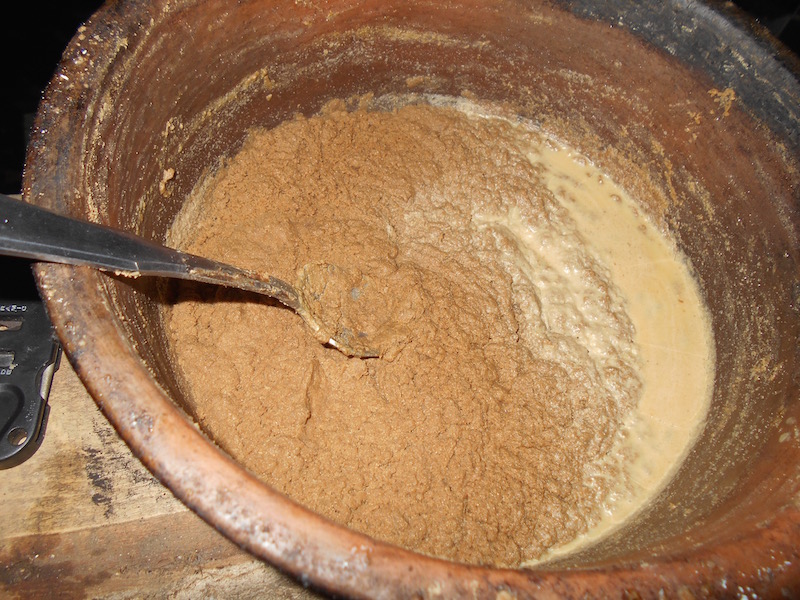
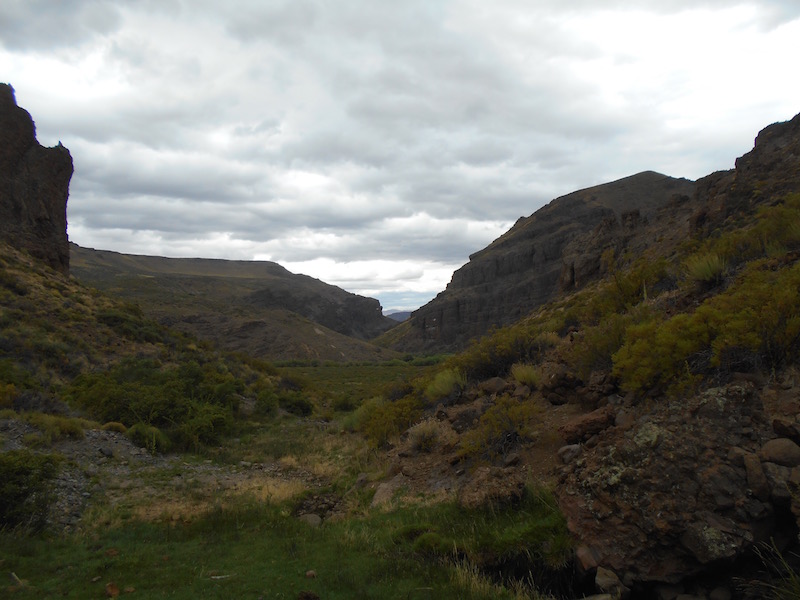
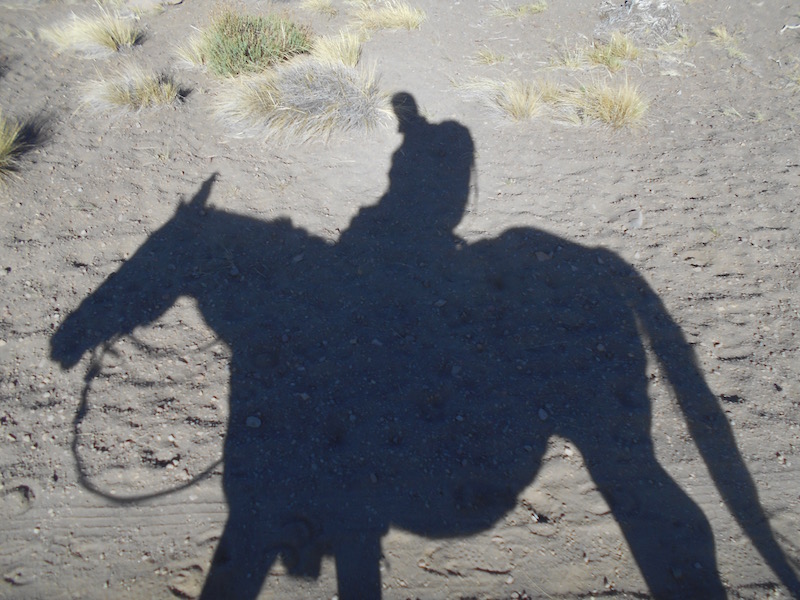
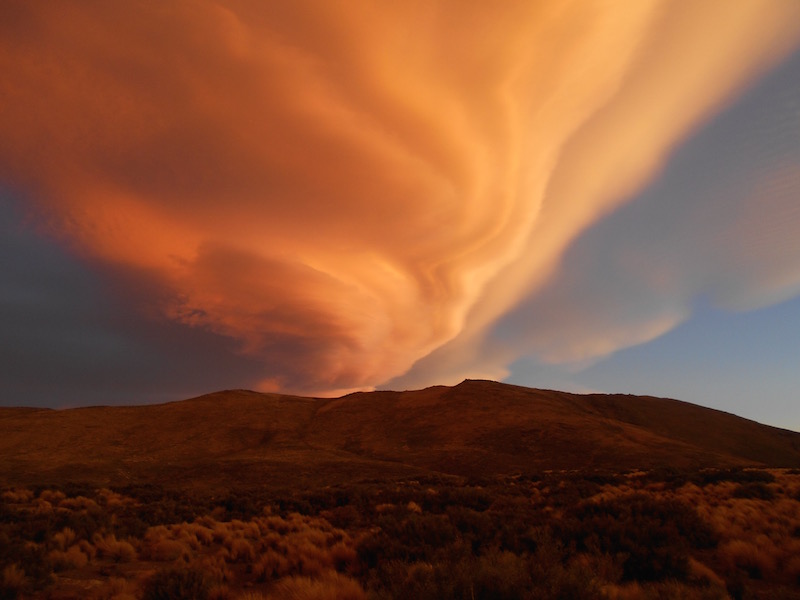
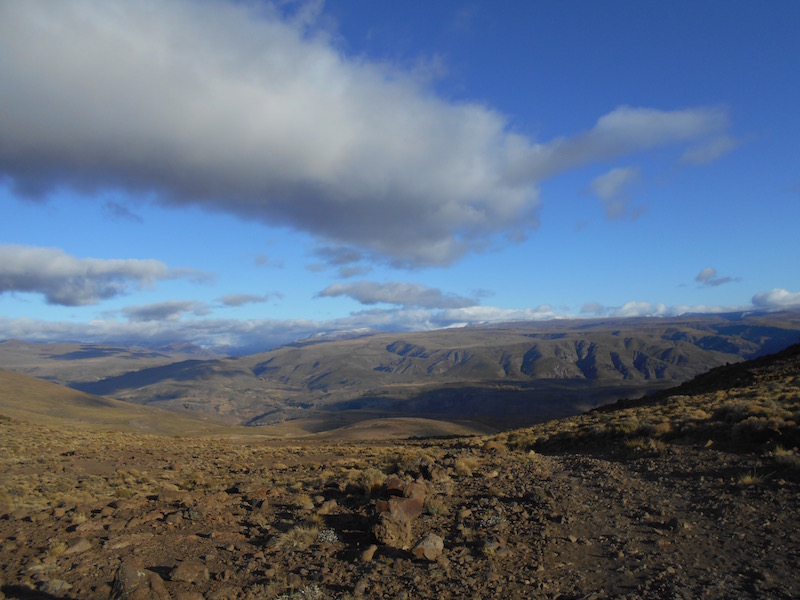
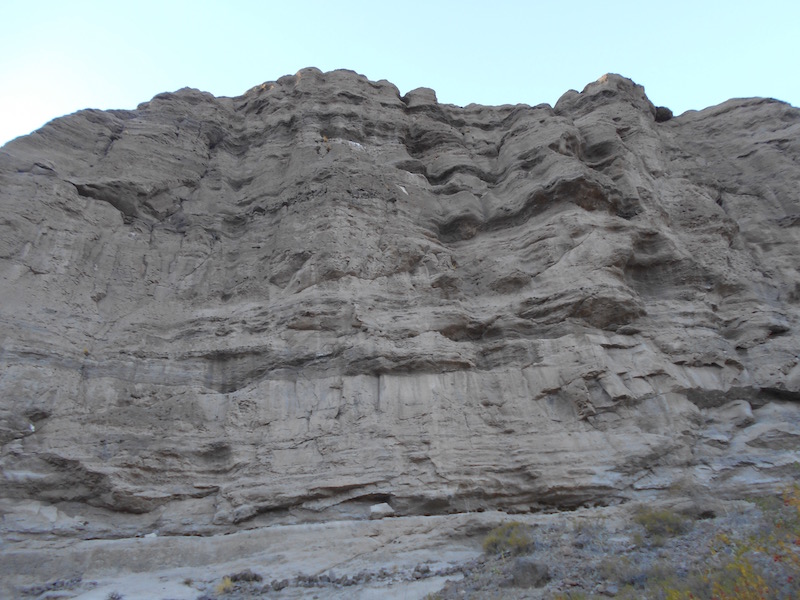
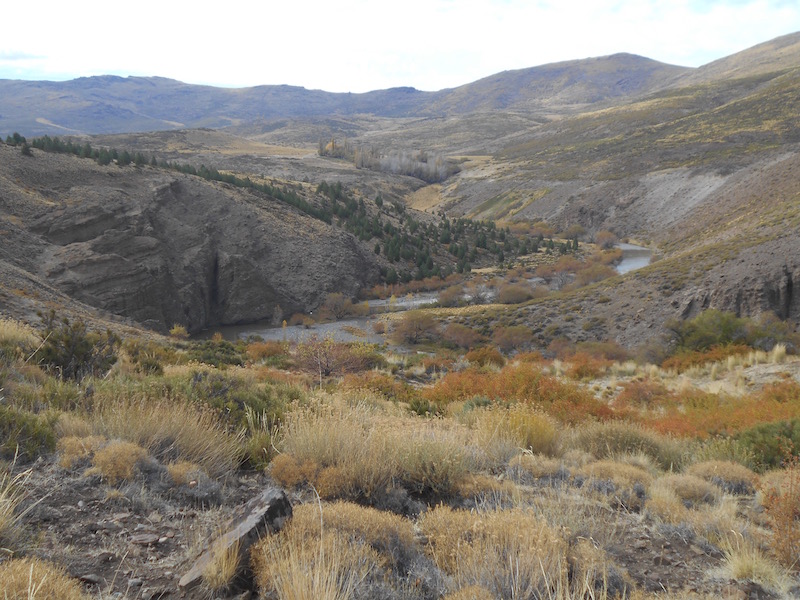
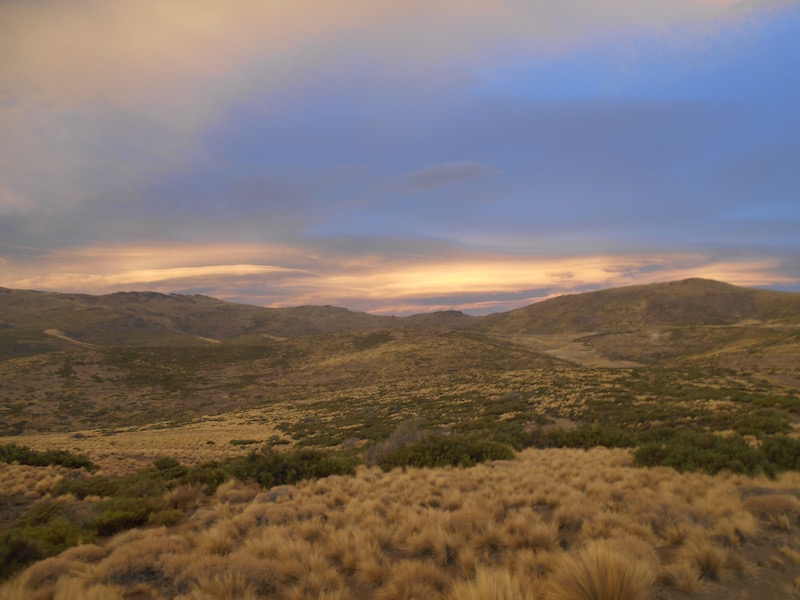
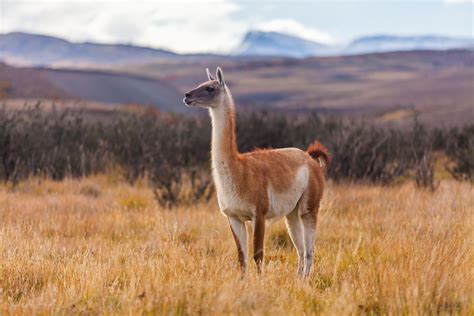
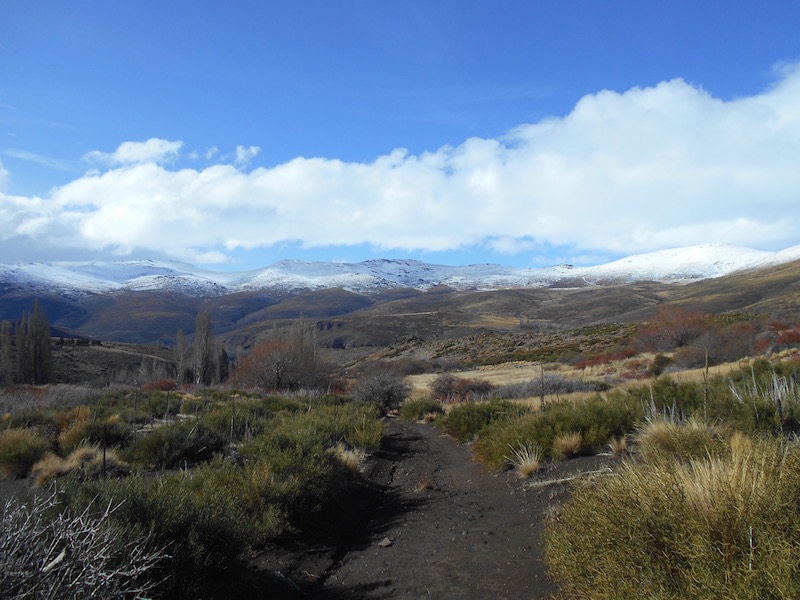
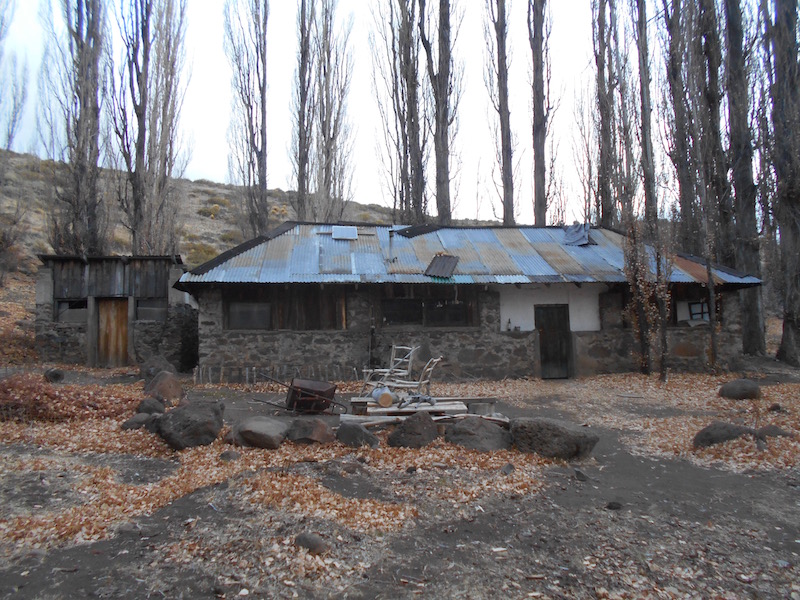
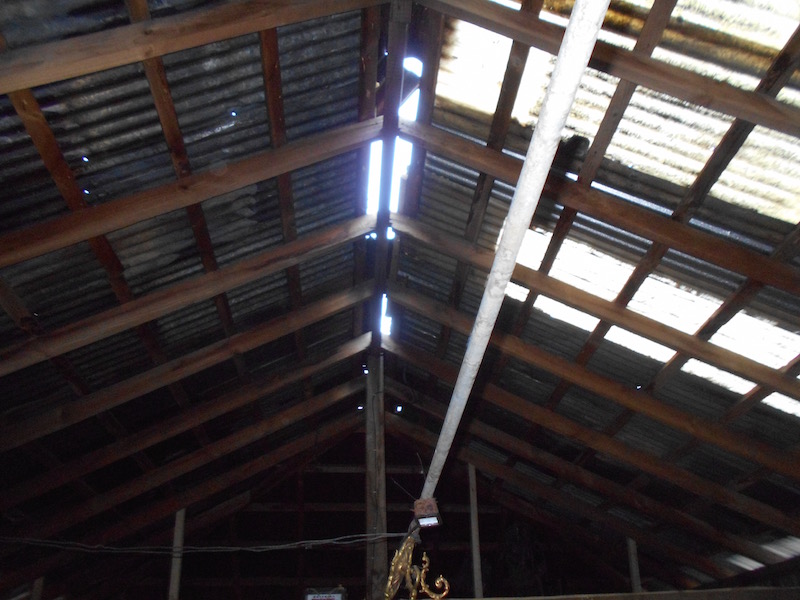
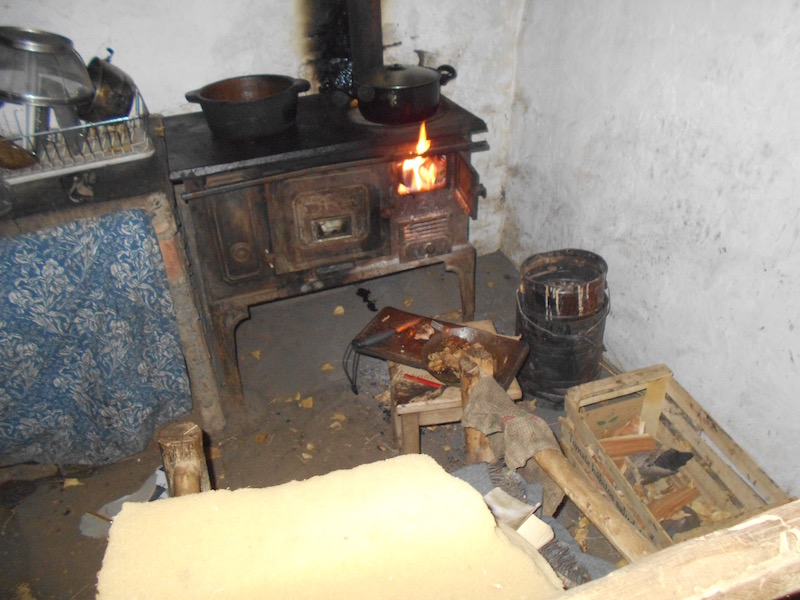
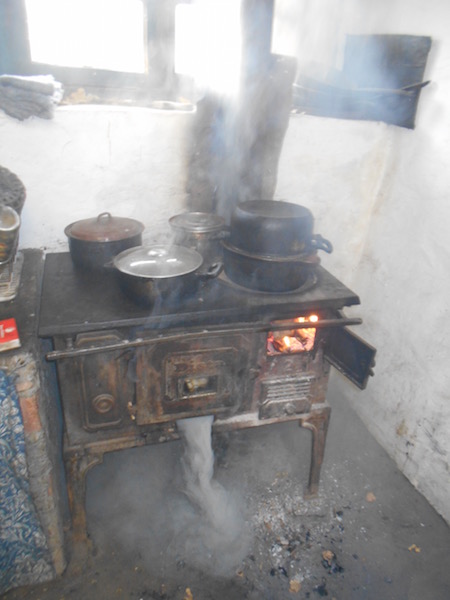
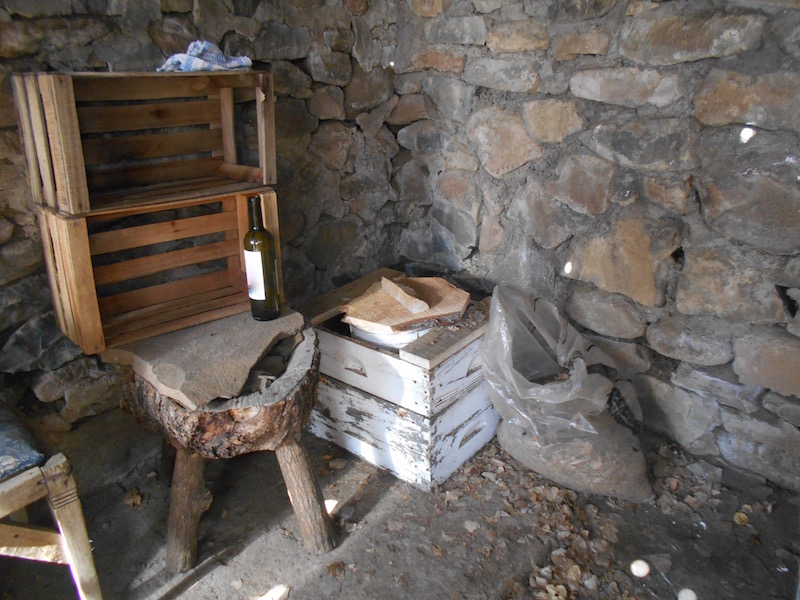
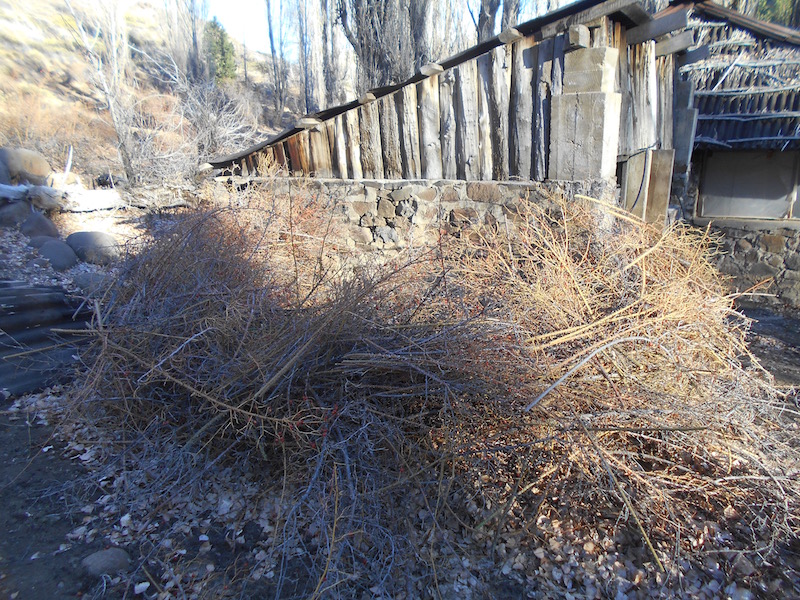
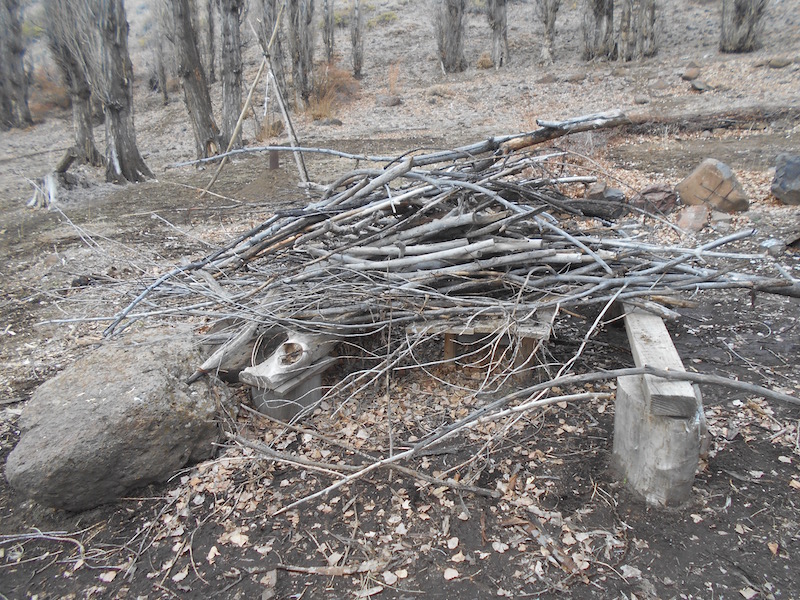
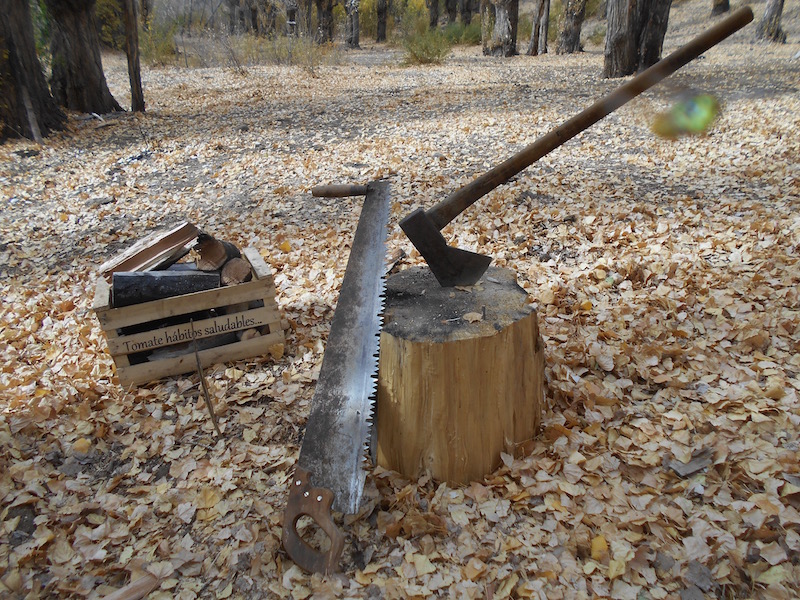
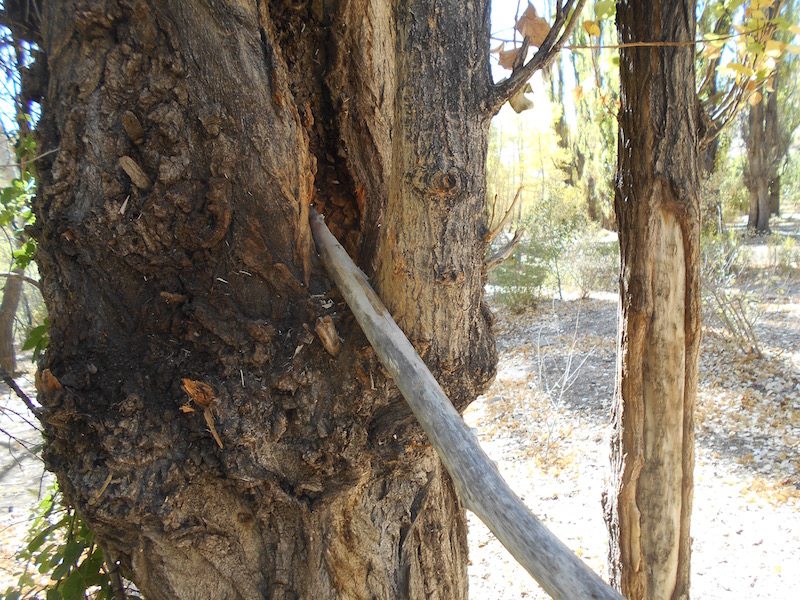
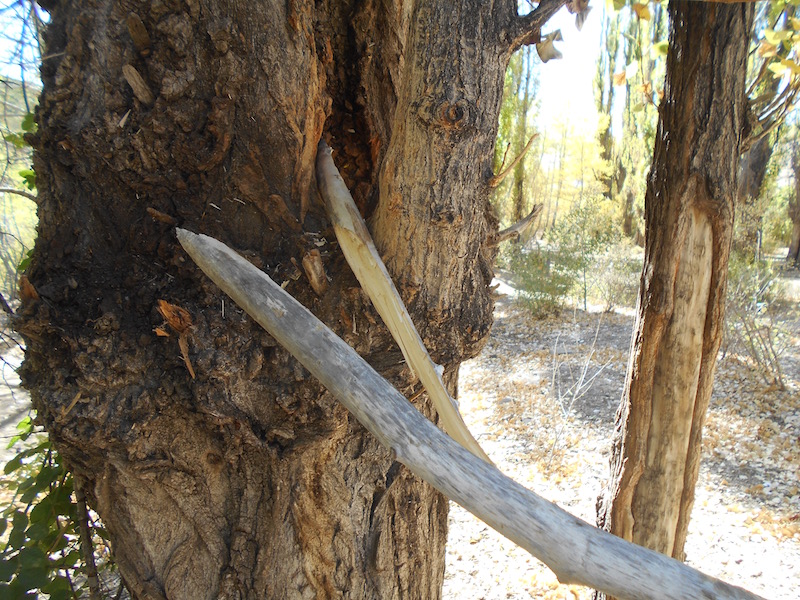
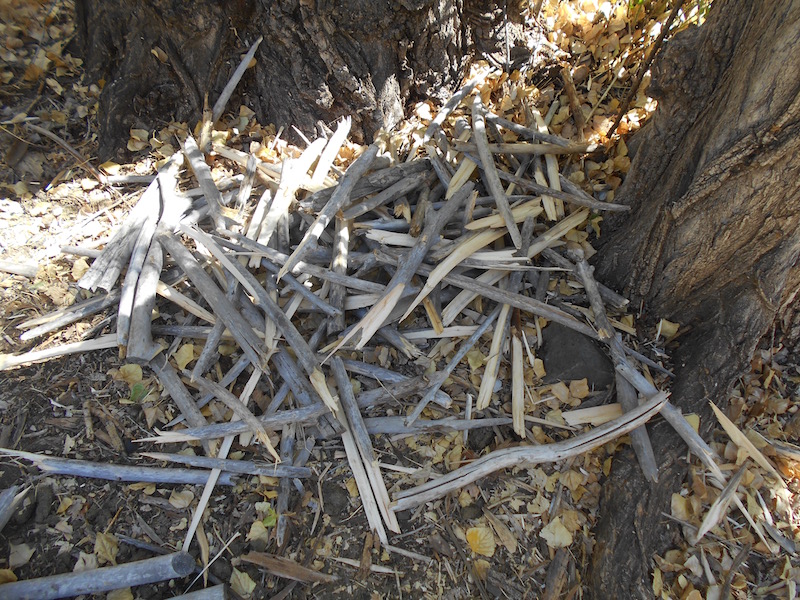
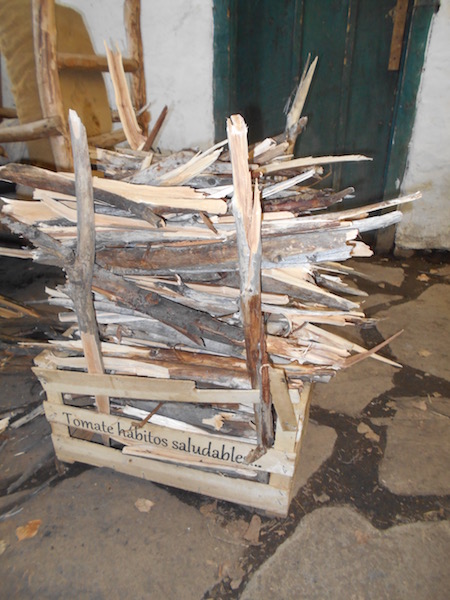
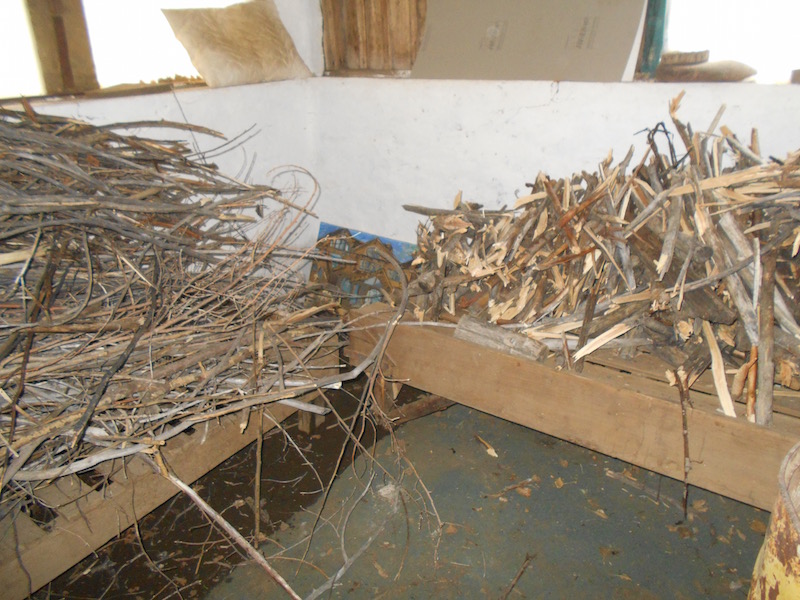
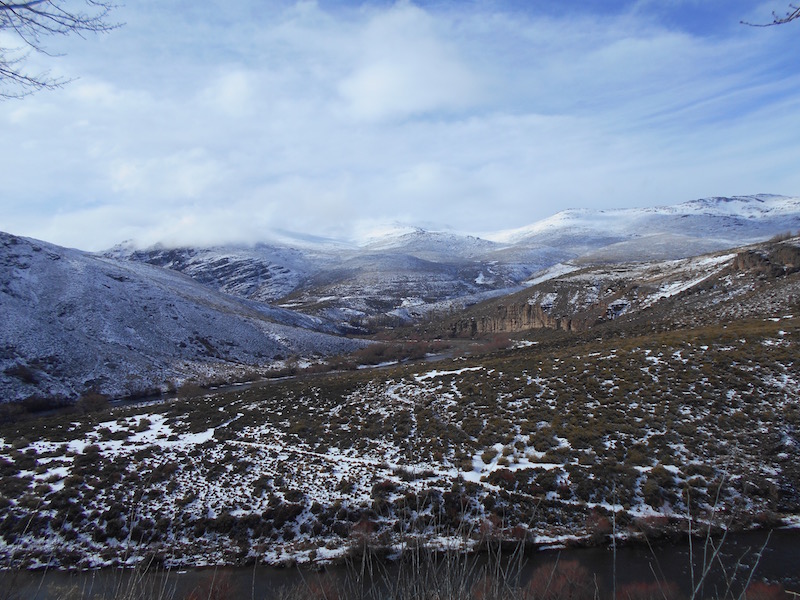
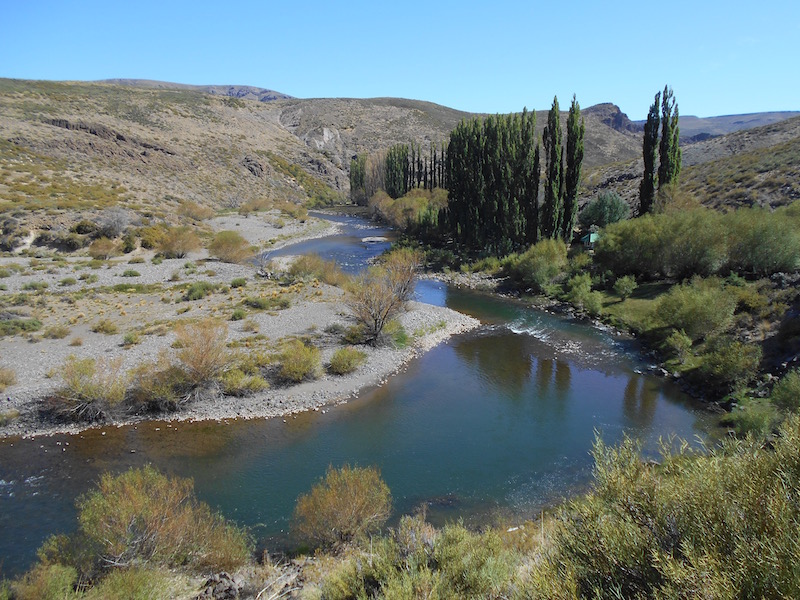
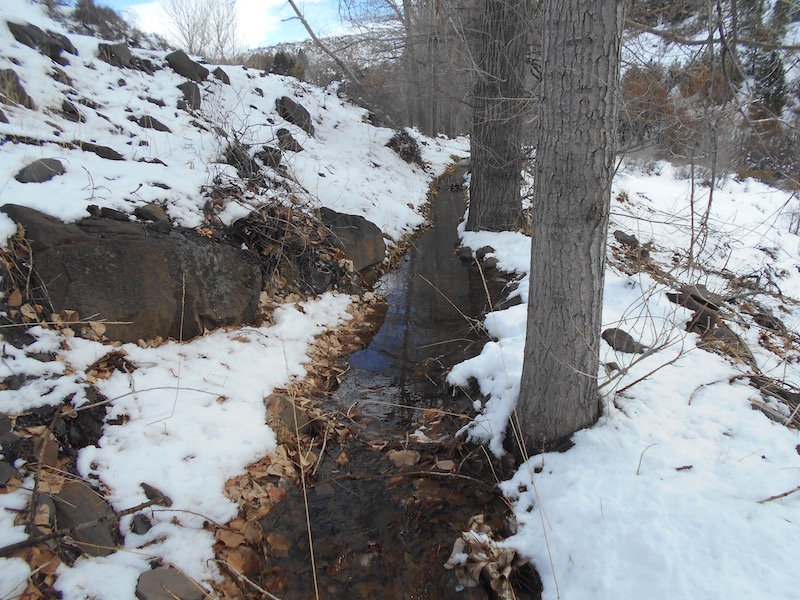
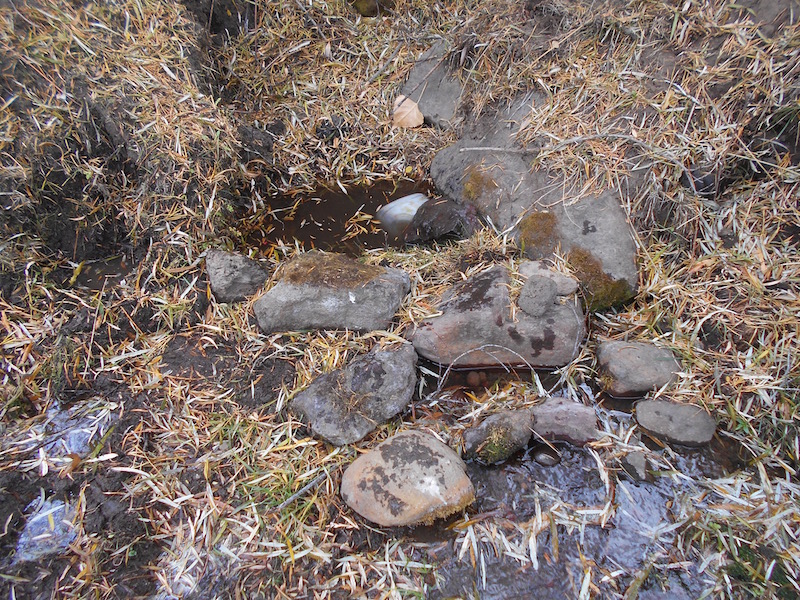
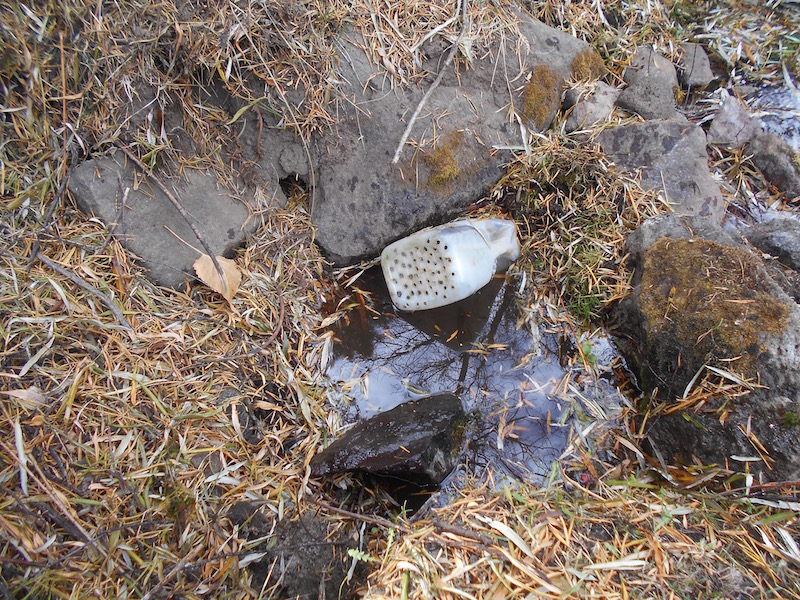
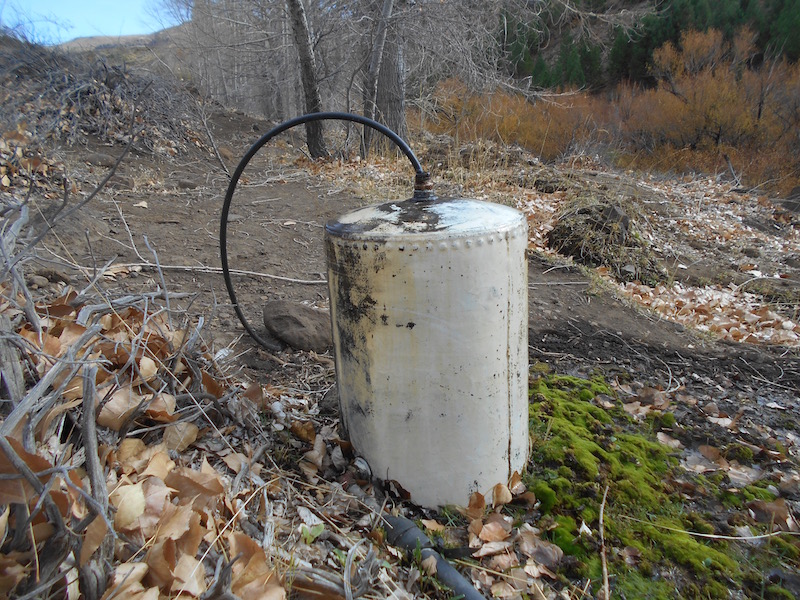
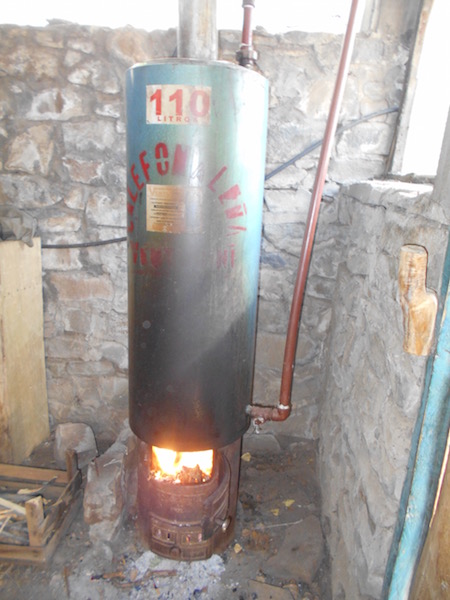
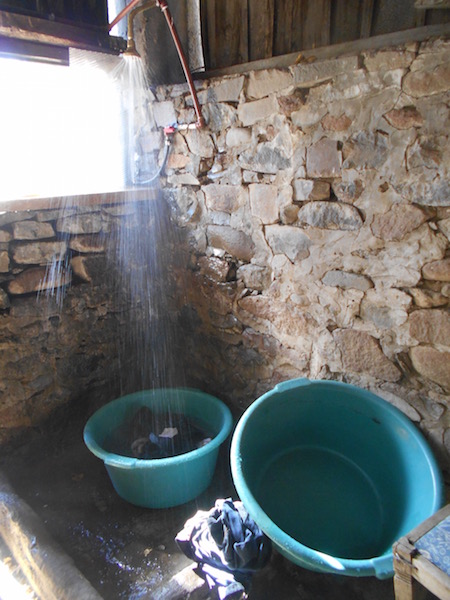
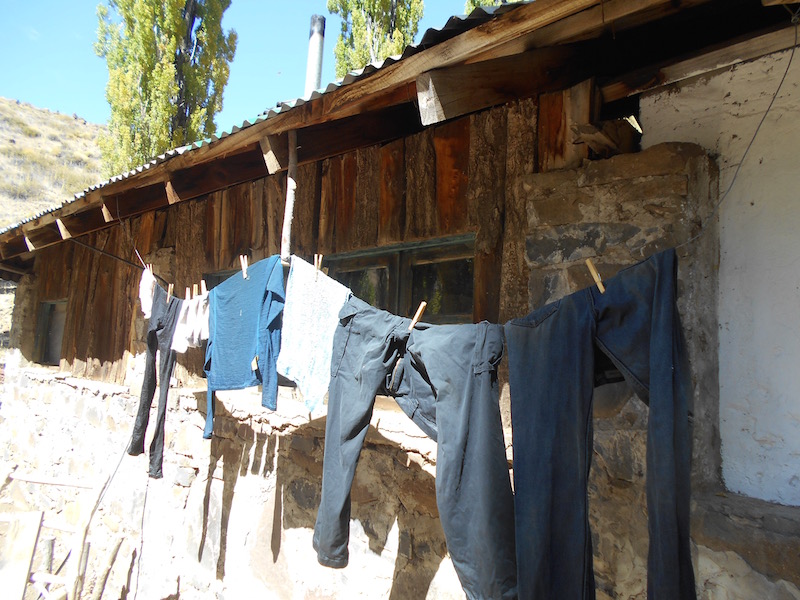
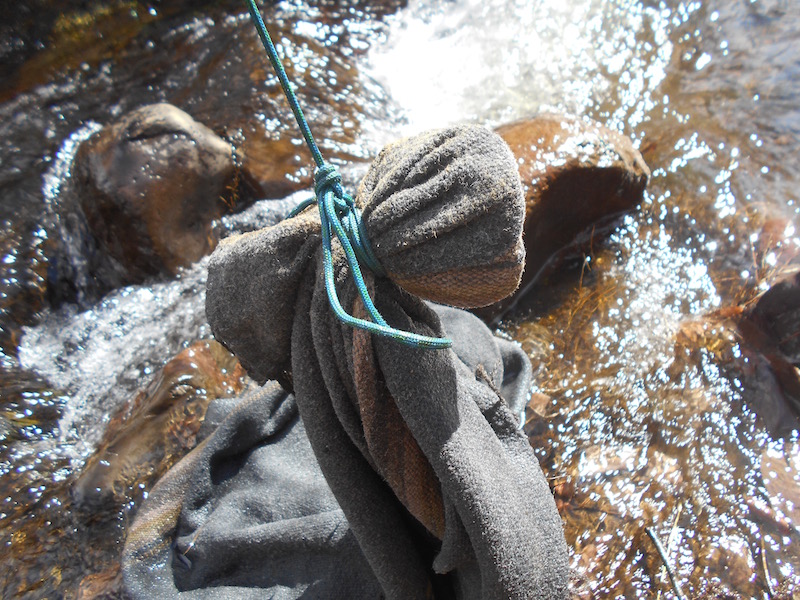
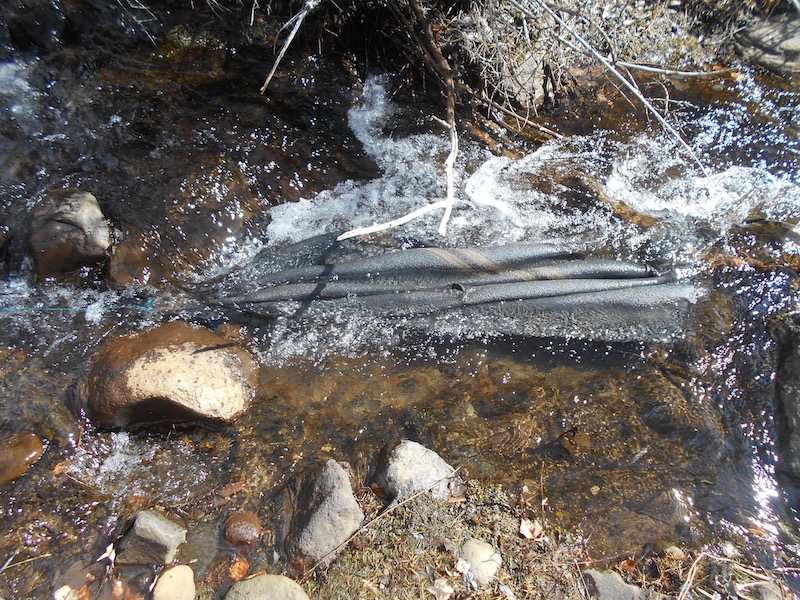
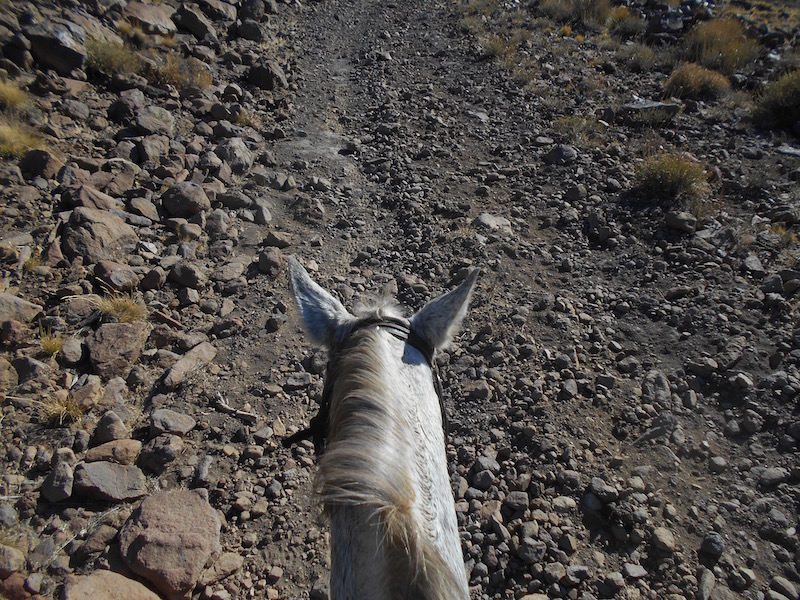
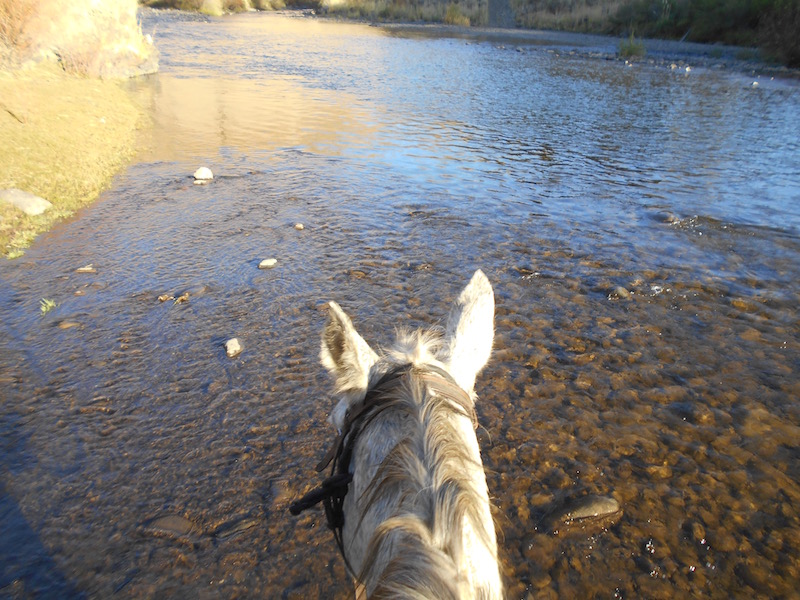
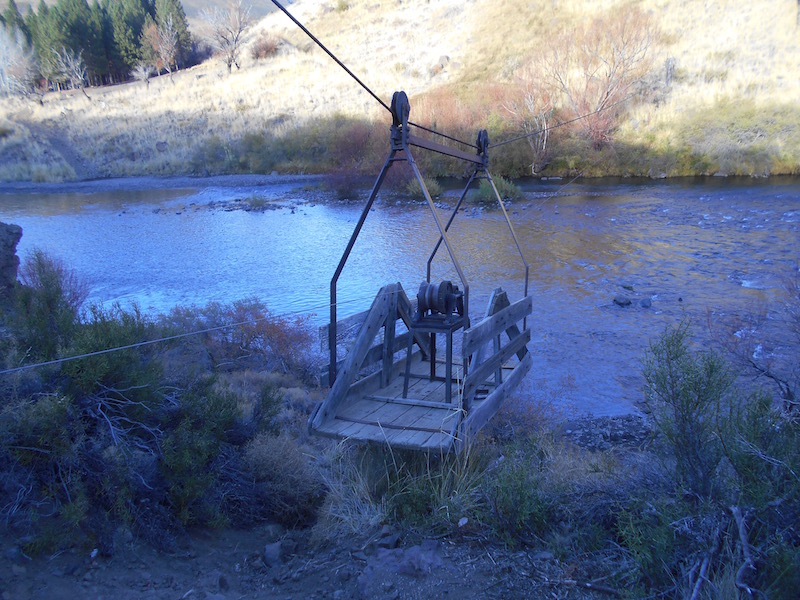
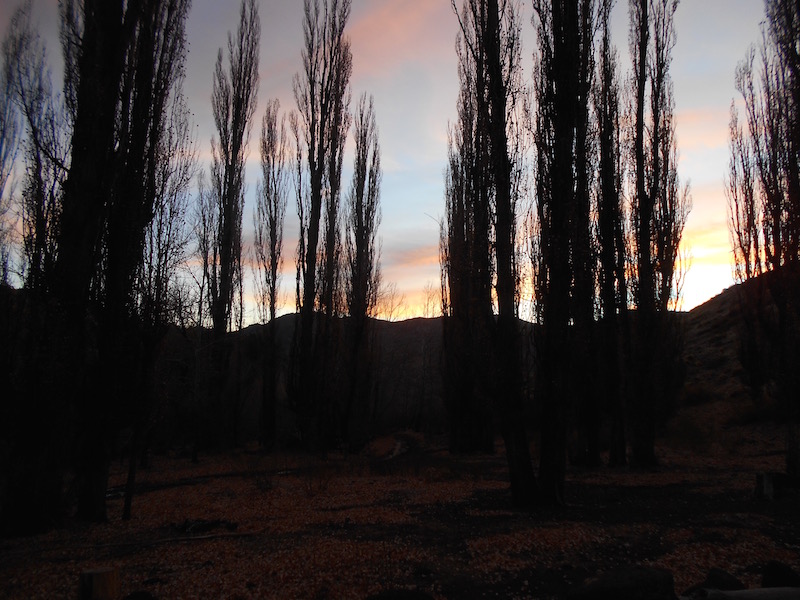
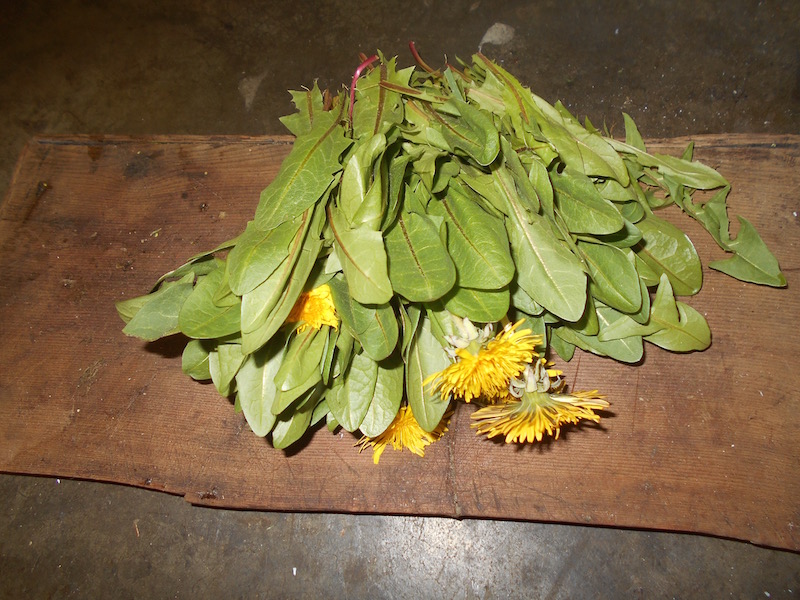
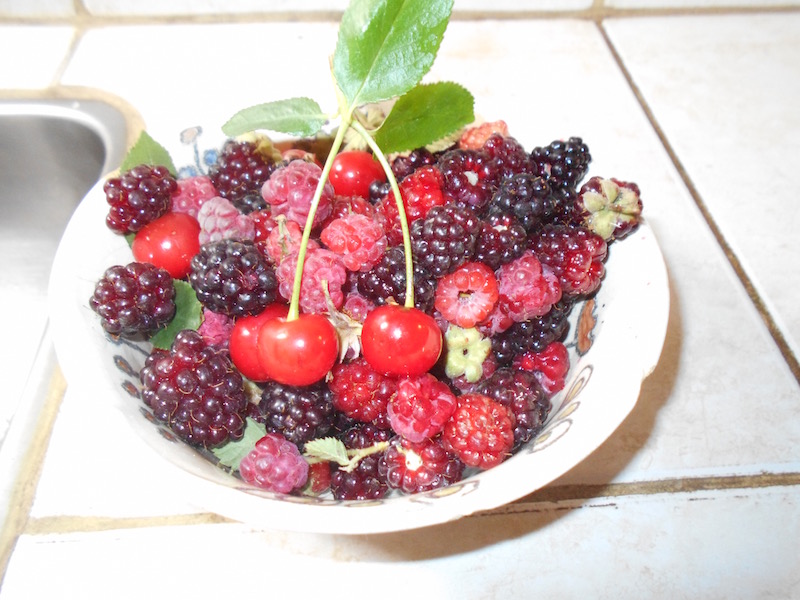
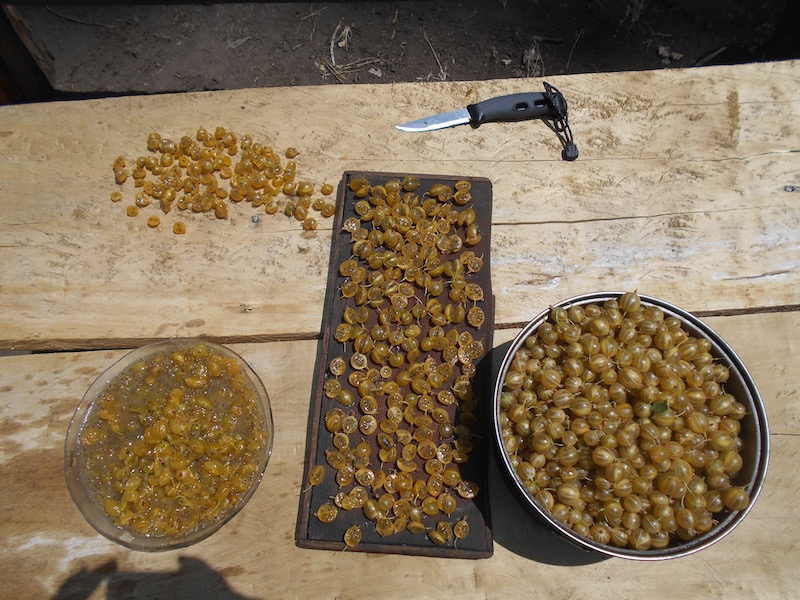
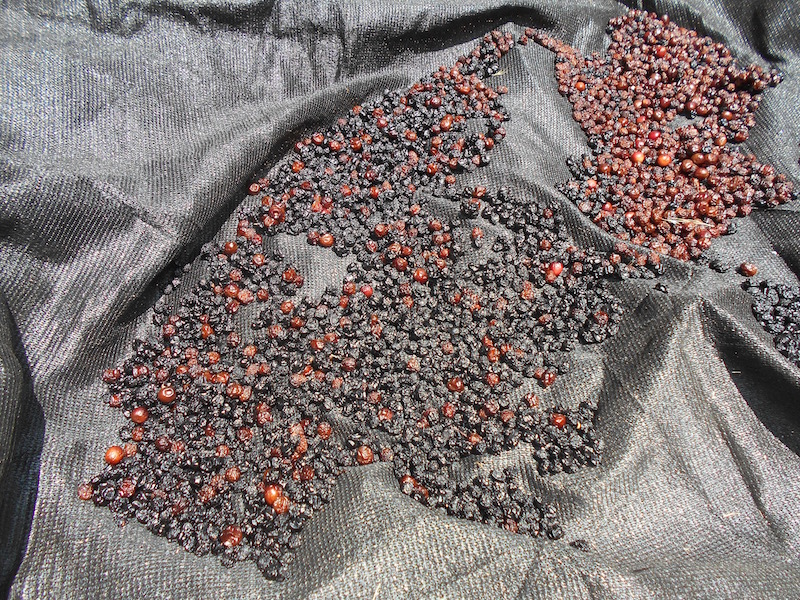
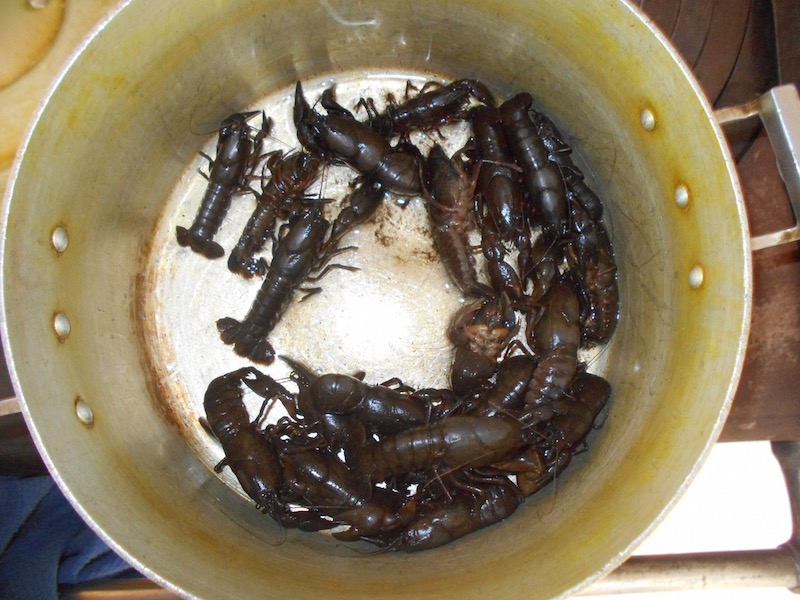
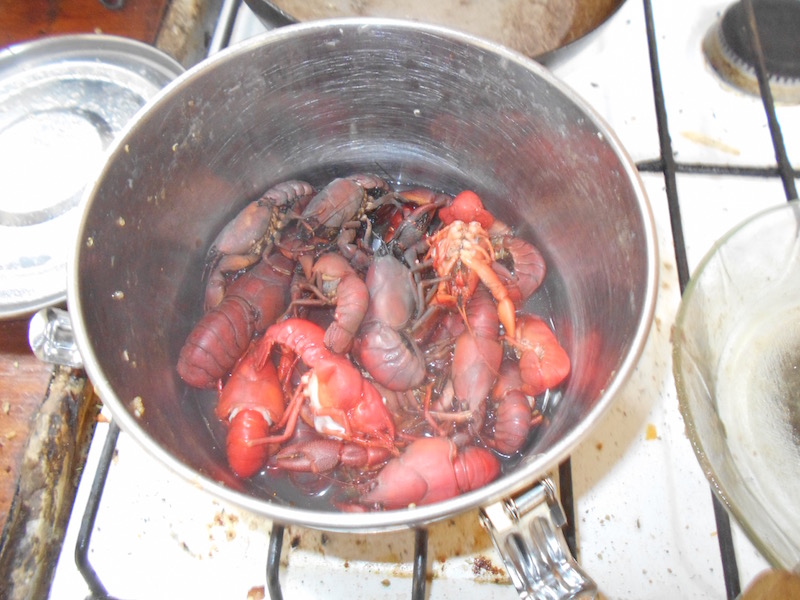
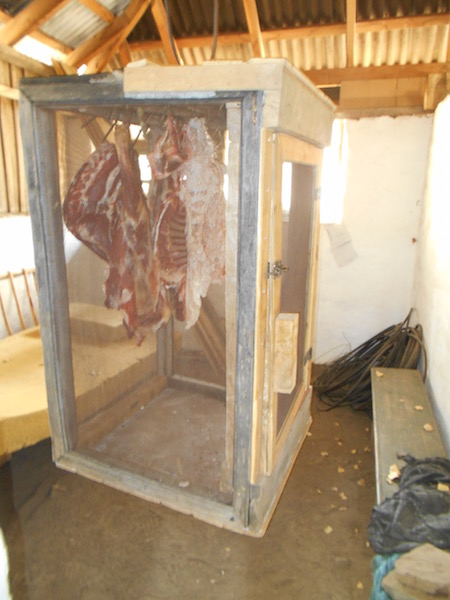
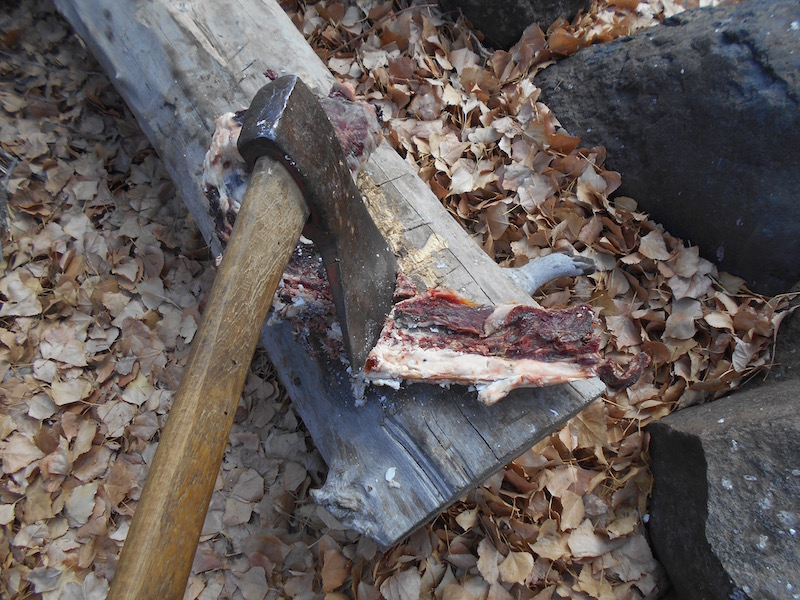
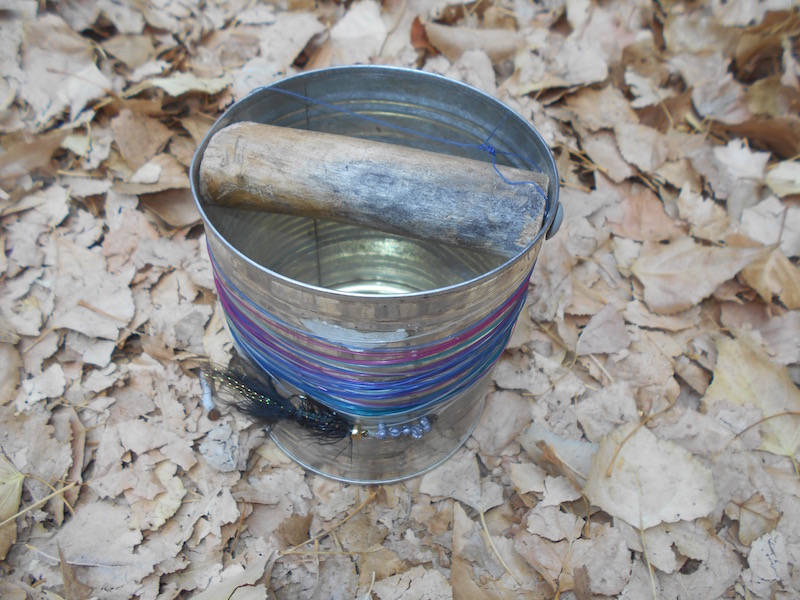
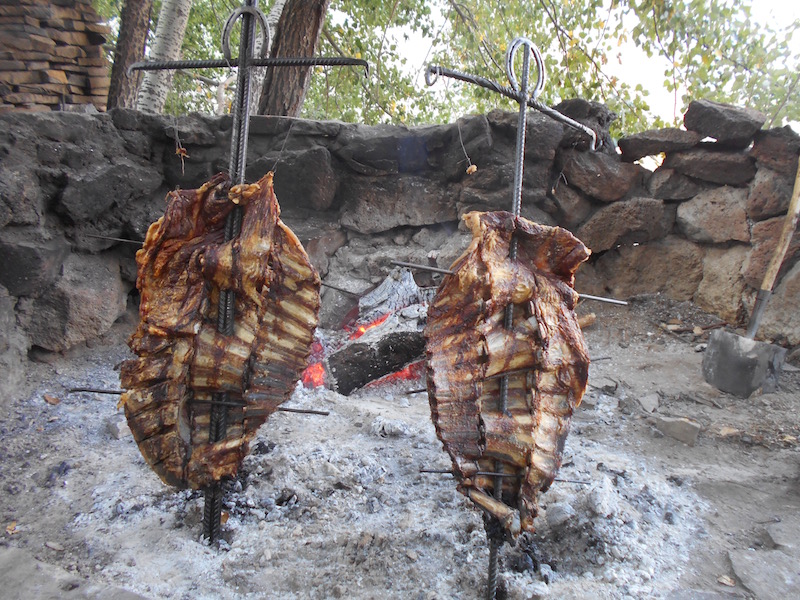
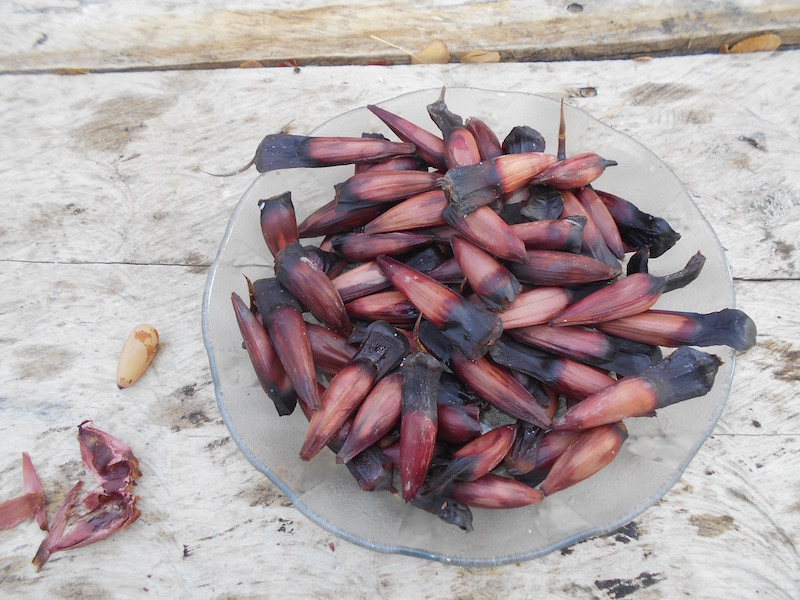
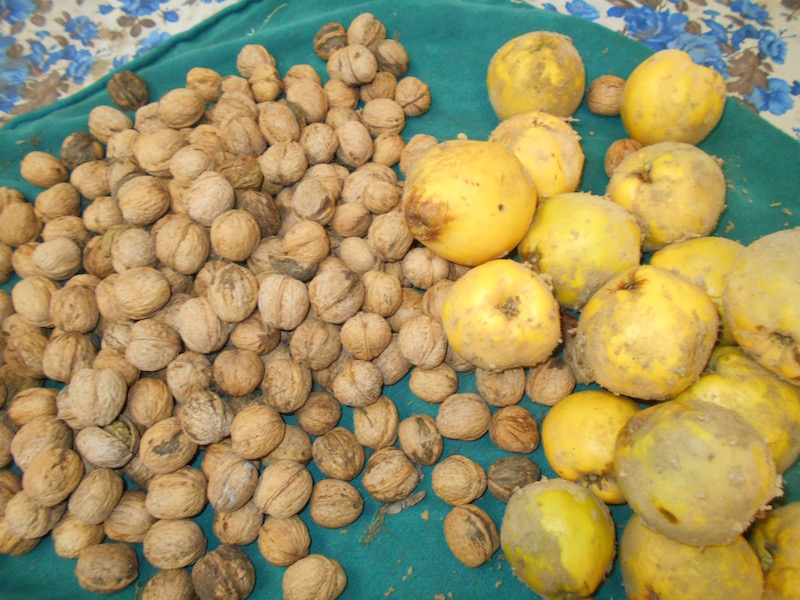
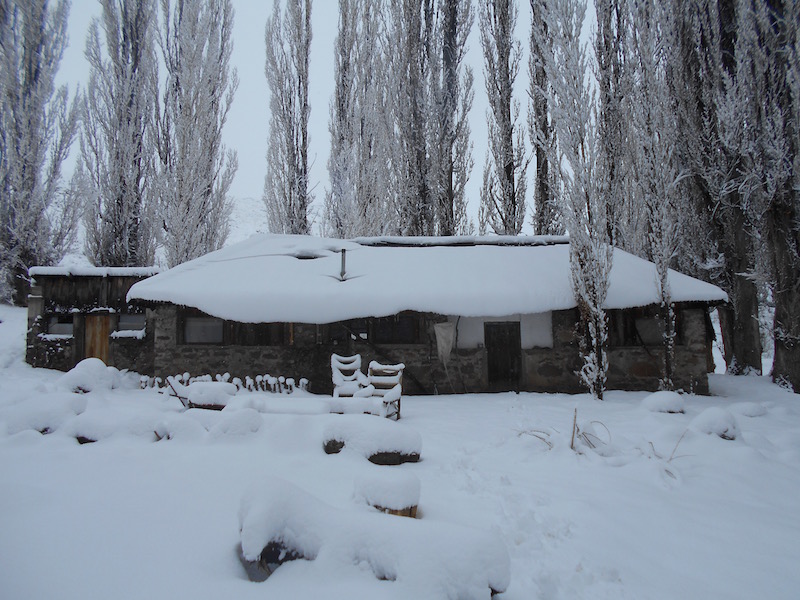
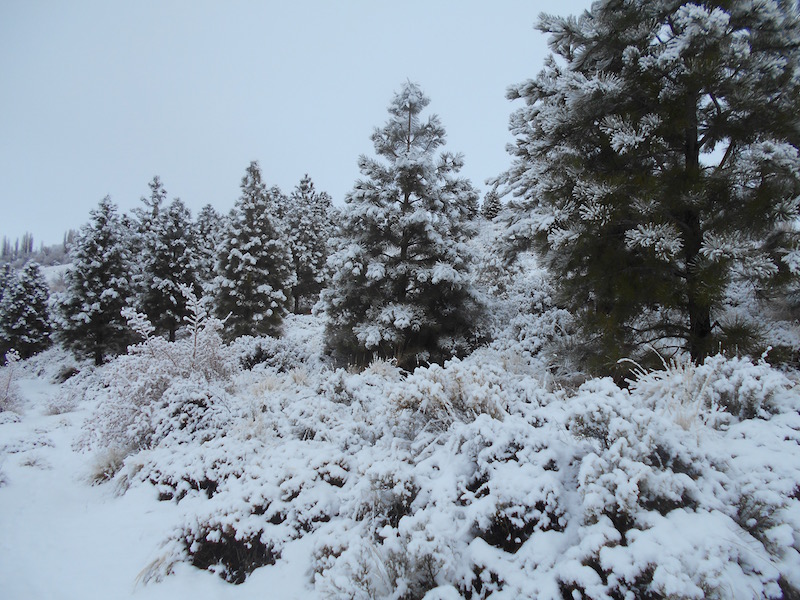
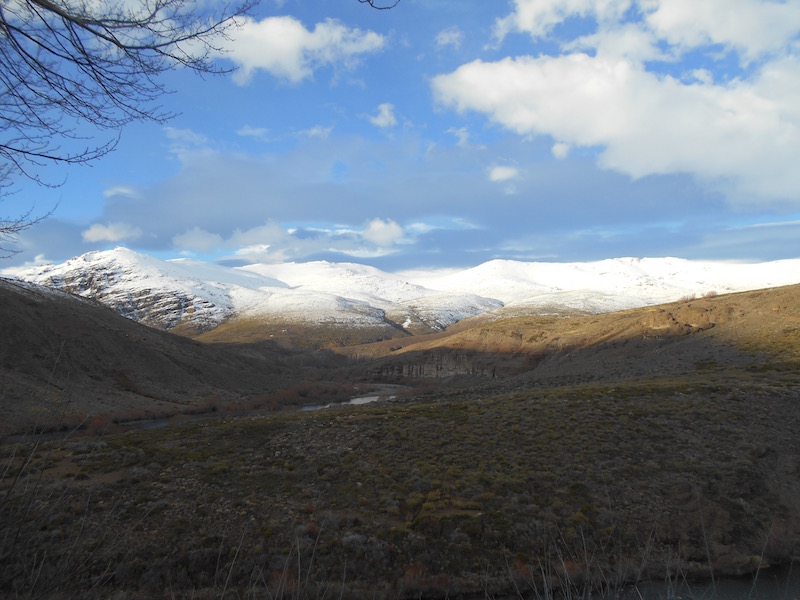
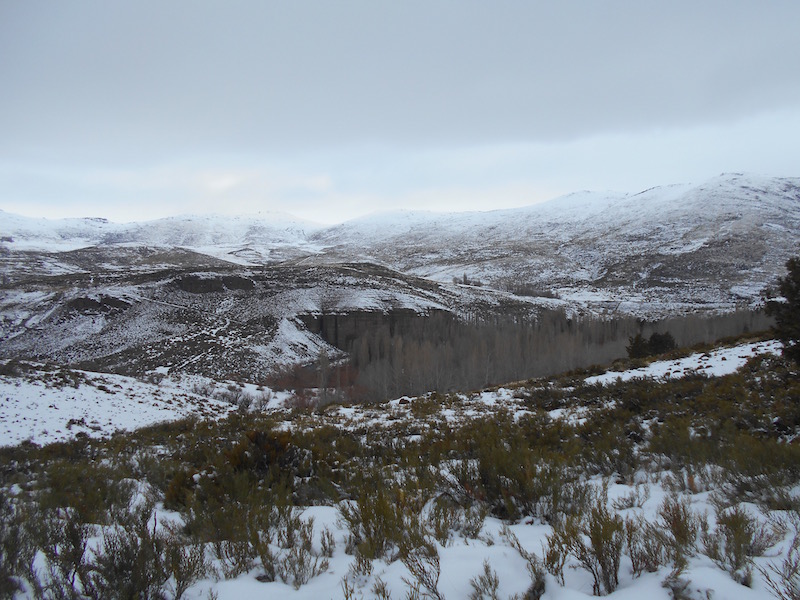
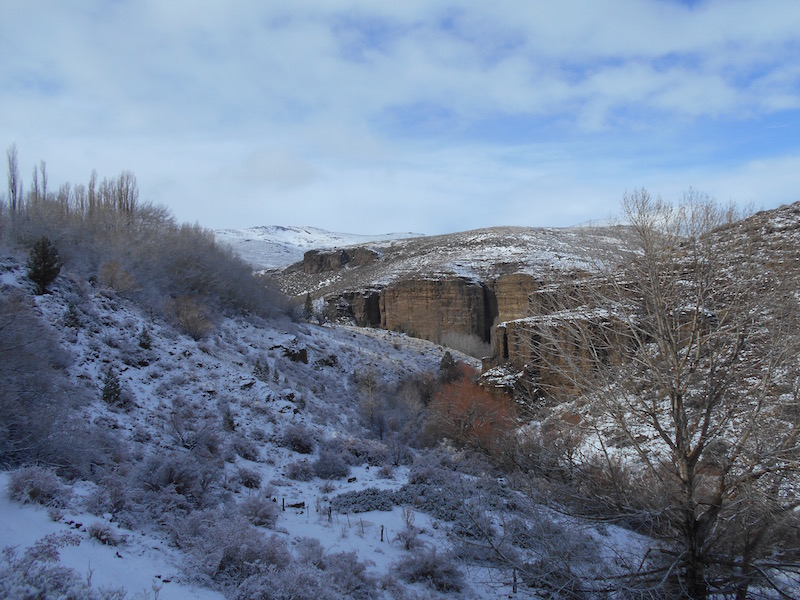
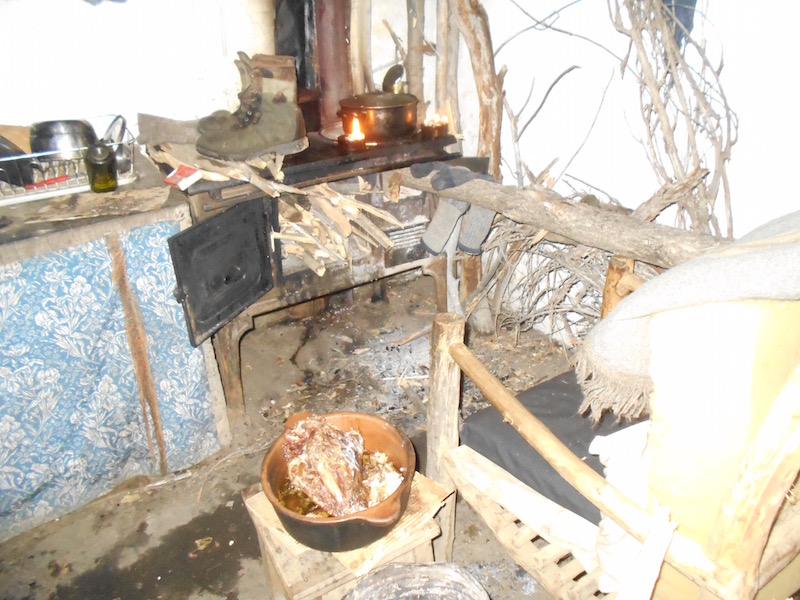
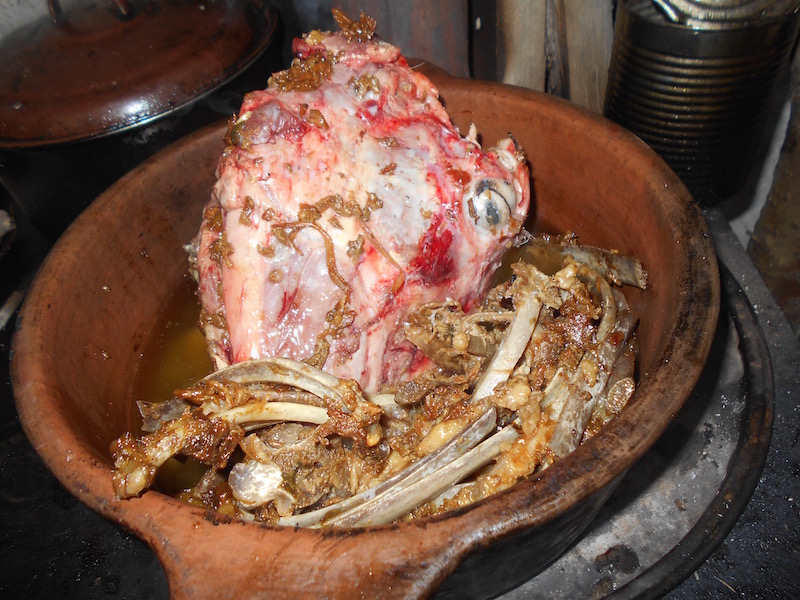
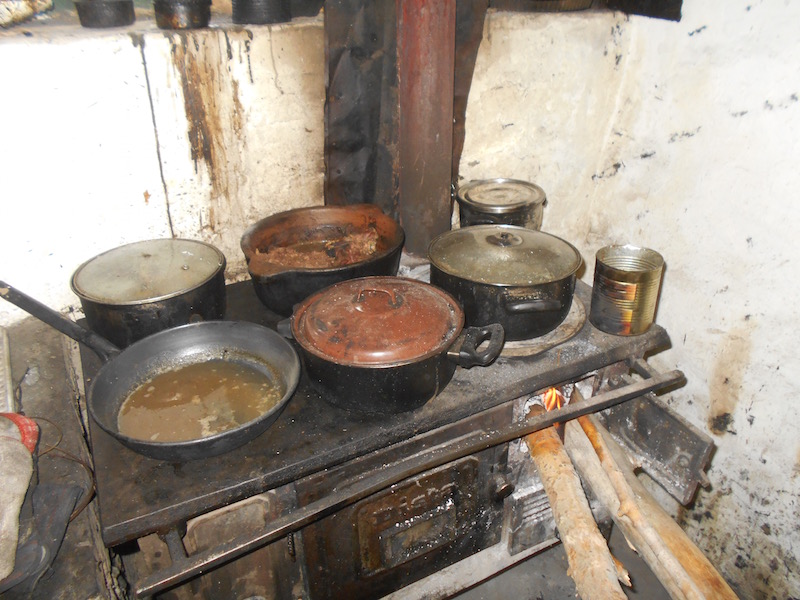
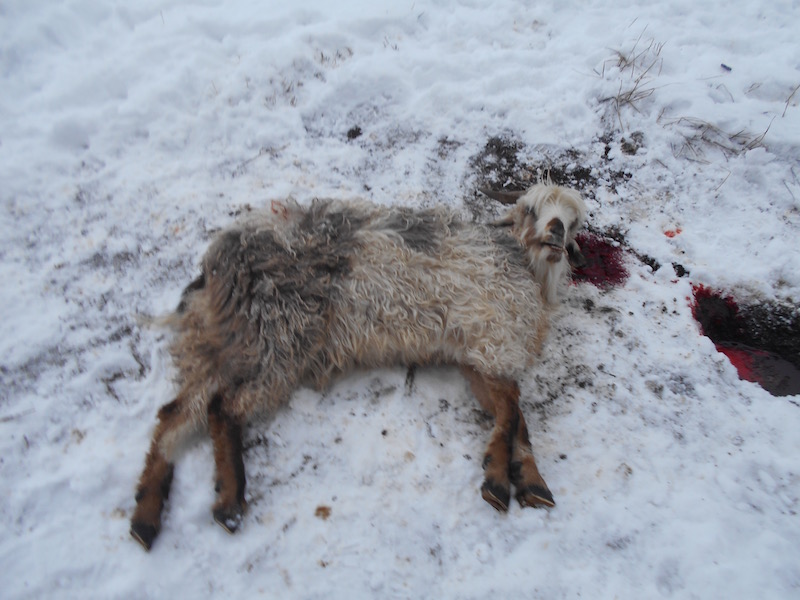

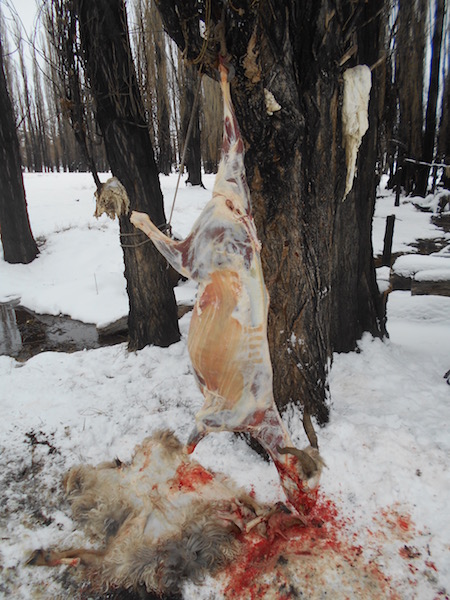

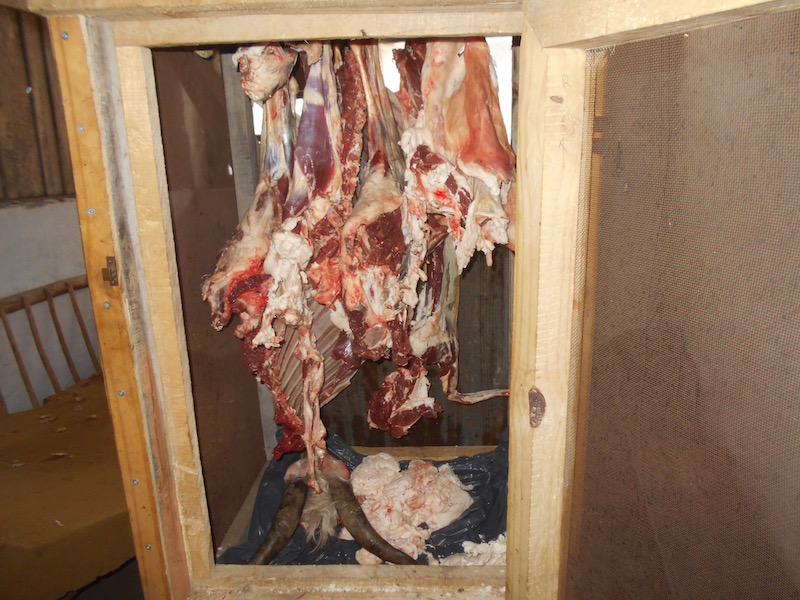
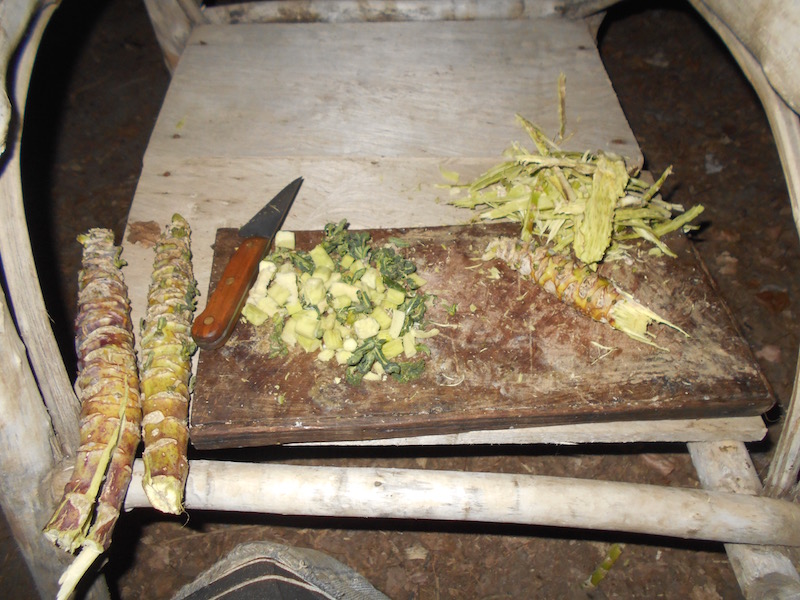
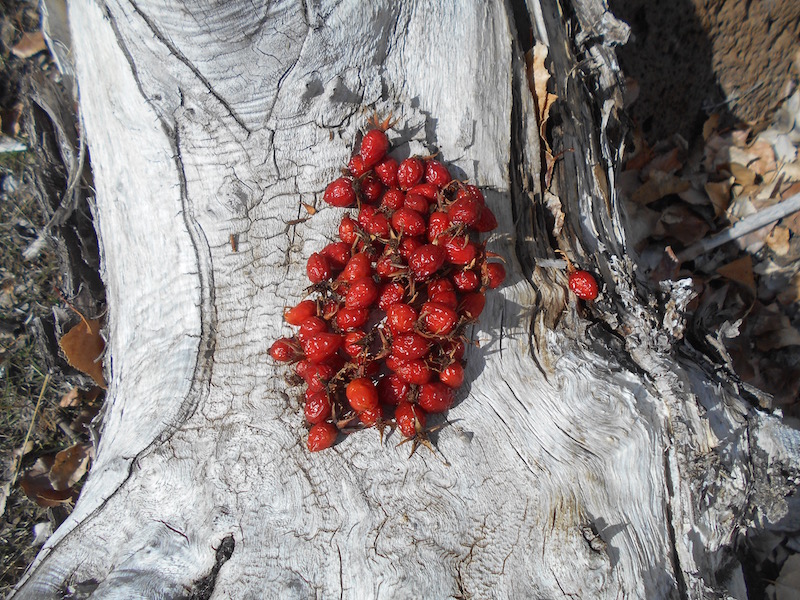
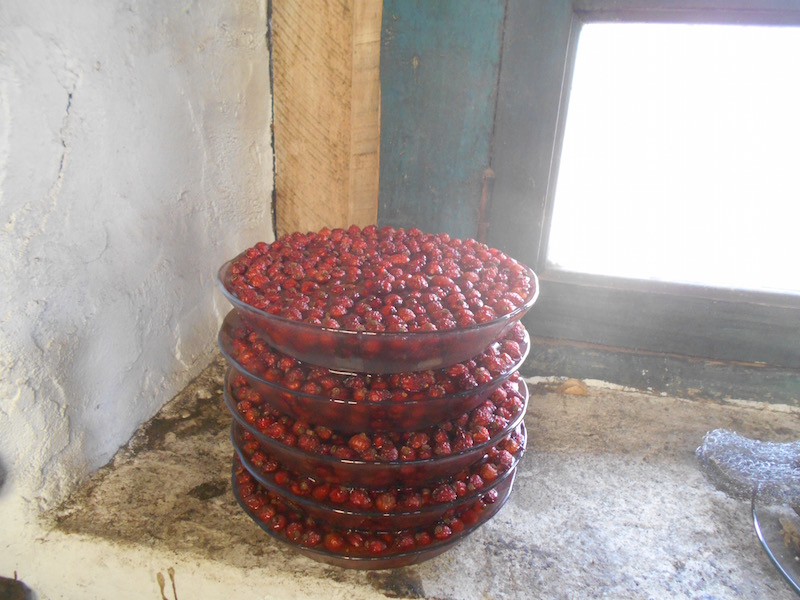
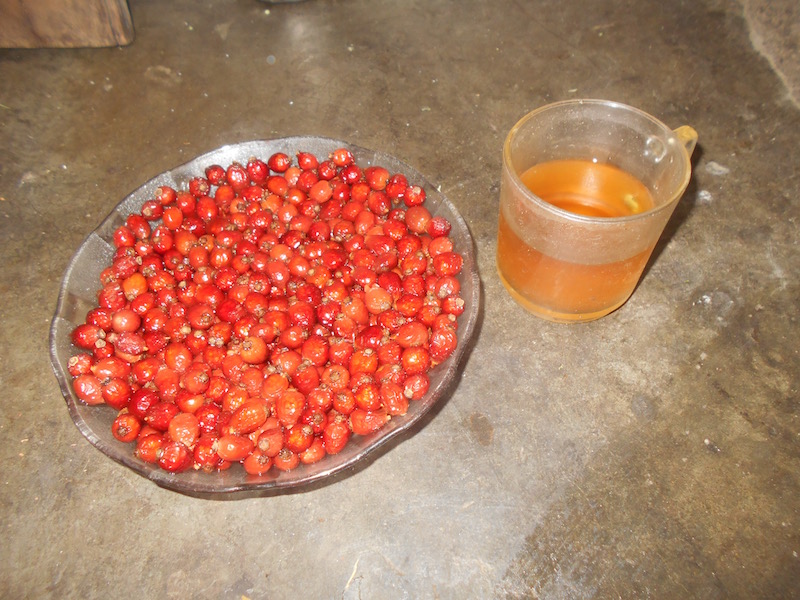
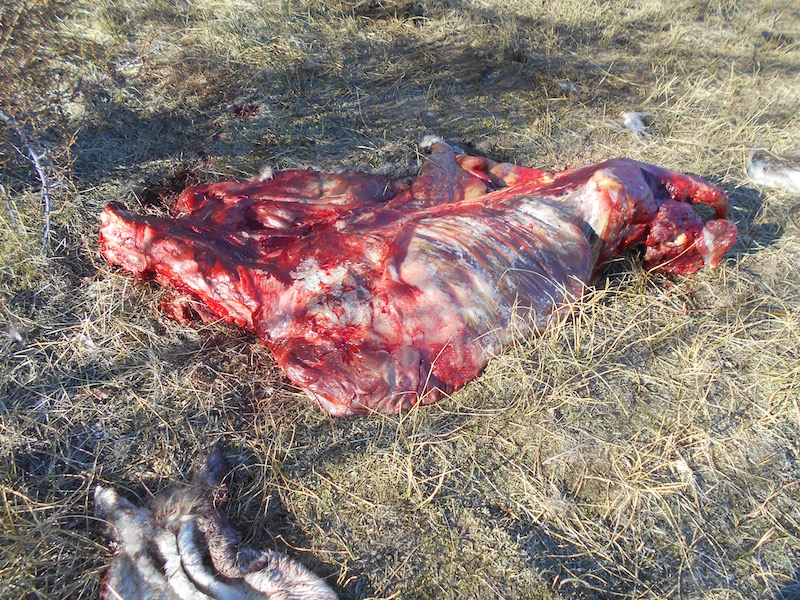
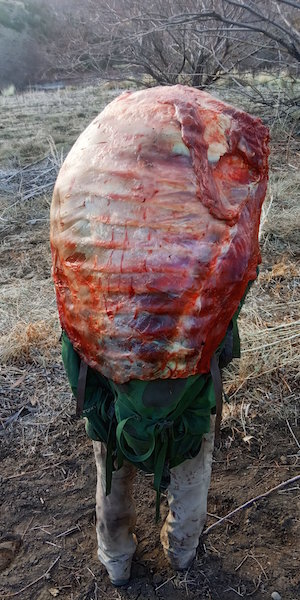
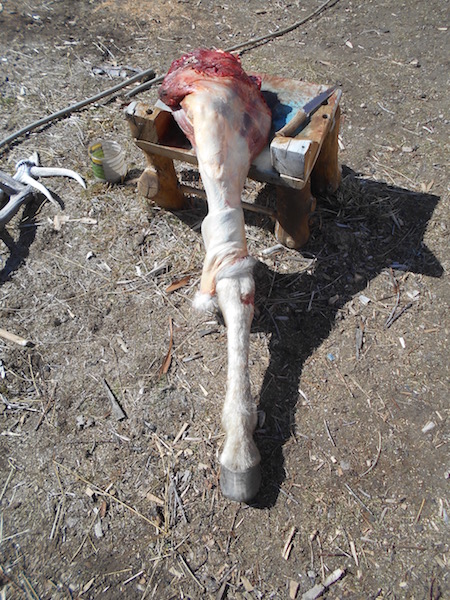
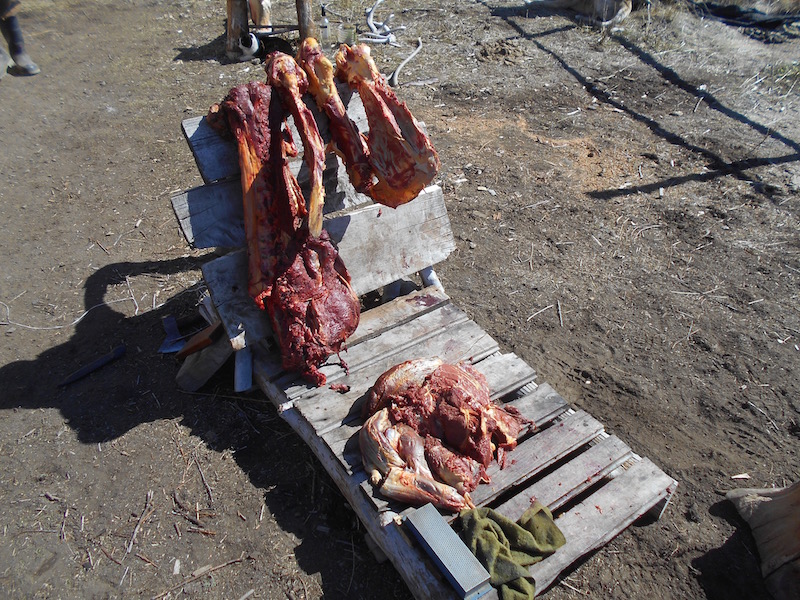
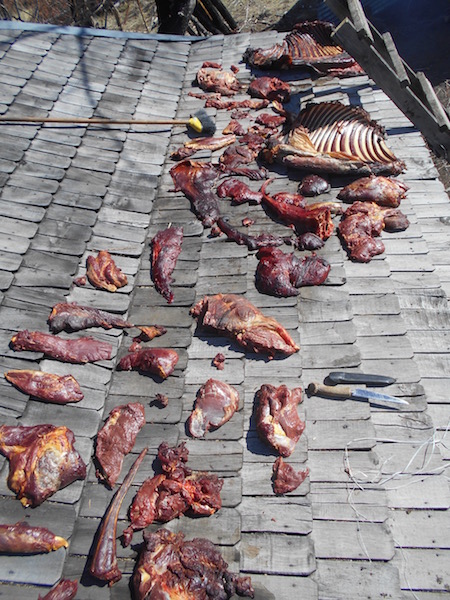
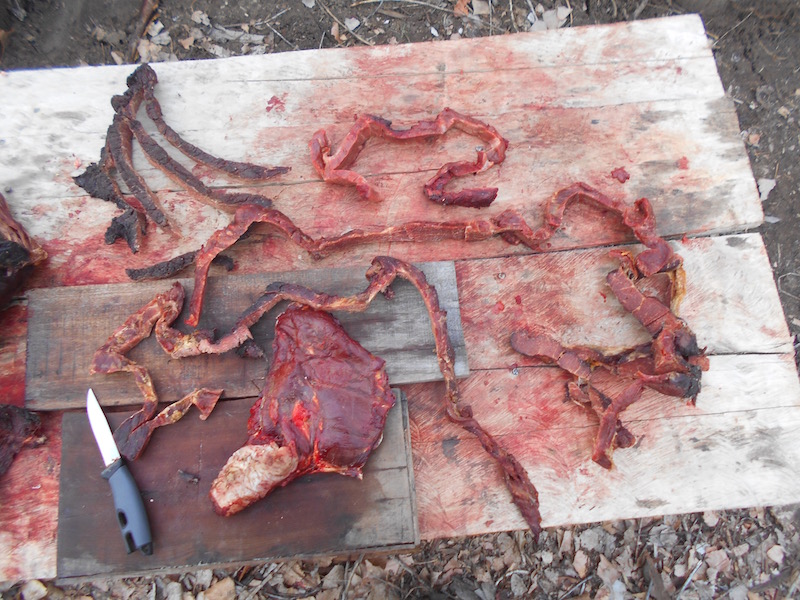
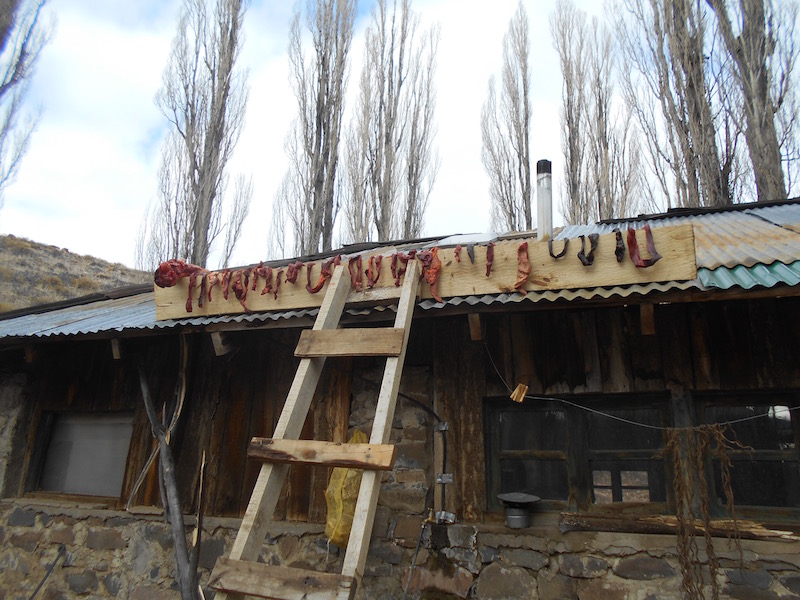
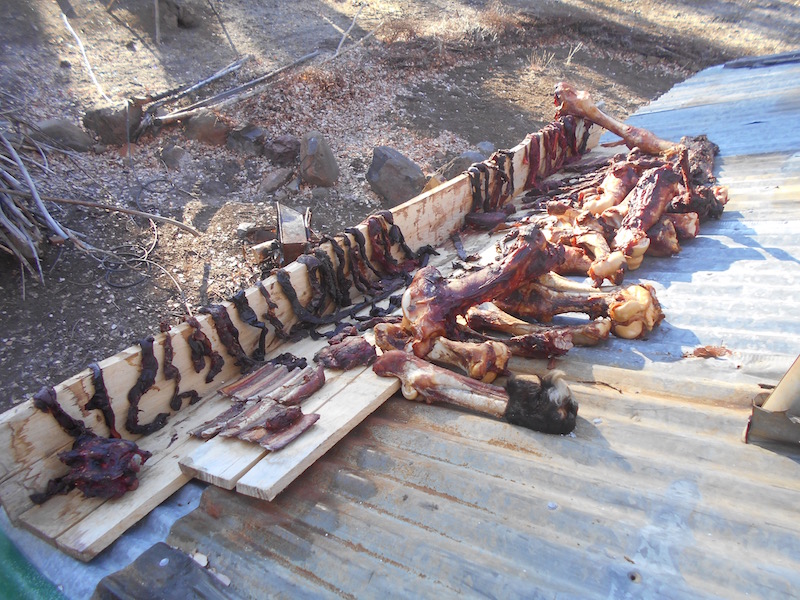
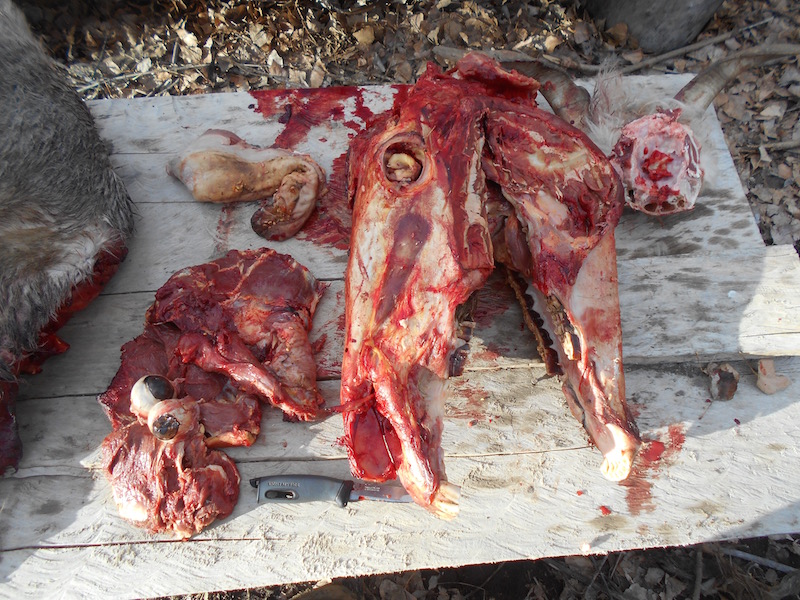
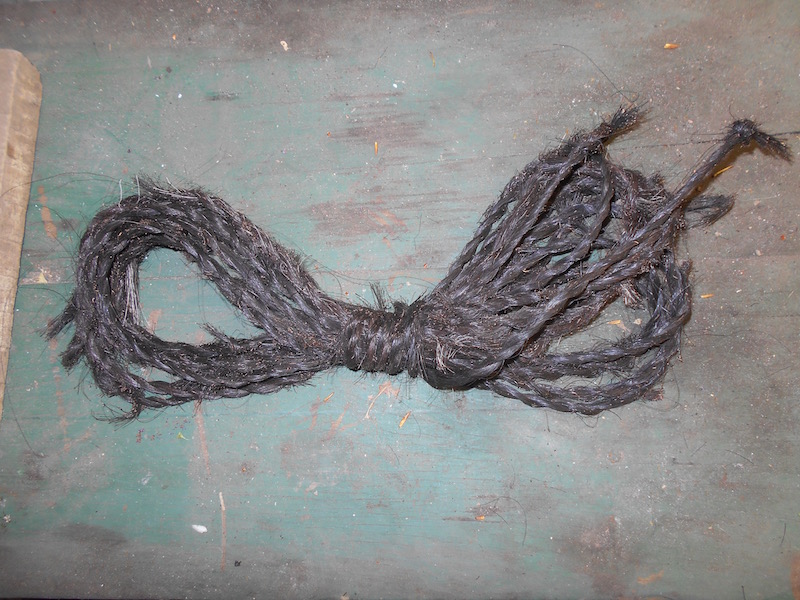
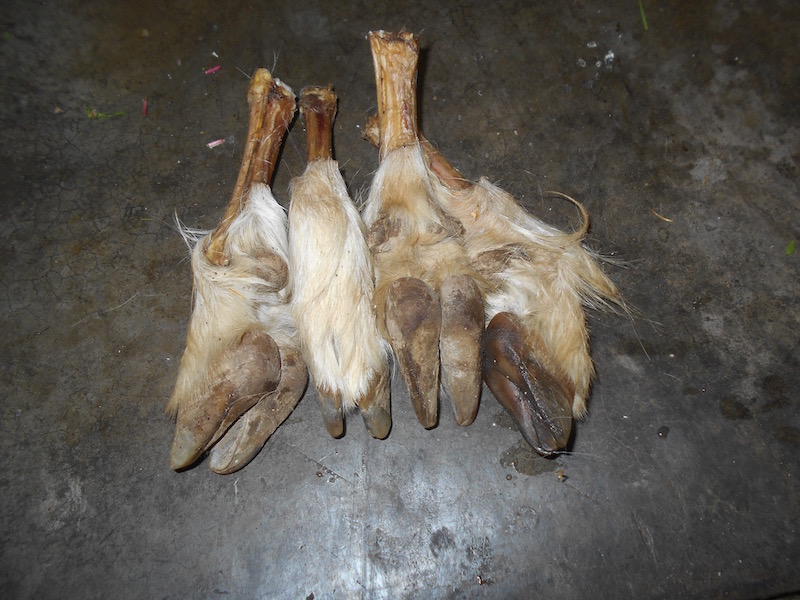
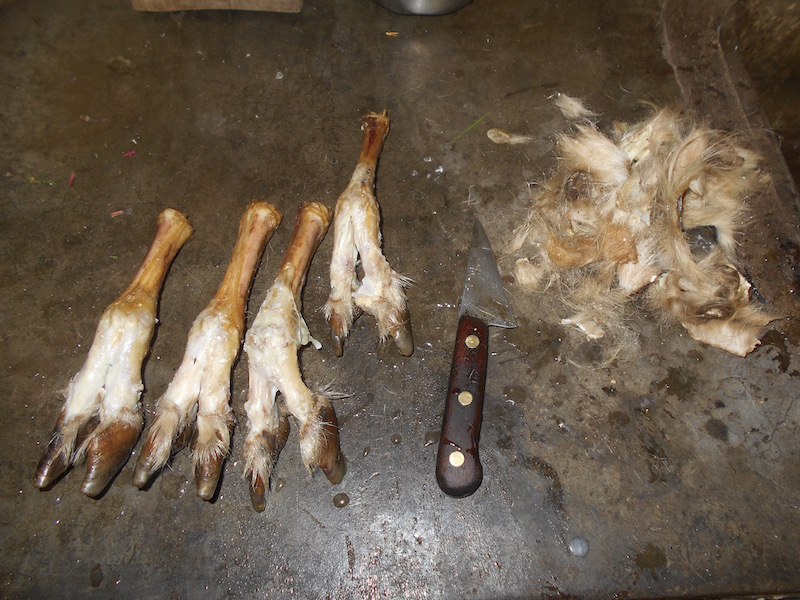
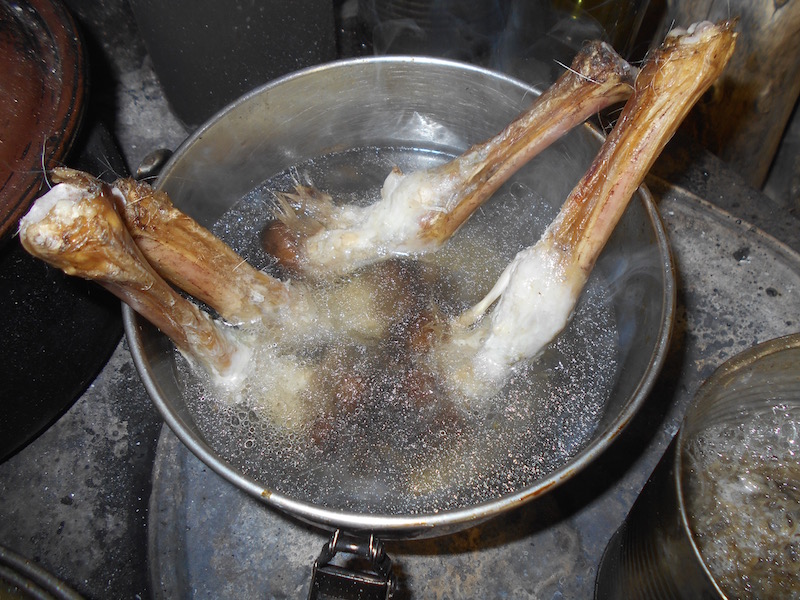
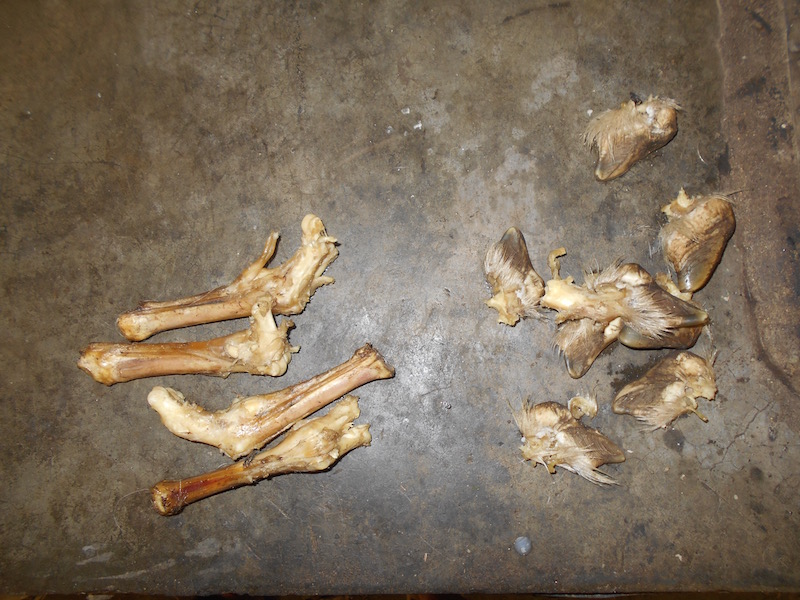
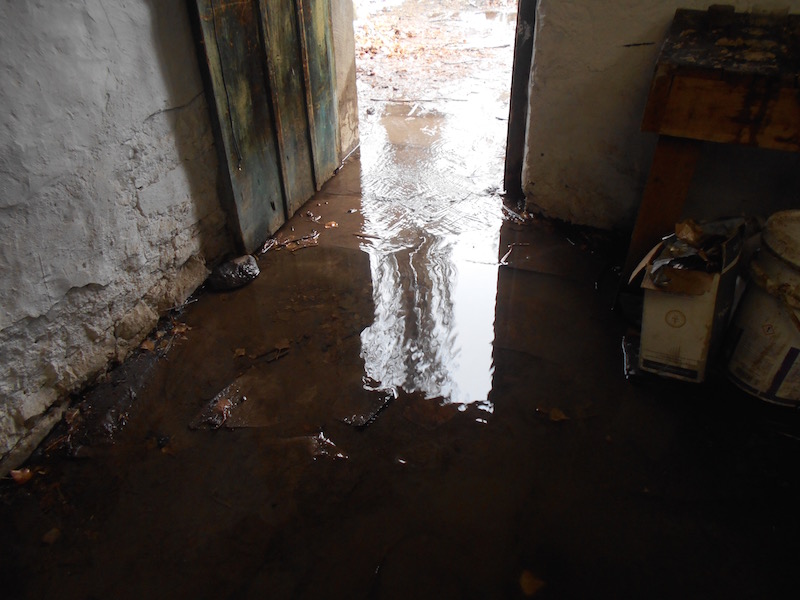
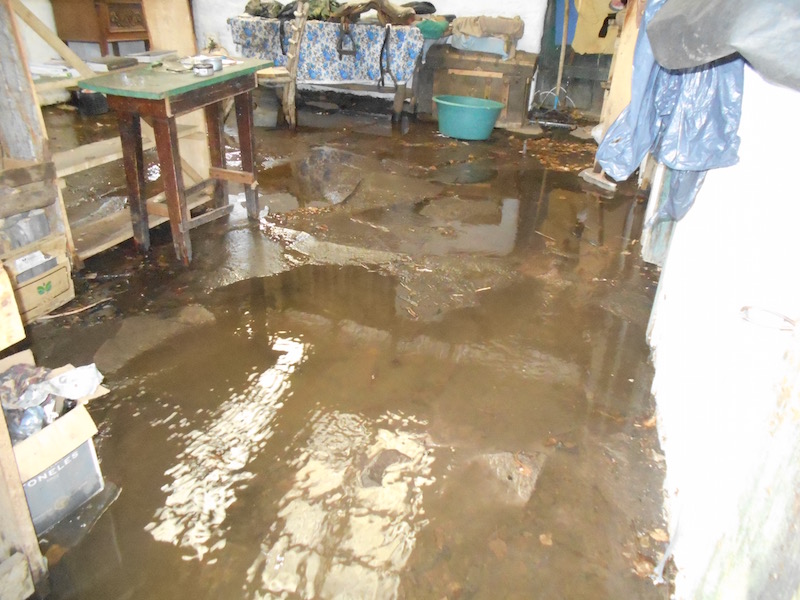
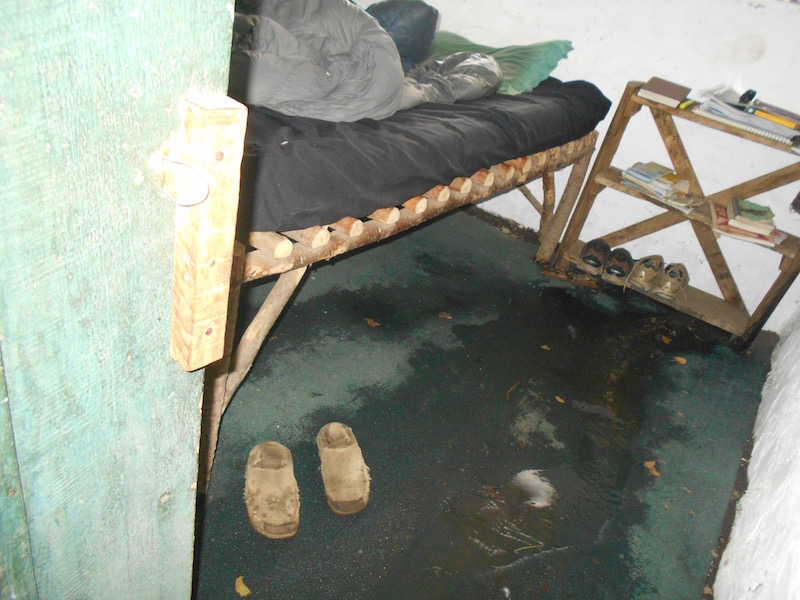
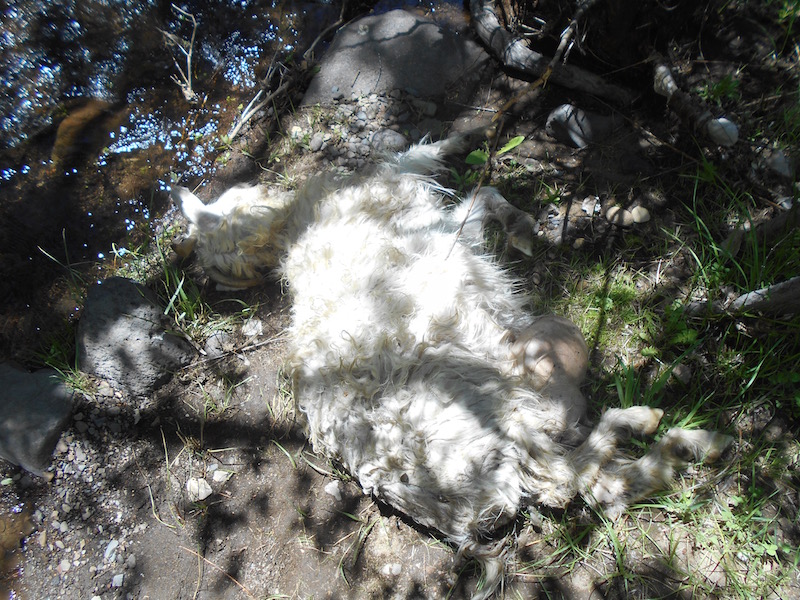
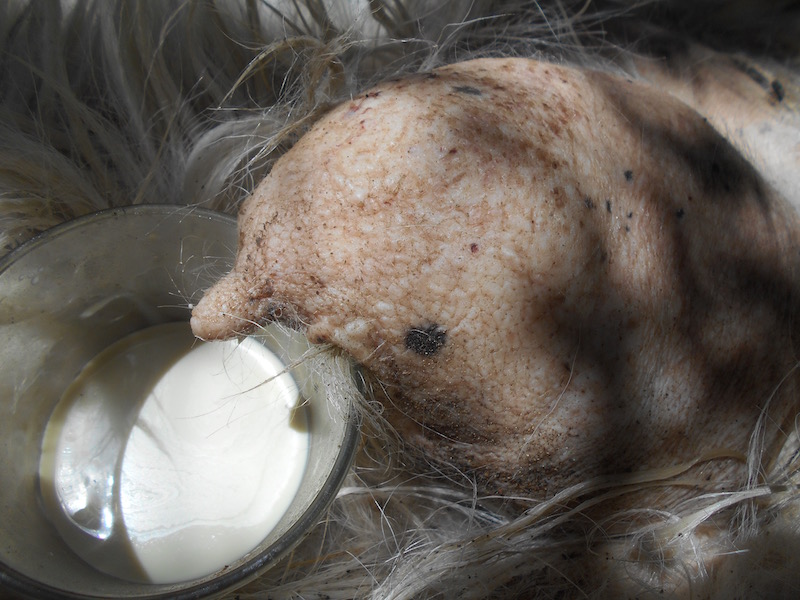
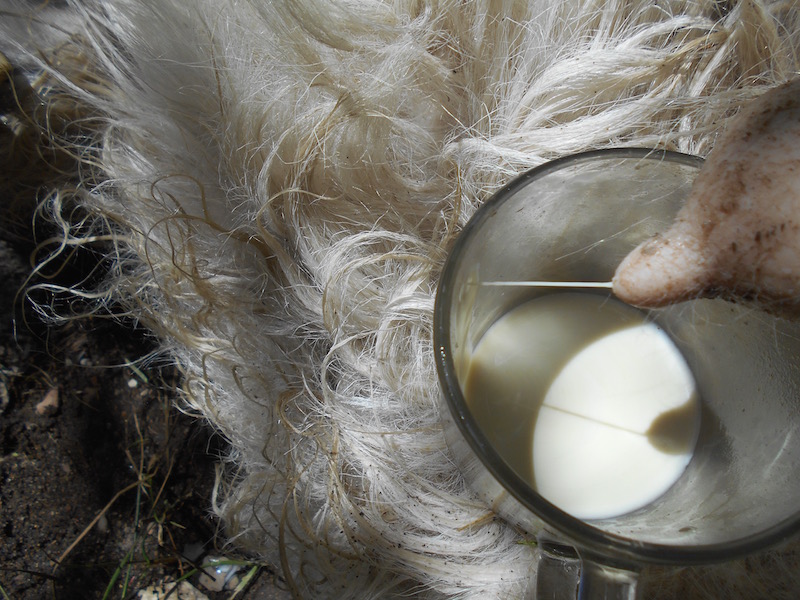
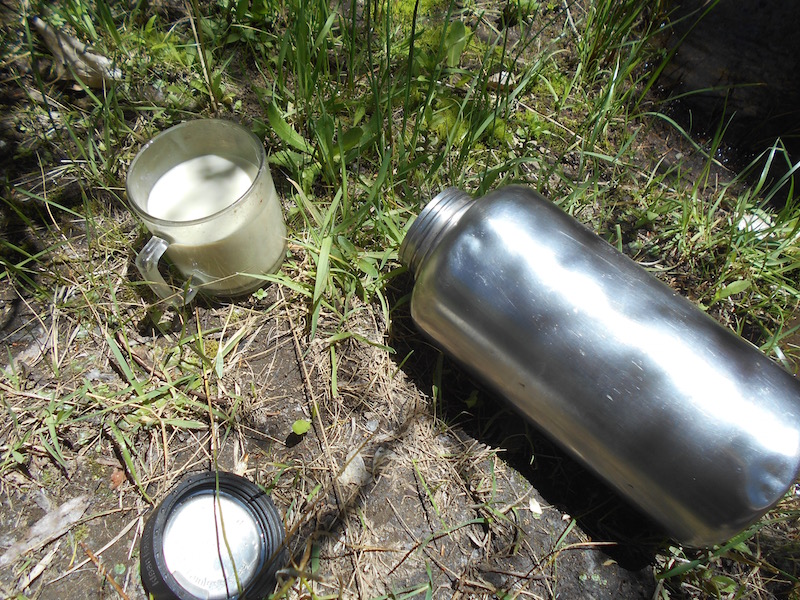
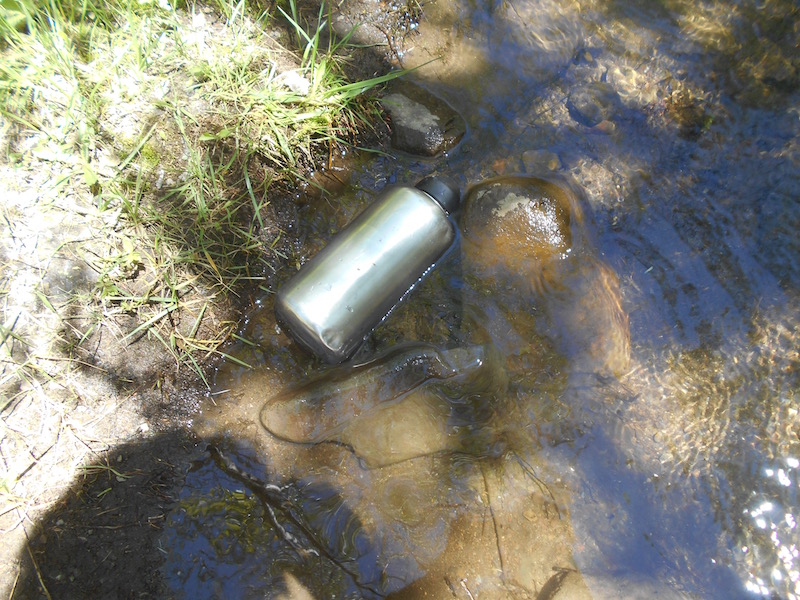
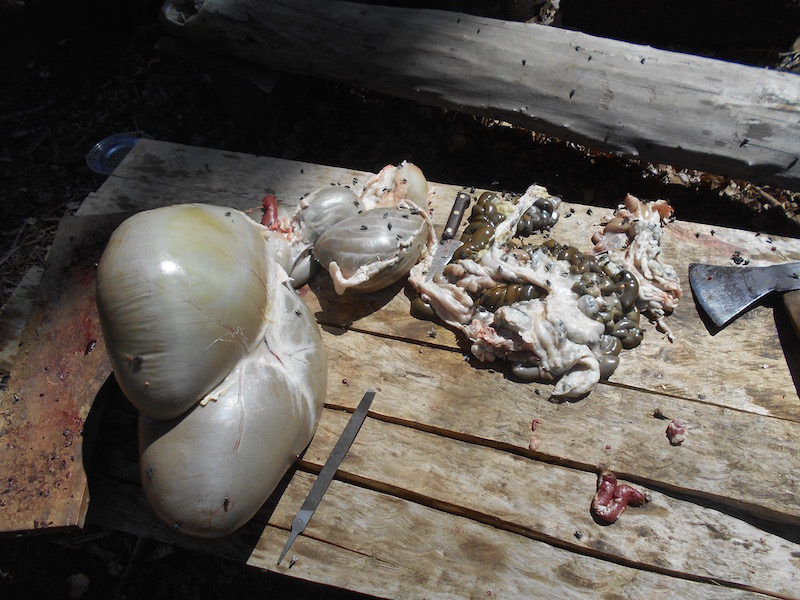
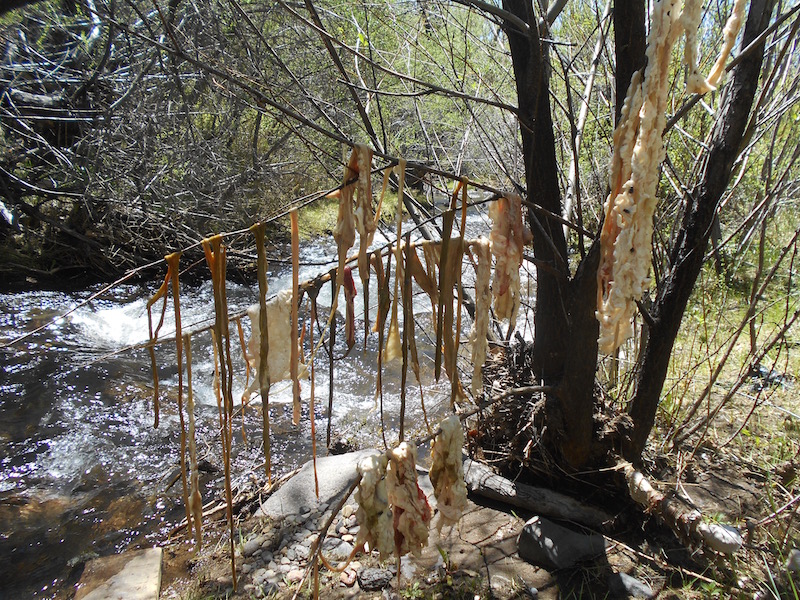
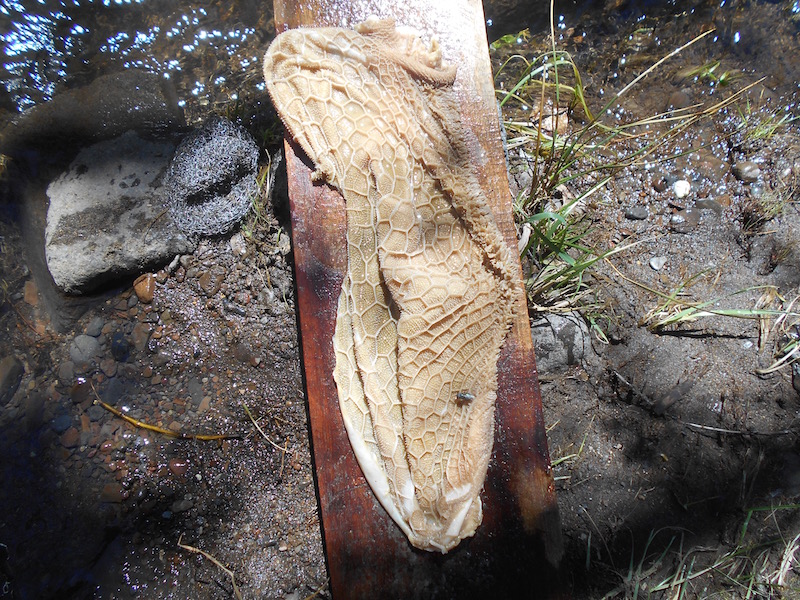
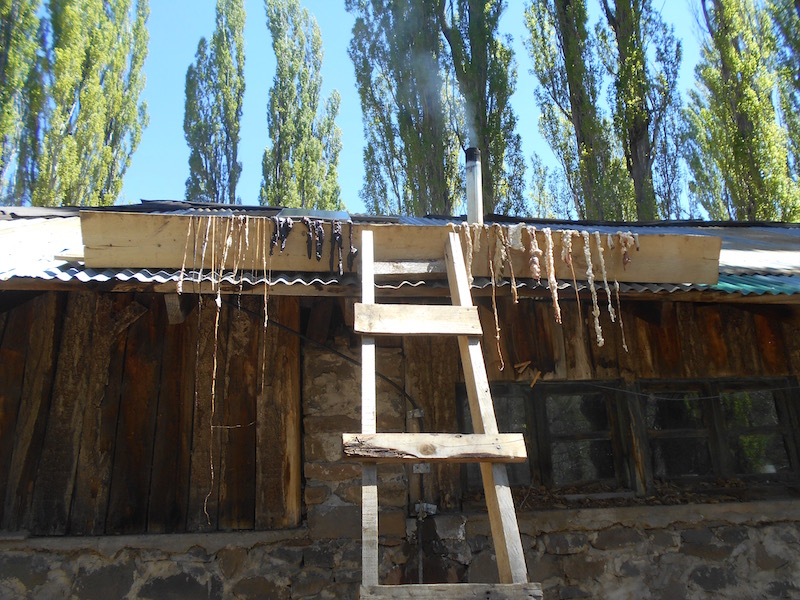
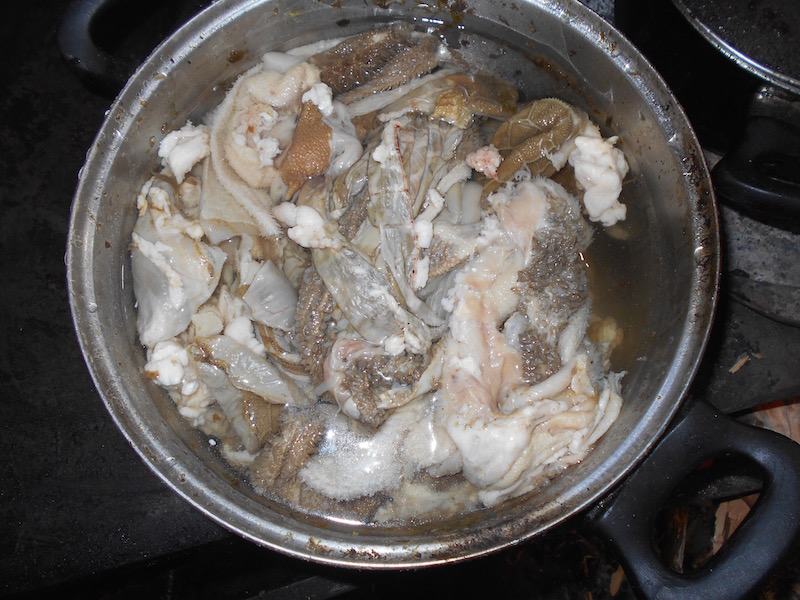
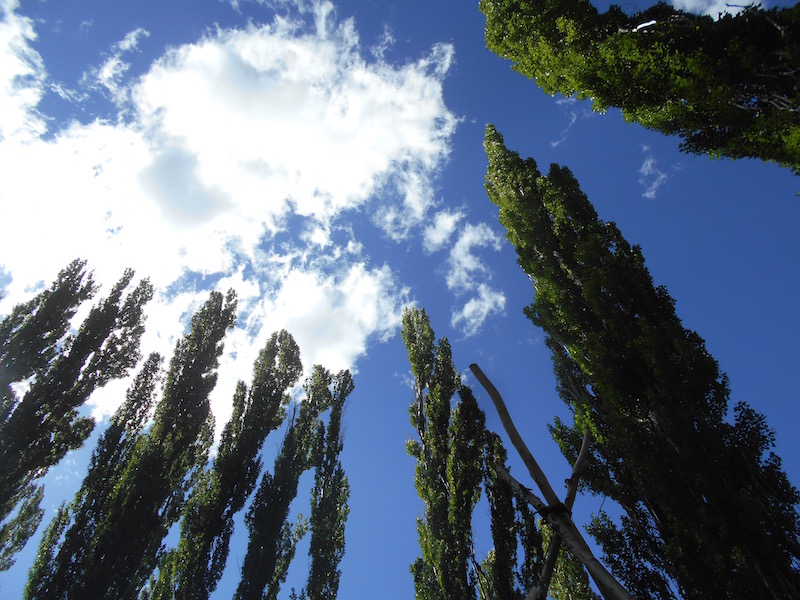
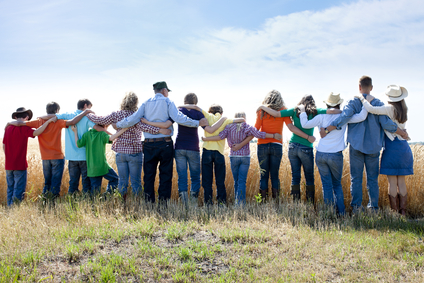
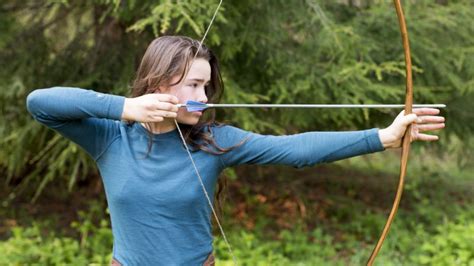
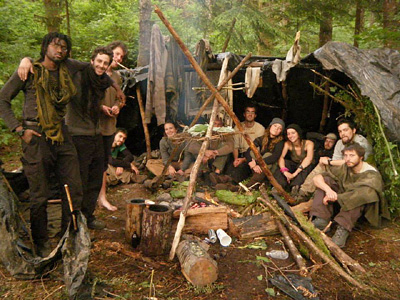
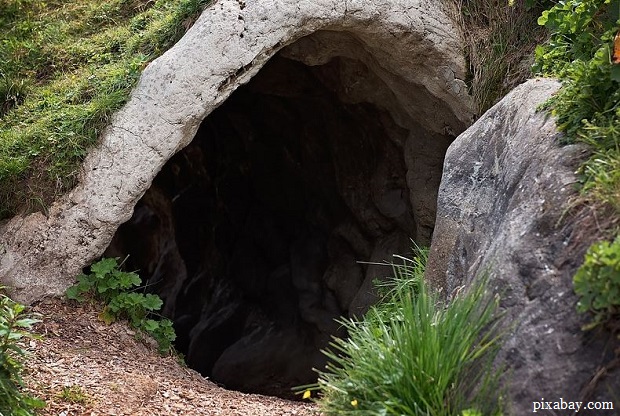
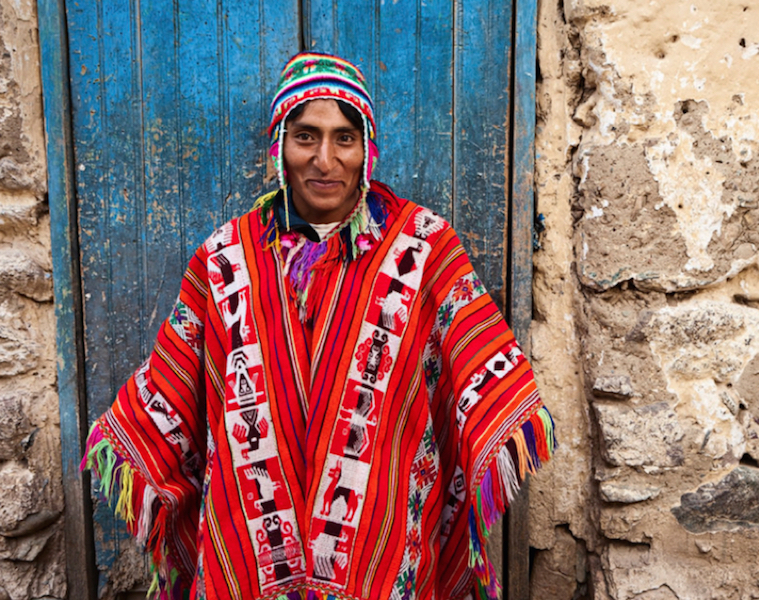
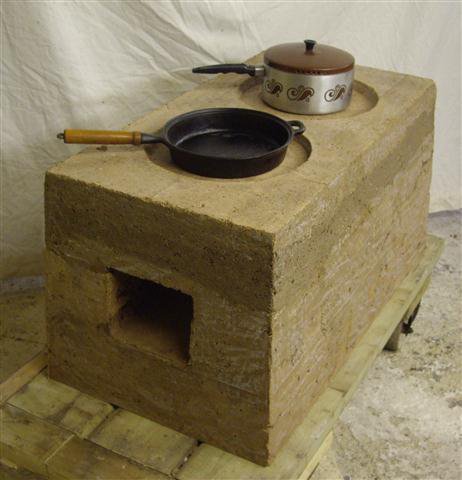
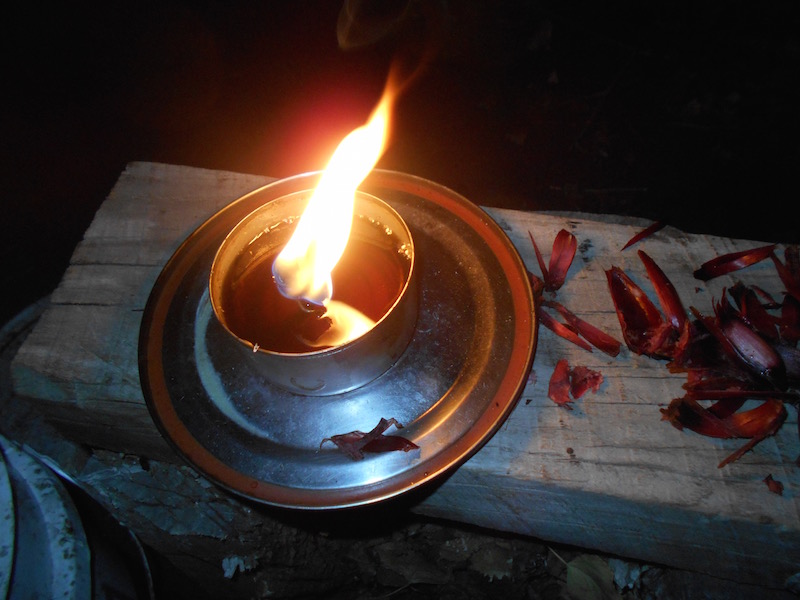
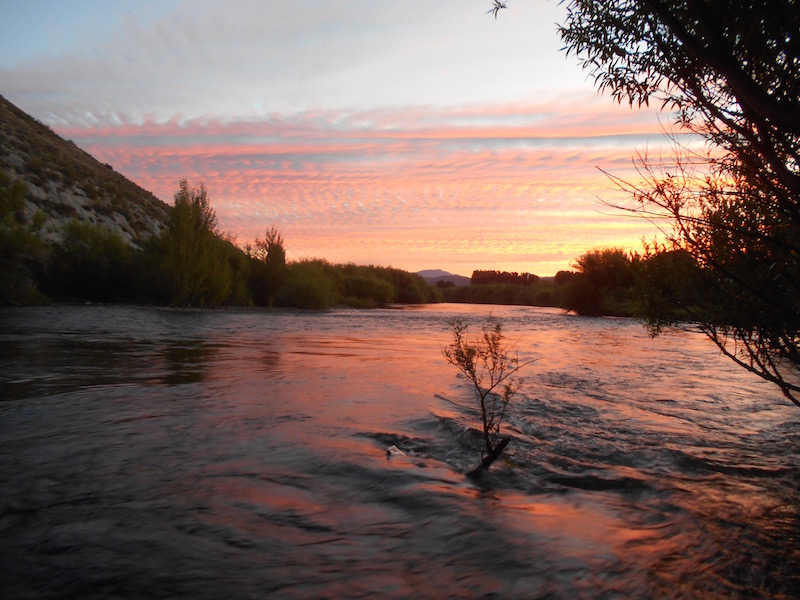
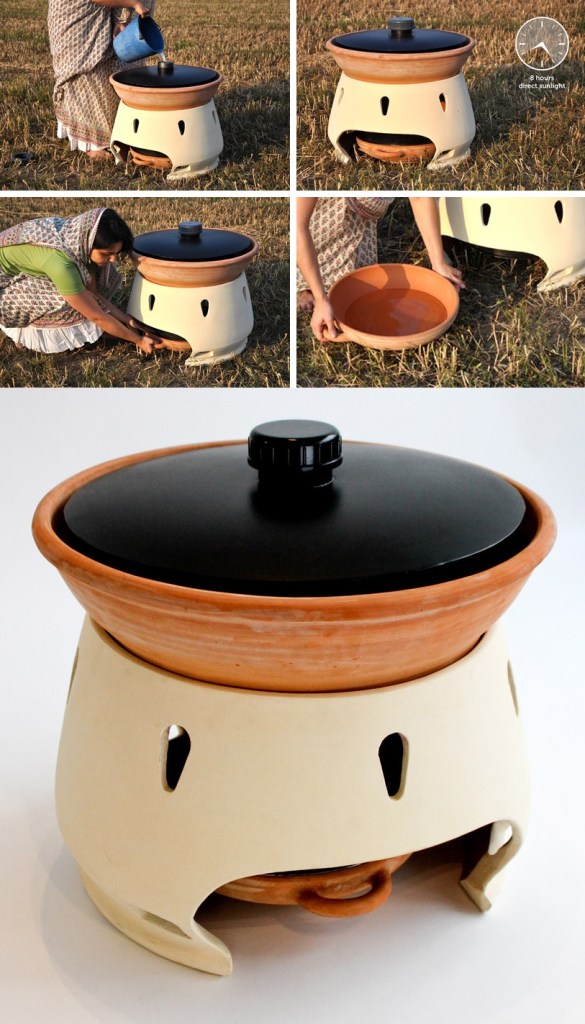
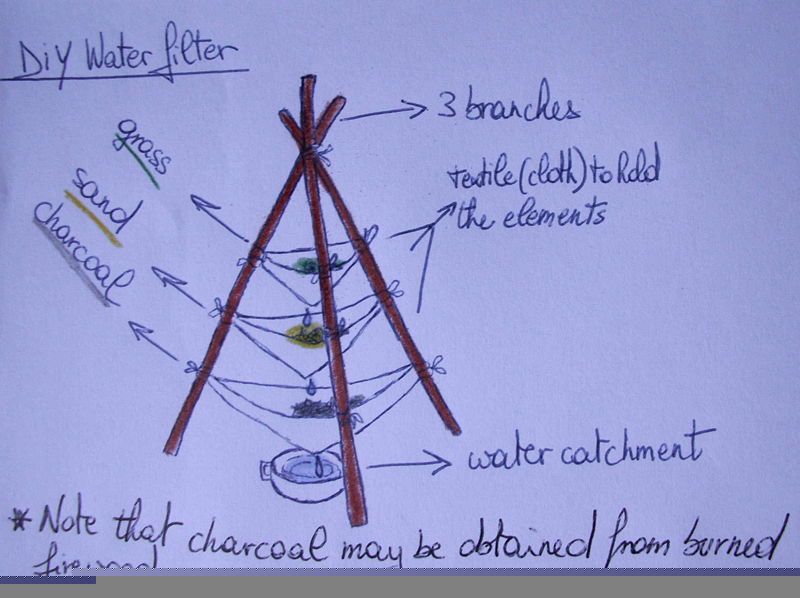
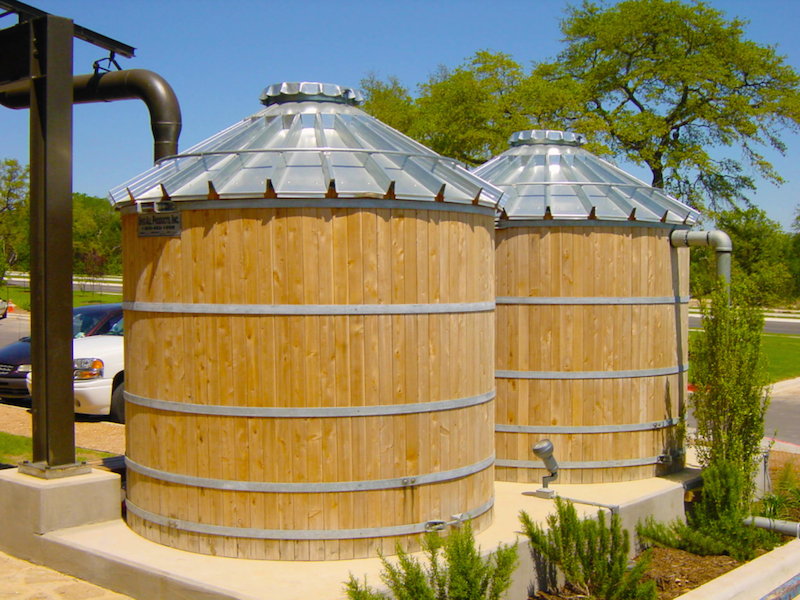

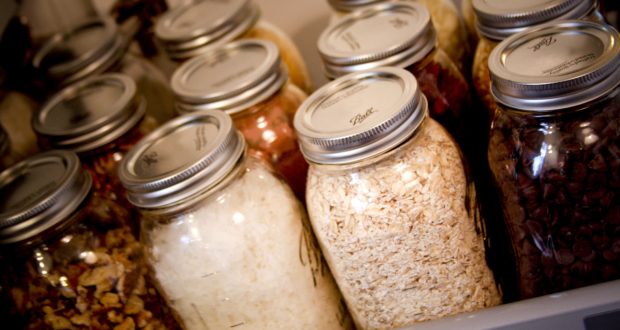
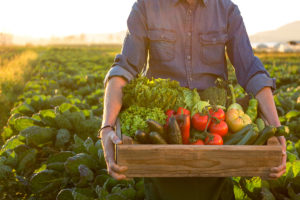
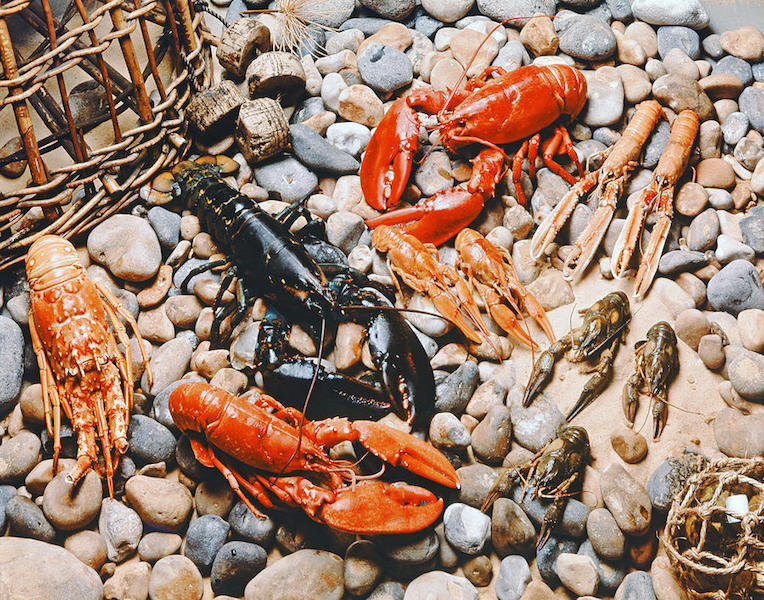
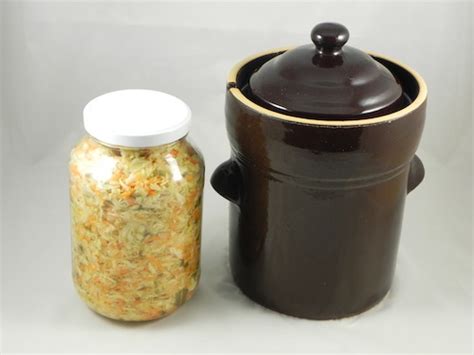
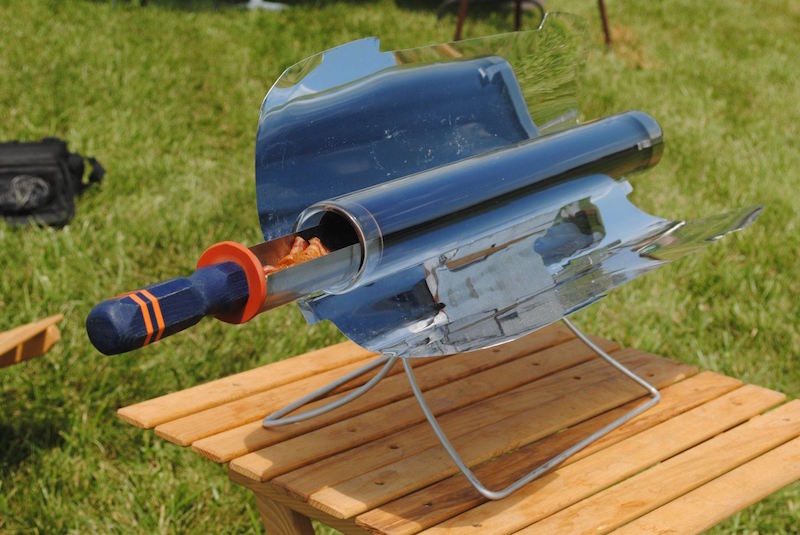

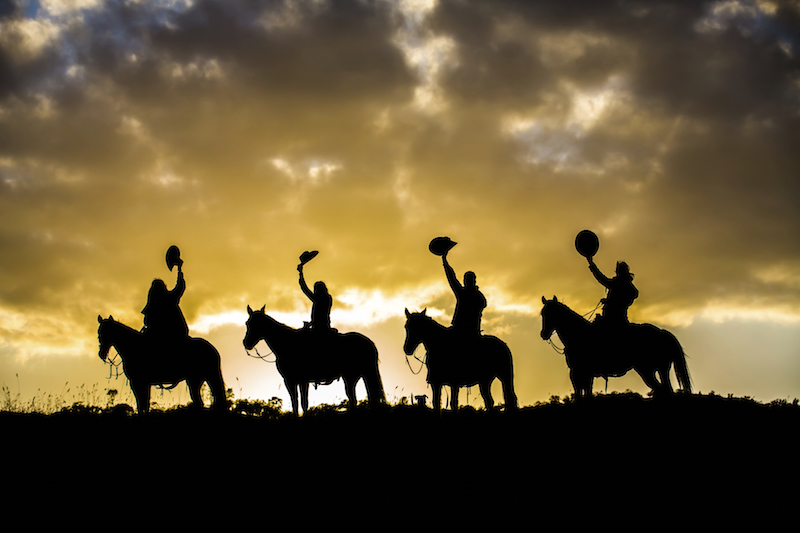

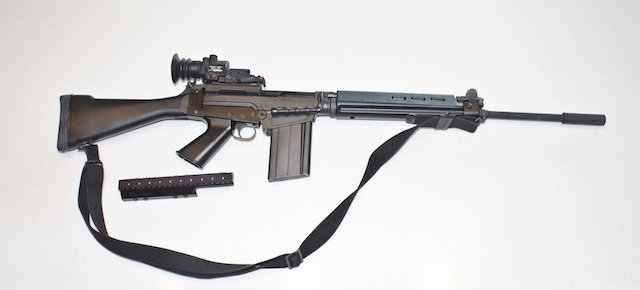

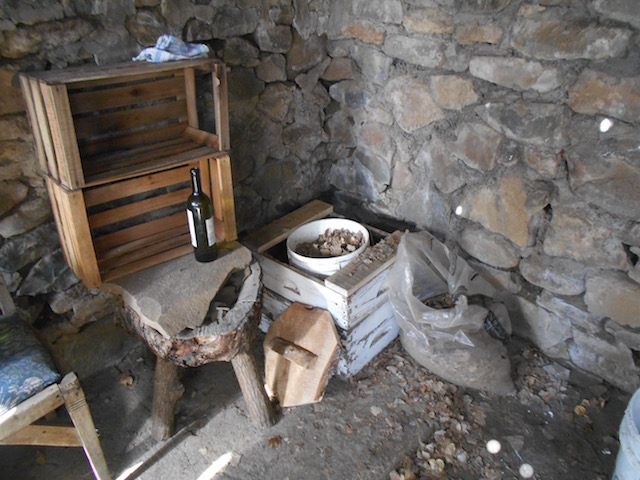
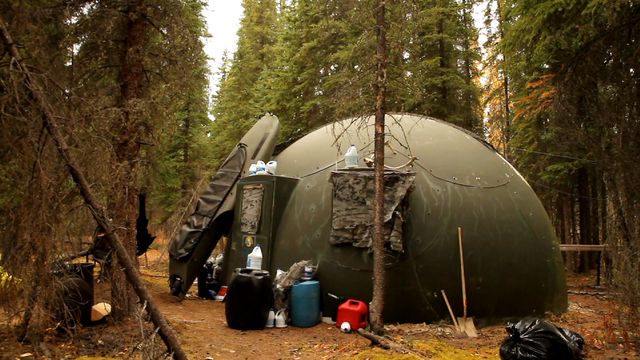
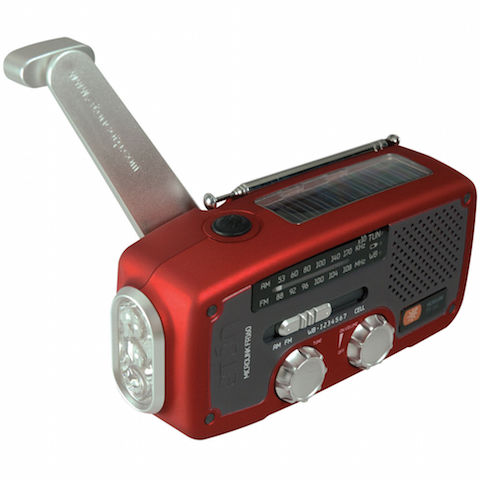
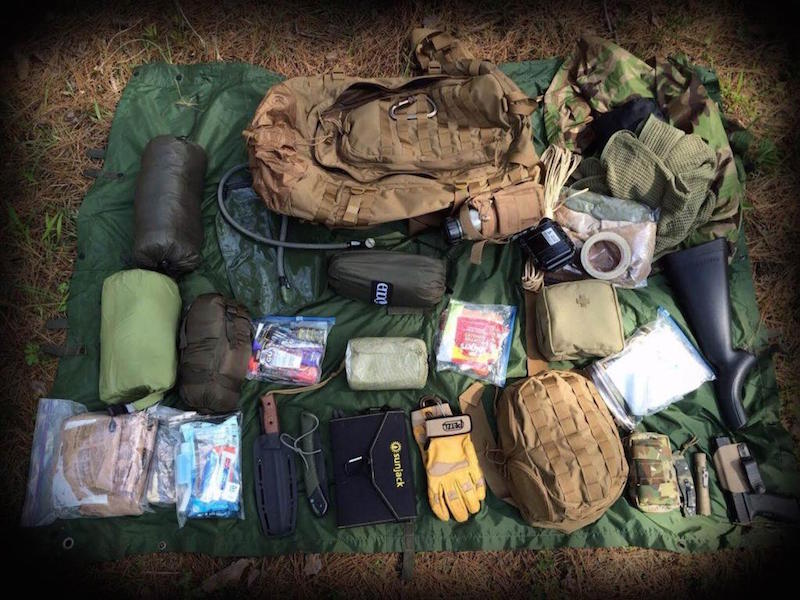
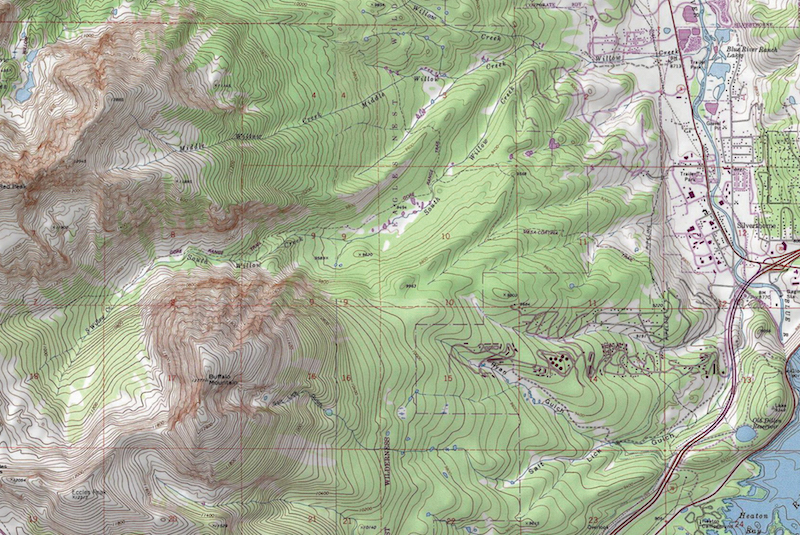
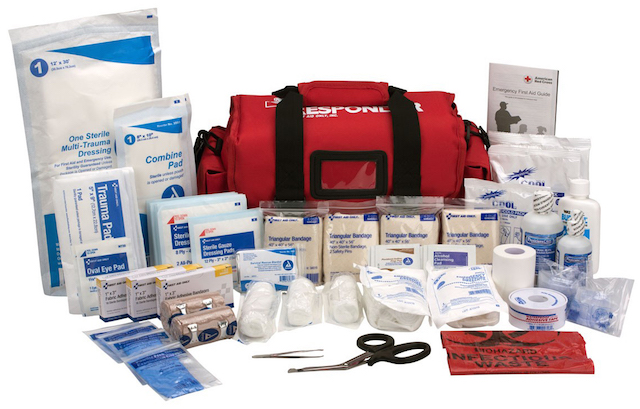
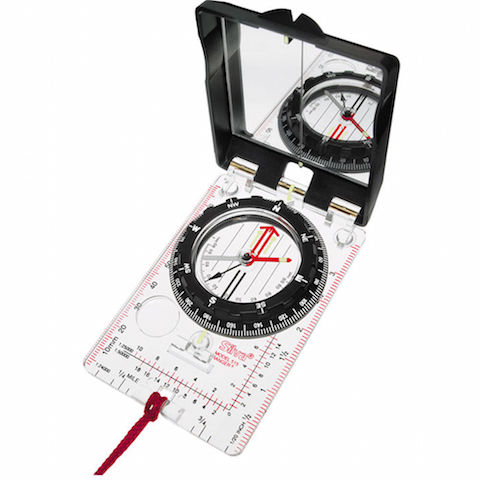
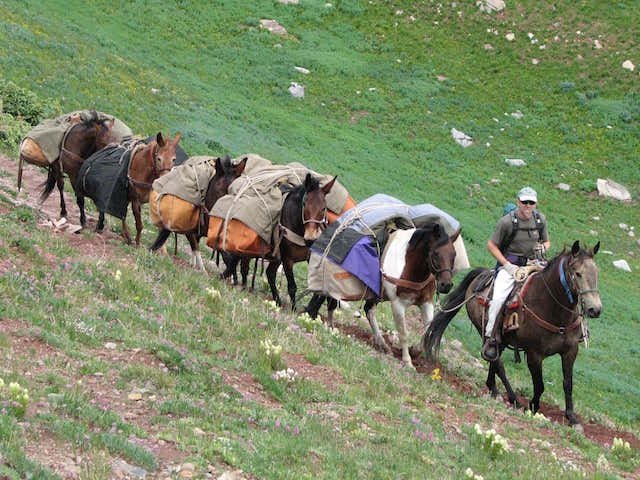
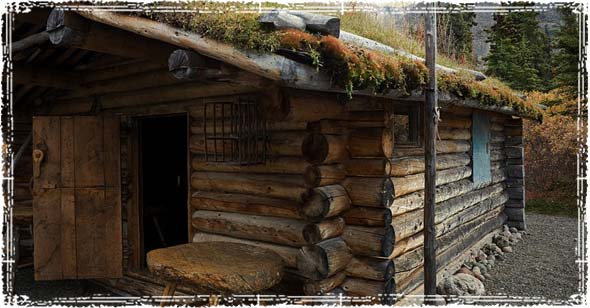
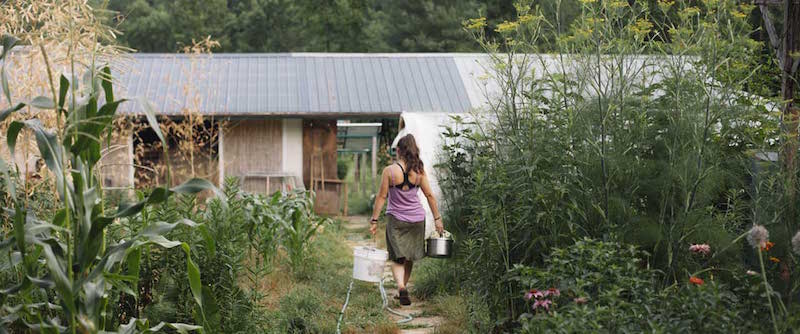

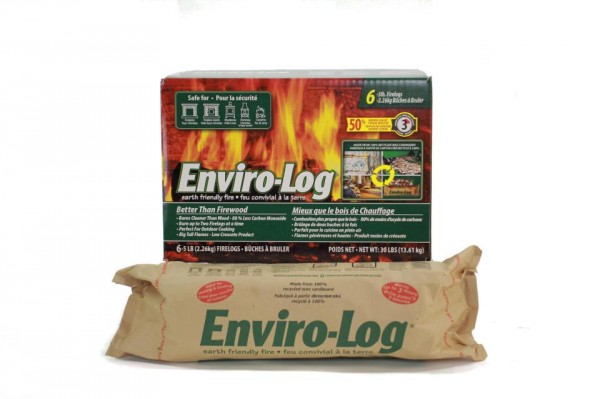